Don’t Photograph Arches National Park Without These Tips
The Bucket List Mermaid contains affiliate links and is a member of the Amazon Services LLC Associates Program. If you make a purchase using one of these links, we may receive commission at no extra cost to you. See the Disclaimer Policy for more information.
Arches National Park in Utah is a photographer’s dream come true. With its surreal landscapes, towering red rock formations, and dramatic desert scenery, it offers an unparalleled backdrop for capturing breathtaking images.
However, with so much beauty packed into a relatively small area, it’s easy to feel overwhelmed—especially if your time and resources are limited.
That’s why I’ve crafted this guide: to help you navigate the park, prioritize the best spots, and take those epic shots you’ve been dreaming of.
As a travel blogger and adventure photographer, I’ve had the privilege of photographing some of the most incredible places on Earth, but Arches National Park holds a special place in my heart.
The photography opportunities here absolutely blew my mind, and the images I captured remain some of my favorites.
Whether you’re an amateur or a seasoned pro, this comprehensive Arches National Park photography guide will equip you with the knowledge to create images that truly stand out. Let’s get started!
Inspired? Share Your Photos!
Quick Snapshot of Dos and Don’ts
- Dos: Plan your shots, use a tripod, and scout locations beforehand.
- Don’ts: Ignore the light, disrupt natural settings, or forget extra batteries.
Is Arches National Park Good for Photography?
Arches National Park is a visual playground for photographers, offering a kaleidoscope of geological wonders that look straight out of a sci-fi movie.
Its compact size makes it accessible, yet every corner brims with unique photo opportunities.
The dramatic red rock arches, spires, and fins rise against vivid blue skies and otherworldly desert landscapes, creating compositions that require minimal effort to look stunning.
Think of it as Mars—but on Earth—with some of the most iconic and photogenic formations you’ll ever see.
Plus, for newer photographers, this park is a fantastic starting point because it’s nearly impossible to take a bad photo. The natural beauty does most of the work for you.
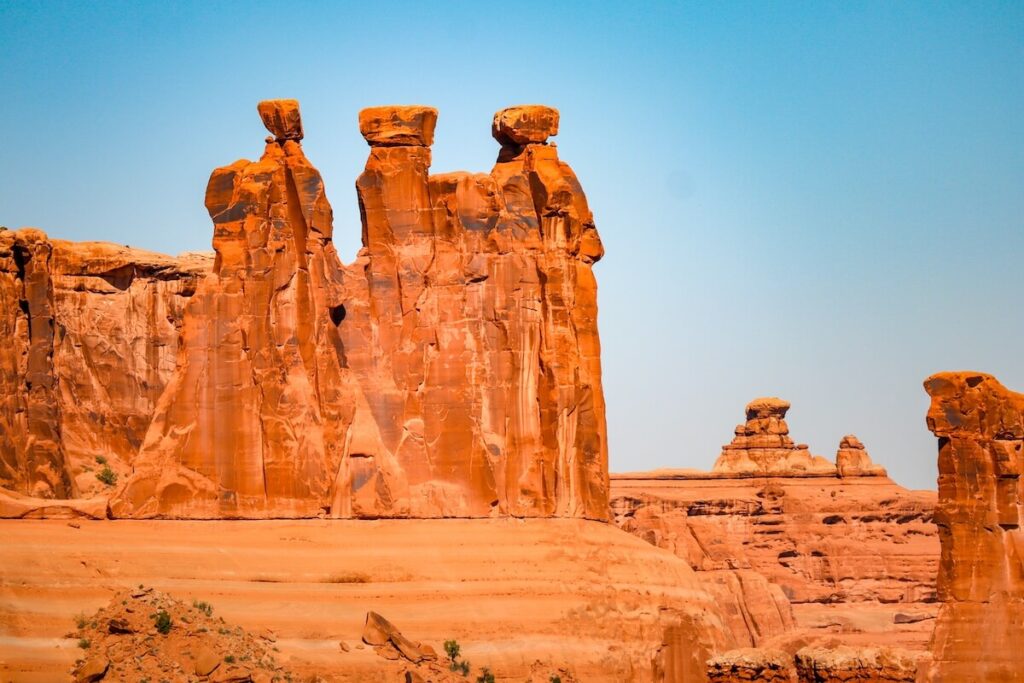
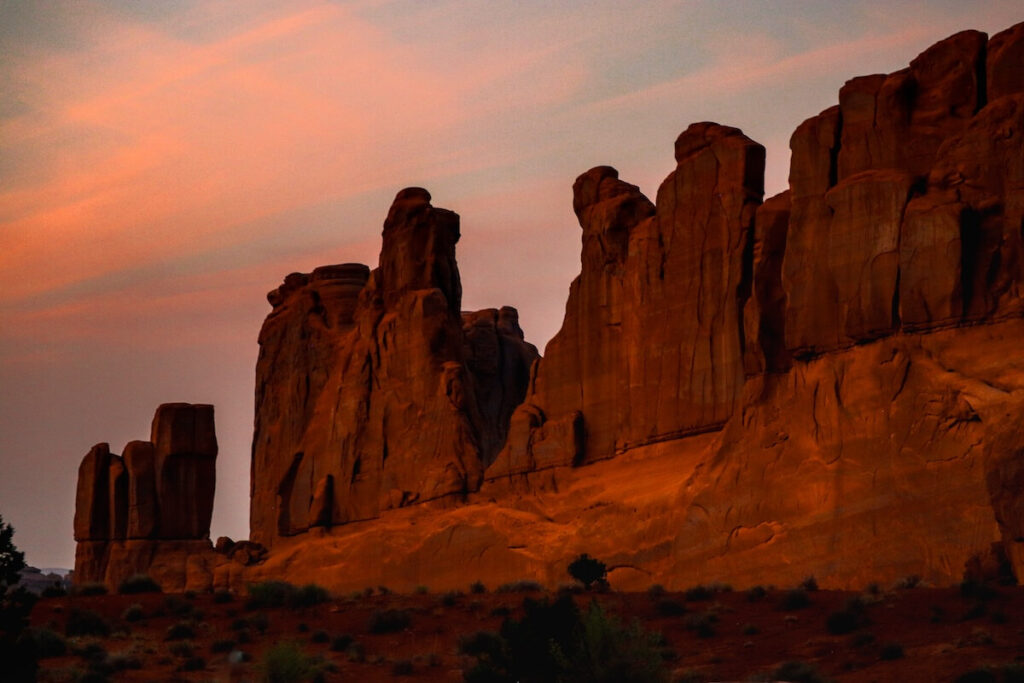
If you are wondering if this is a good spot for photography, I’ll let the photos speak for themselves.
Best Camera Gear for Arches National Park Photography
It is tricky to recommend camera gear, because it is highly dependent on the photographer and your specific style.
However, if you are starting out or looking for some new gear, here are my recommendations for gear to photograph Arches National Park.
Warning: this might get a little technical. If I am speaking another language to you right now (and that’s okay!), I am going to link my exact camera and telephoto lens and you can skip this entire section.
Lenses for Arches National Park Photography
Generally, I would make sure that you have a versatile lens for your camera.
Wide-Angle Lens
Perfect for capturing expansive landscapes and large arches like Delicate Arch or Landscape Arch.
When photographing Arches National Park, I used my wide-angle lens most for capturing those vast and epic wide shots. I found this helpful when I was underneath the arches and getting up close and personal.
My lens is 15-45mm, but I would recommend staying in 24-35mm to reduce distortion.
Telephoto Lens
Telephoto lens in Arches National Park are great for isolating details, capturing shots I couldn’t reach, or photographing wildlife from a distance.
My telephoto lens is 55-200mm and this captured some epic details and close up shots.
Prime Lens
A fast prime (like a 24mm f/1.8) can deliver stunning depth of field and sharpness for epic landscapes.
Although I personally didn’t shoot with a prime lens, there are photographers who swear by them.
Their reasoning? They have fewer optical flaws (like chromatic aberration and lens distortion) and are great in low light.
Budget, Medium, and Luxury Camera Options
Budget
Canon EOS Rebel T7 or Nikon D3500—entry-level DSLRs that deliver excellent image quality.
I shot everything on this page with a Canon EOS m50. I love it! However, I have had some issues finding compatible lenses. It is an exceptional camera considering how much I paid for it!
Medium
Sony a7 iii or Fujifilm X-T5—compact, mirrorless options with stellar performance.
Luxury
Sony Alpha 7R V or Nikon Z9—top-tier options with high resolution and dynamic range.
Alternative Options
Action Cameras
GoPros are fantastic for wide-angle adventure shots.
My other favorite, espeically if you are traveling alone, is the Insta360. I get some of my iconic mermaid shot on this baby! You can get a free selfie stick on me if you buy it through this link.
Note: Do NOT use any drones within Arches National Park. That is a big no-no!
Smartphones
Honestly, modern smartphones are a very suitable alternative to standard cameras. Heck, some of them even rival some camera models.
Phones like the iPhone or Google Pixel 8 can produce stunning photos with advanced computational photography.
I just upgraded to the iPhone 16 and I am blown away at its photography and videography capabilities!
Essential Accessories
- Tripod: Vital for low-light or night photography.
- Filters: Use polarizing filters to cut glare and enhance colors, or neutral density (ND) filters (these reduce the amount of light entering the camera for longer exposures). Make sure it is the right size for your lens!
- Remote Shutter Release: Avoid camera shake when shooting long exposures. This is great for night photography or when shooting with a tripod.
- Extra Batteries & Memory Cards: The desert can drain batteries quickly due to the heat, and you’ll want plenty of storage.
How to Get to Arches National Park
Arches is located just five miles north of Moab, Utah, off US-191.
The nearest major airports are in Grand Junction, Colorado (1.5 hours away), and Salt Lake City, Utah (4 hours away).
You can find flights here and rent a car here.
From Moab, follow the well-marked signs to the park entrance.
There might be a line at the entrance station if you are here in peak season.
At the entrance station, you will need to pay a fee or show your Park Pass, and potentially show your reservation.
Read More – Best Adventure Tours in Moab
Reservations for Arches National Park
Check the National Park Service website for up-to-date information on the park’s timed-entry reservation system, especially during peak seasons.
When I rolled up to Arches National Park, I was blindsided by this and had to turn around and come back later.
The timed entry slots were only from 7am to 4pm. This means that I was able to enter the park before 7am or after 4pm.
Luckily for photographers, sunrise and sunset are the prime times. Therefore, you might be able to enter the park at times when a timed-entry reservation is not required.
Read More – Sunrise Spots in Arches National Park | Sunset Spots in Arches National Park
Also, if you are looking for a place to stay, I parked my RV at the Sun Outdoors North Moab and wrote an in-depth review for them.
How Arches National Park is Laid Out
The park is organized around a main scenic road with convenient pullouts and parking areas at major attractions.
Most iconic sites, like Delicate Arch, Windows Section, and Balanced Rock, are easily accessible via short hikes or viewpoints.
Side roads lead to less-visited spots like Tower Arch and the Fiery Furnace.
This is what I loved about Arches National Park! The organization is very convenient to photographers, allowing you to get epic shots with very little effort.
This is also nice for photographers and adventurers with limited mobility. Although you can hike into the middle of nowhere for a photography adventure, it isn’t necessary.
Read More – Top Hikes in Arches National Park
Best Time to Visit Arches National Park for Photography
Best Time of Year to Visit Arches National Park
Choosing a time to visit Arches National Park is largely going to depend on the photos that you want to take.
Do you want rich contrasts between the rocks and snow? Epic rainbows? Dramatic shadows?
Therefore, to help you out, I’ve listed the pros and cons of each season.
- Spring (March to May):
- Pros: Wildflowers bloom, temperatures are mild, and the lighting is soft and diffused.
- Cons: Can be crowded during spring break and holidays.
- Summer (June to August):
- Pros: Longer days provide extended golden hours for photography. It is also a great time for astrophotography and thunderstorm photography.
- Cons: Extreme heat makes midday photography challenging, and trails can be less enjoyable due to crowds. Good luck trying to find parking!
- Fall (September to November):
- Pros: Cooler temperatures, fewer crowds, and vibrant evening skies. Fall colors normally start to come in October.
- Cons: Days are shorter, so plan your shoots accordingly.
- I parked my RV here during fall and loved it! Be warned, it was still toasty and semi-crowded.
- Winter (December to February):
- Pros: Snow dusting on red rocks creates magical contrasts, and the park is much quieter.
- Cons: Cold temperatures and shorter daylight hours require careful planning.
- Photographers love winter here! If you don’t mind the cooler temperatures and potentially driving on some snow, winter is an epic time to visit Arches National Park.
Best Time of Day for Photography
- Golden Hour: Early morning and late afternoon provide the softest and most flattering light.
- Midday: While harsh, it can be used creatively for deep shadows and high-contrast shots.
- Night: Perfect for astrophotography, with minimal light pollution allowing for stunning views of the Milky Way.
Below is a table of the best places to photograph certain locations as provided by the park service. These fall into early morning and late afternoon.
Don’t worry – I’ll go more into detail about the best locations to photograph in the next section.
| Photography Location | Best Time of Day |
| Moab Fault | Early Morning |
| The Three Gossips | Early Morning |
| Sheep Rock | Early Morning |
| The Great Wall | Early Morning |
| Turret Arch | Early Morning |
| The Spectacles | Early Morning |
| Double Arch | Early Morning |
| Cache Valley | Early Morning |
| Wolfe Ranch | Early Morning |
| Landscape Arch | Early Morning |
| Double O Arch | Early Morning |
| Park Avenue | Late Afternoon |
| Courthouse Towers | Late Afternoon |
| Petrified Dunes | Late Afternoon |
| Balanced Rock | Late Afternoon |
| The Garden of Eden | Late Afternoon |
| North & South Windows | Late Afternoon |
| Delicate Arch | Late Afternoon |
| Fiery Furnace | Late Afternoon |
| Skyline Arch | Late Afternoon |
| Fins in Devil’s Garden | Late Afternoon |
| Tower Arch | Late Afternoon |
Best Spots for Incredible Shots
- Delicate Arch: The most iconic arch in Arches National Park—frame it with the La Sal Mountains in the background.
- Landscape Arch: The thinnest natural arch in the world; best shot early morning or late afternoon. If you go slightly off to the right of the main trail, there is a better view.
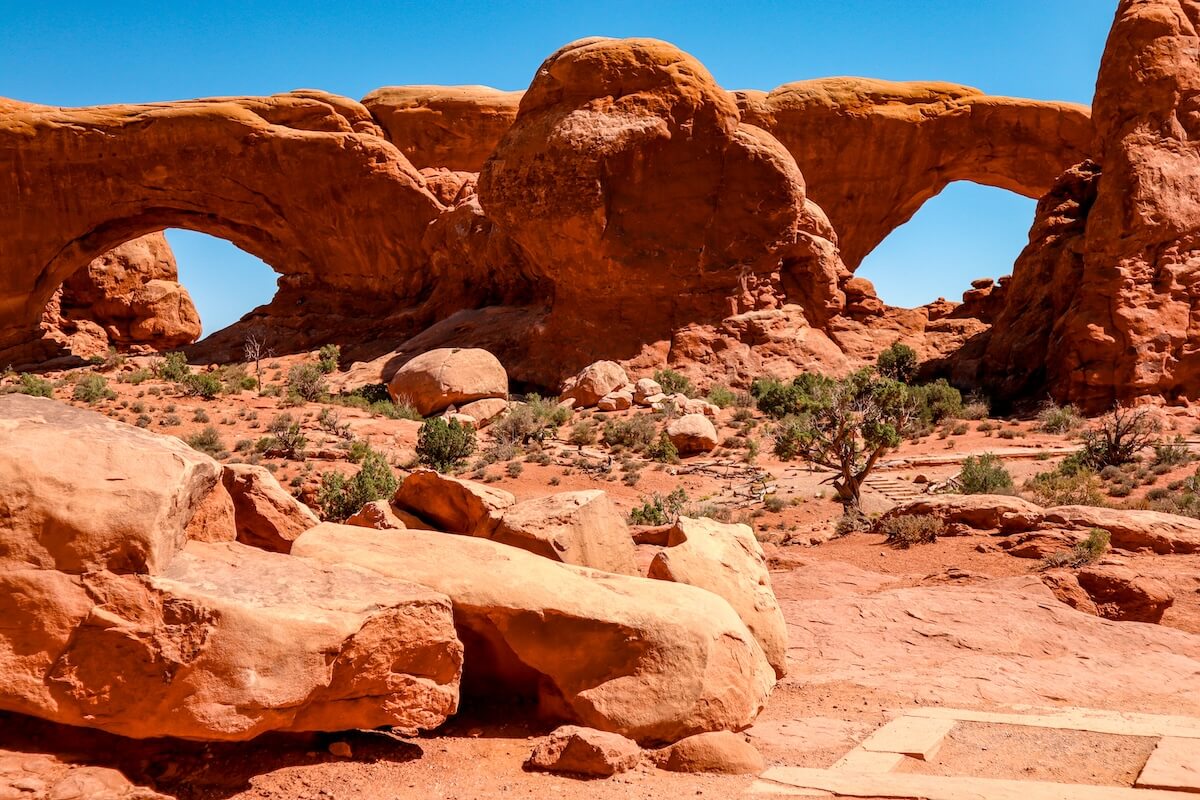
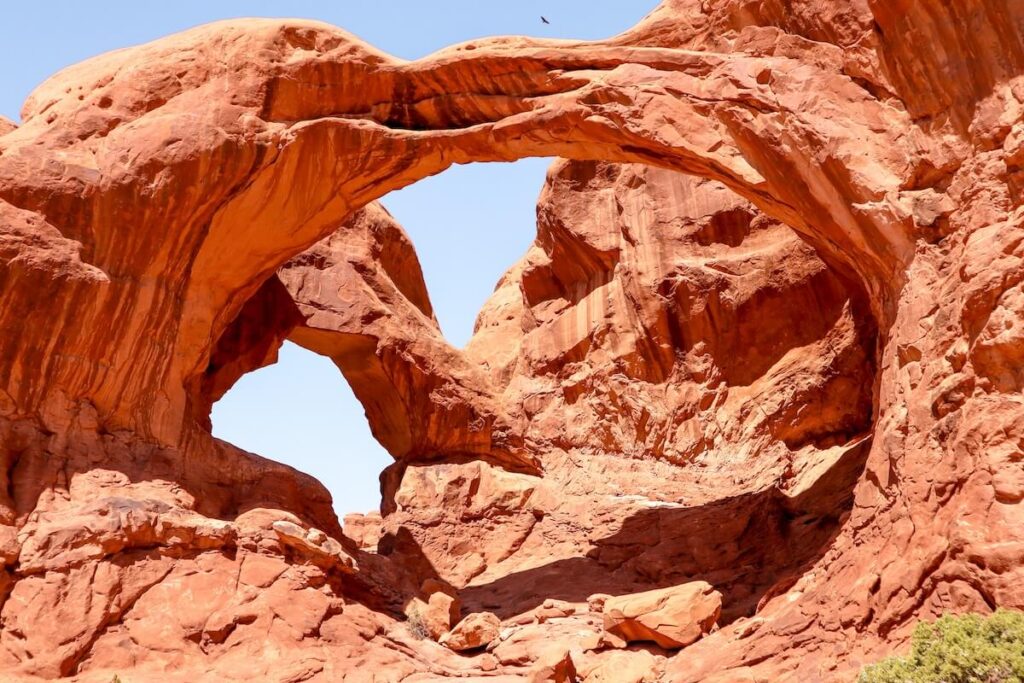
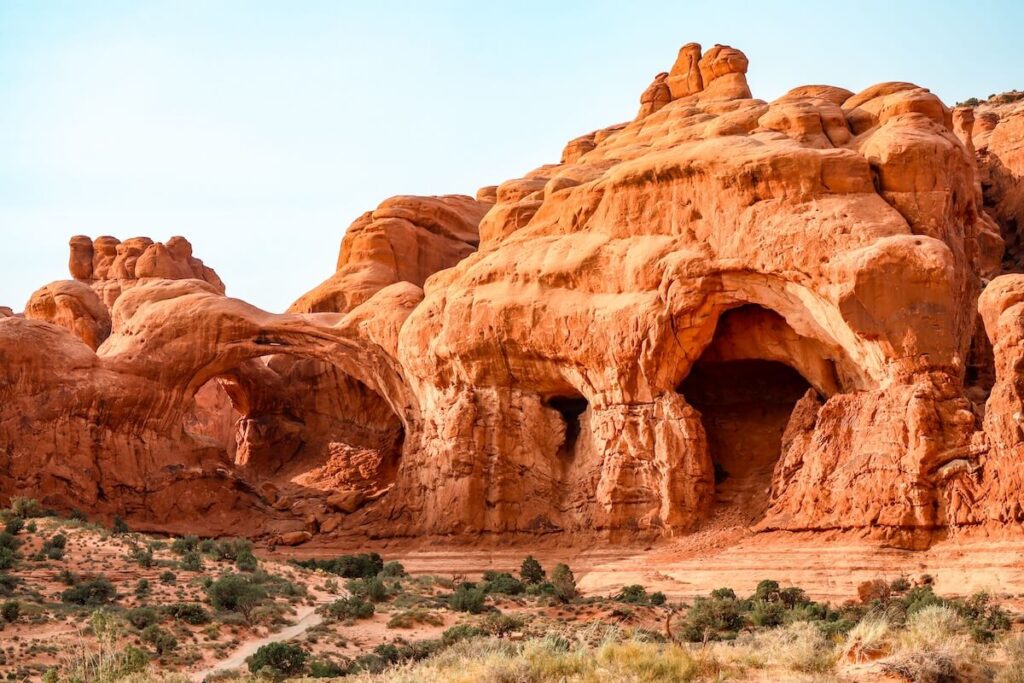
- Double Arch: Perfect for creative compositions that highlight its massive scale. This was my favorite arch to photograph! It’s epic!
- North and South Windows: Capture symmetry or use one window to frame the other. Don’t forget to walk around the loop and photograph the Turret Arch as well.
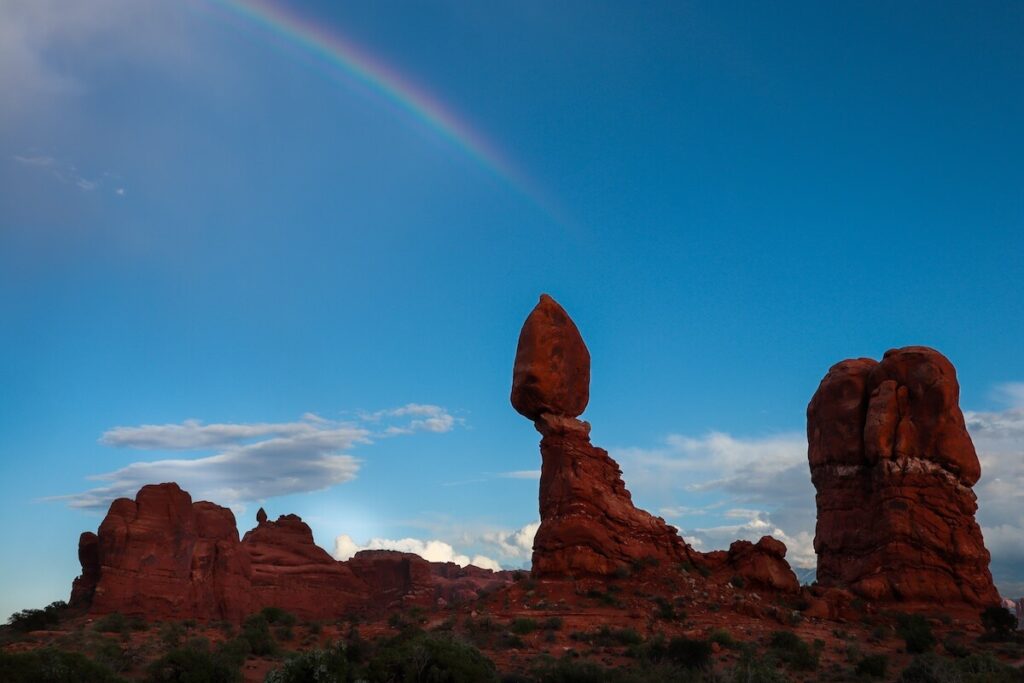
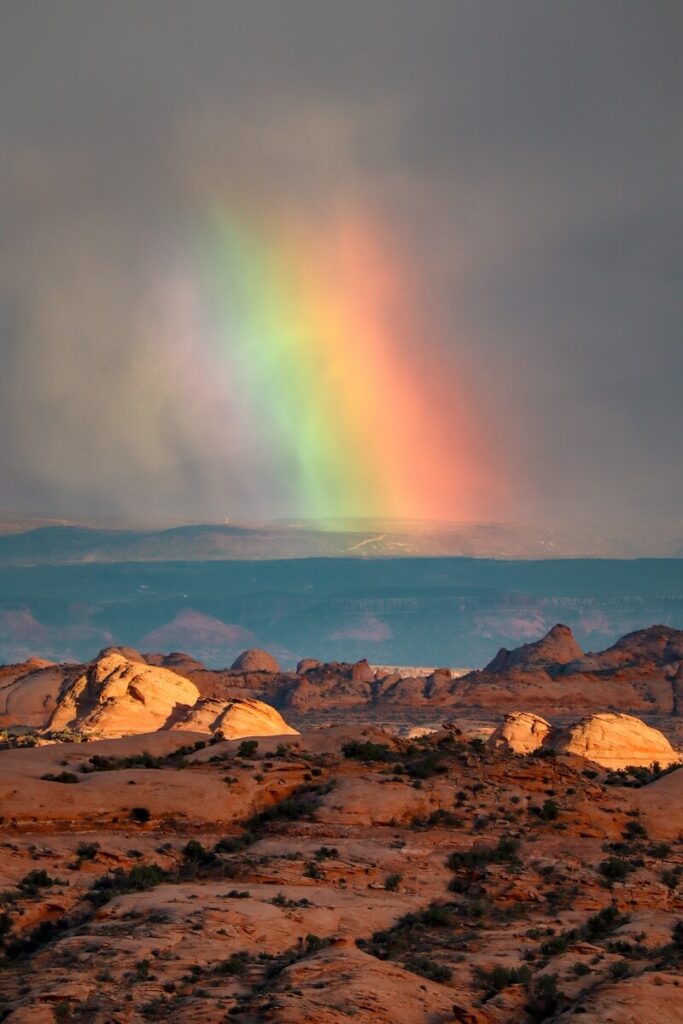
- Balanced Rock: A great subject for sunset silhouettes. I even got a shot of Balanced Rock with a rainbow!
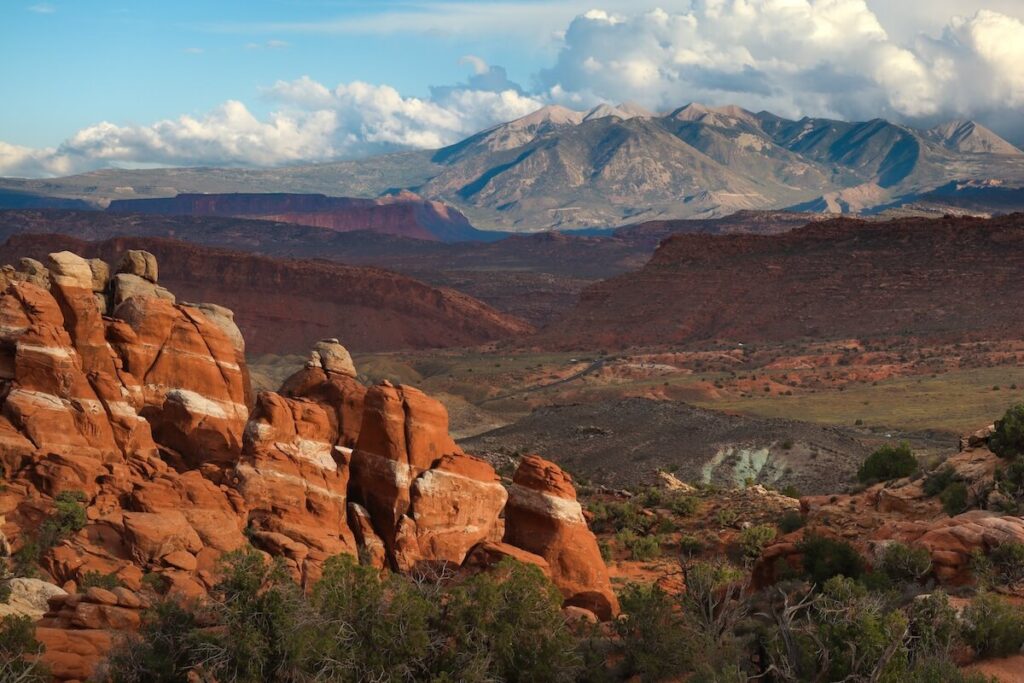
- Fiery Furnace: Unique, twisting formations ideal for abstract shots (permit or guided tour required). If you don’t have a permit, the viewpoint is great for photography and looks over the park and the La Sal Mountains.
- Devil’s Garden: If you are down for some adventuring, there are some epic arch shots in the Devil’s Garden trail system. The entire thing is about 7 miles and I got to see 7 unique arches with very limited crowds. This was my favorite section of the entire park!
Wildlife in Arches National Park
While the dramatic rock formations often steal the show, Arches National Park is also home to a surprising variety of wildlife that can add dynamic elements to your photographs.
- Desert Bighorn Sheep: Often spotted in the early morning or late afternoon along rocky slopes and cliffs. Look near Courthouse Towers or Park Avenue.
- Lizards: Common throughout the park, these reptiles are especially active during warm, sunny days. You’ll find them basking on rocks or darting across trails.
- Ravens: Their striking black feathers contrast beautifully with the red rocks. These intelligent birds can often be found near picnic areas or perched on rock formations.
- Red Foxes and Coyotes: Rare but not impossible to spot, especially during dawn or dusk near open plains.
- Kangaroo Rats and Other Small Mammals: Best spotted at night around desert scrub areas.
- Birds of Prey: Hawks and eagles soar above the park, particularly near cliffs and open valleys.
The only animal I saw was some mule deer…but keep your eyes peeled!
For the best chance of capturing wildlife, visit early in the morning or late in the afternoon when animals are most active, and use a telephoto lens to photograph them without disturbing their natural behavior.
Composition Tips for Stunning Shots
First off, let me say that there are no rules of photography. You do you. You are the artist.
However, these are some ideas if you want your photos to me more “traditionally pleasing” to the eye.
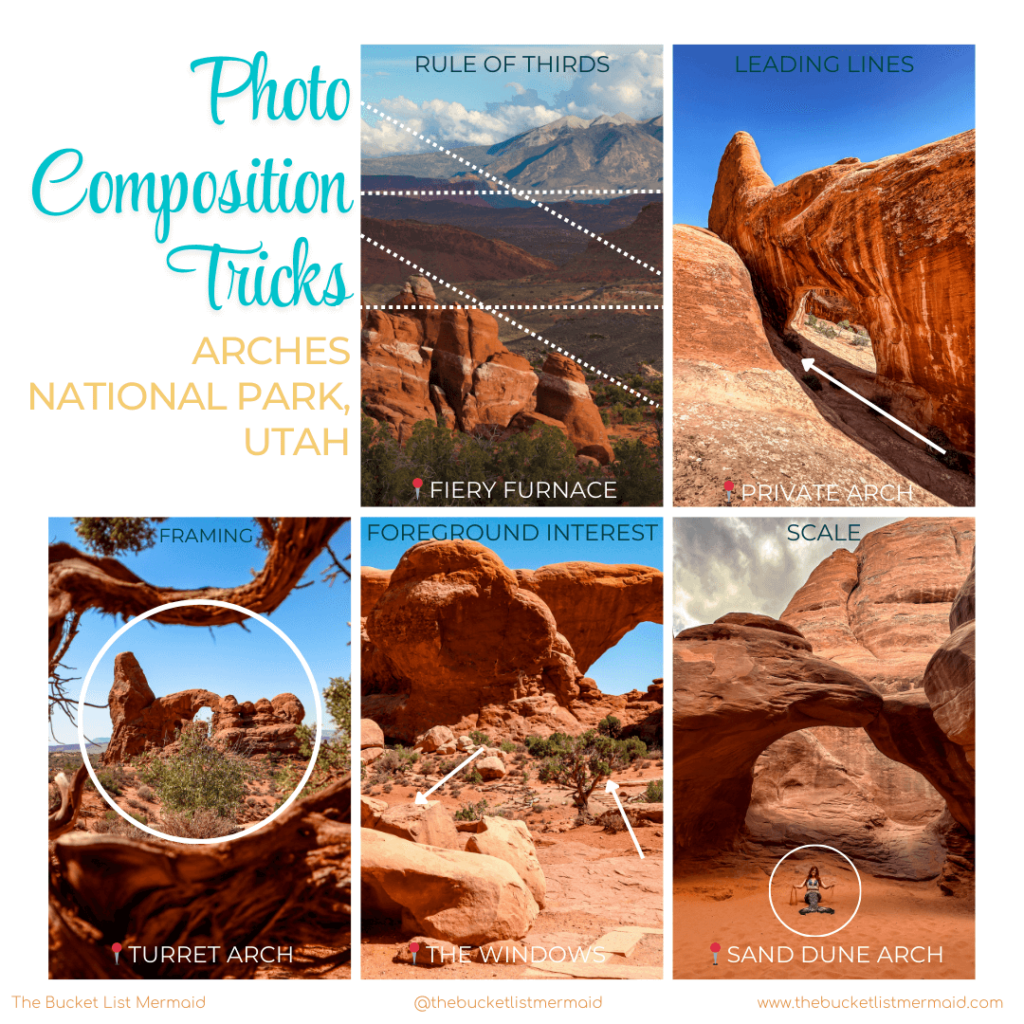
Rule of Thirds
Position your subject off-center for dynamic compositions. I like to place the subject in the lower third, the background in the middle third, and the sky in the upper third. You can also do this diagonally.
Leading Lines
Use trails or rock formations to guide the viewer’s eye. This can be trickier in natural settings, but there are some cool opportunities to use rocks and lead to arches.
Framing
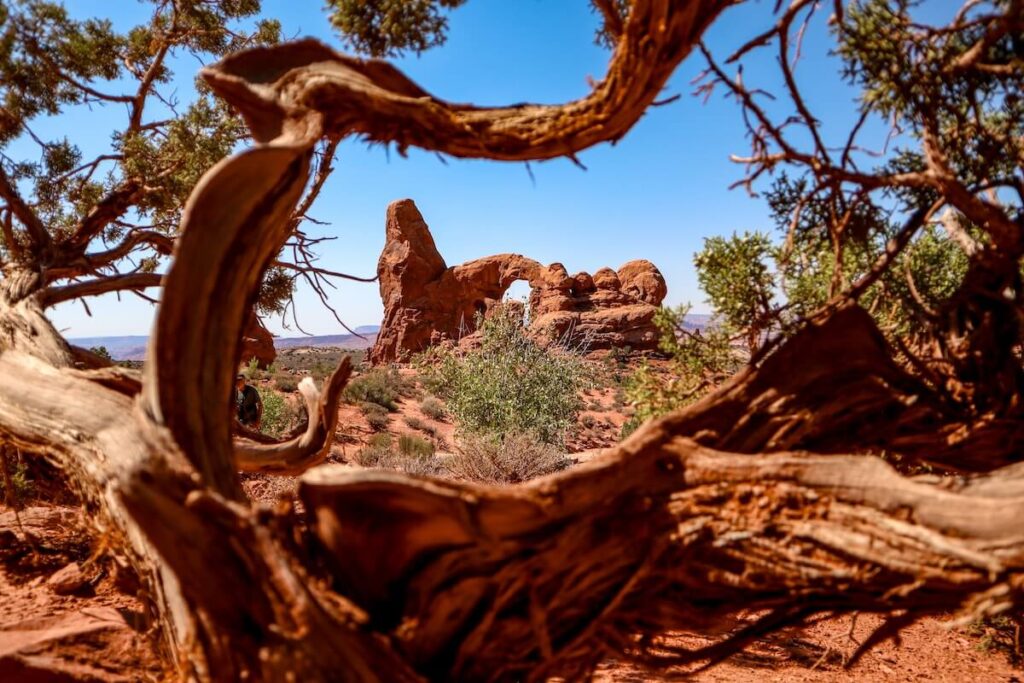
Shoot through arches or natural gaps for dramatic framing. This takes some scouting and creativity. One of the most iconic frames is the Turret Arch through the North Arch. I decided to spice it up and shoot it through some shrubbery.
Foreground Interest
Add plants, rocks, or people to create depth. This is very easy here and creates a more interesting image.
Scale
Include people or objects to showcase the immense size of the formations. Again, this is very easy because and putting in some perspective will showcase just how ginormous these rocks really are!
Check out the photo guide below! Here are some pictures that I took in Arches National Park that attempted to adhere to these standard photography rules.
Lighting Tips
- Golden Hour: Soft, diffused light creates warm tones and long shadows.
- Midday: Use shadows creatively, especially under arches.
- Night: Perfect for capturing the Milky Way or star trails.
Advanced Techniques
HDR Photography
Combine multiple exposures to capture highlights and shadows.
Focus Stacking
Achieve sharpness across the entire frame and play with depth of field.
Long Exposures
Create dreamy clouds or smooth motion in streams after a rain.
Night Photography in Arches National Park
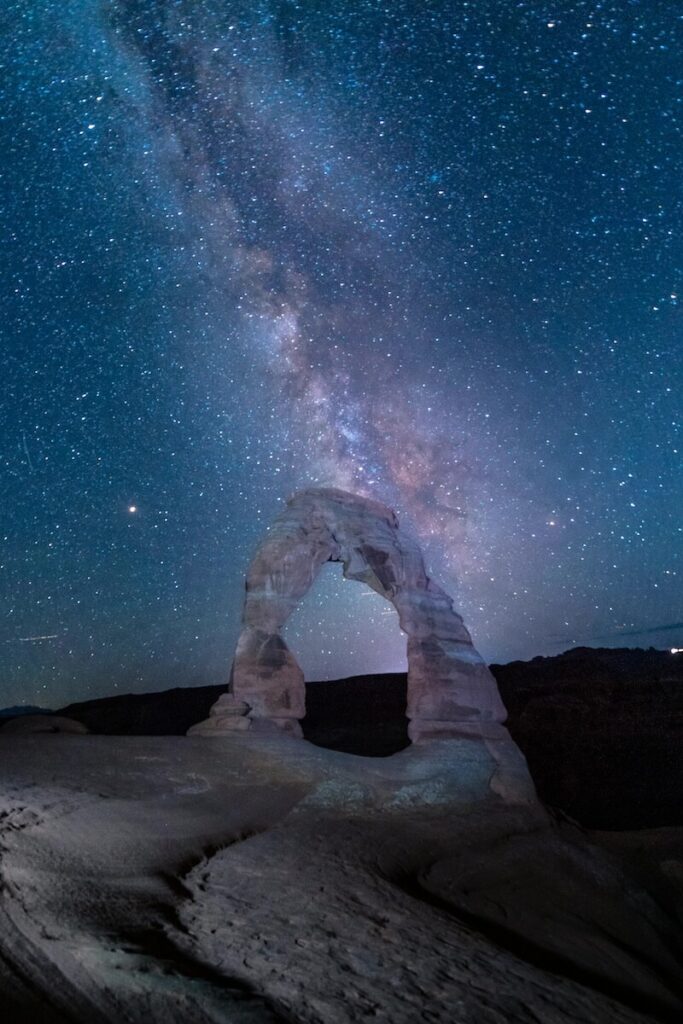
The park’s lack of light pollution makes it ideal for capturing:
- The Milky Way: Best visible in spring and summer.
- Star Trails: Use long exposures for stunning circular patterns.
Tips for Night Photography in Arches National Park
Always Shoot in Manual
If you are going to tackle the beast that is “astrophography” and “night photography”, learn how to shoot in manual to get maximum control.
Get as Much Light As Possible
This is going to be a very low light situation. Therefore, you are going to have to let in as much light into your camera as possible.
You can do this by opening your shutter. You can experiment, but it is recommended up to 30 seconds.
You can also experiment with your aperture and ISO settings to let in even more light. I, personally, only bump up the ISO if there is no other option because it makes photos look grainy.
Keep Your Camera Still
With these long exposure shots (opening the shutter), any slight bump will make the photo blurry.
I would highly recommend bringing a tripod.
If you forgot a tripod, don’t panic! I have set my camera up on the ground, on a backpack, or anywhere sturdy. You don’t get as much control as you would have had with a tripod, but it’s better than nothing.
Play with what Works!
You are the artist here! Feel free to experiment with your settings to your liking.
Don’t use Artificial Light Sources
Arches National Park frowns heavily upon using external light sources to light up rocks or other formations.
Additional Gear for Night Photography
- Fast lens (f/2.8 or wider).
- Remote Shutter Release
- Headlamp with a red light to preserve night vision.
Editing Your Photos from Arches National Park
Congrats! You got the perfect shot at Arches National Park! Now what?
This part is entirely up to you as the photographer and your style. Have fun!
Editing Software
Adobe Lightroom and Photoshop are top picks; Snapseed is great for mobile editing.
I edit all of my photos in Adobe Lightroom.
Tips for Editing Arches National Park Photos
- Enhance reds and oranges to make rocks pop.
- Adjust highlights and shadows for more texture.
- Experiment with contrast to create drama.
My Editing Style for Arches National Park Photos
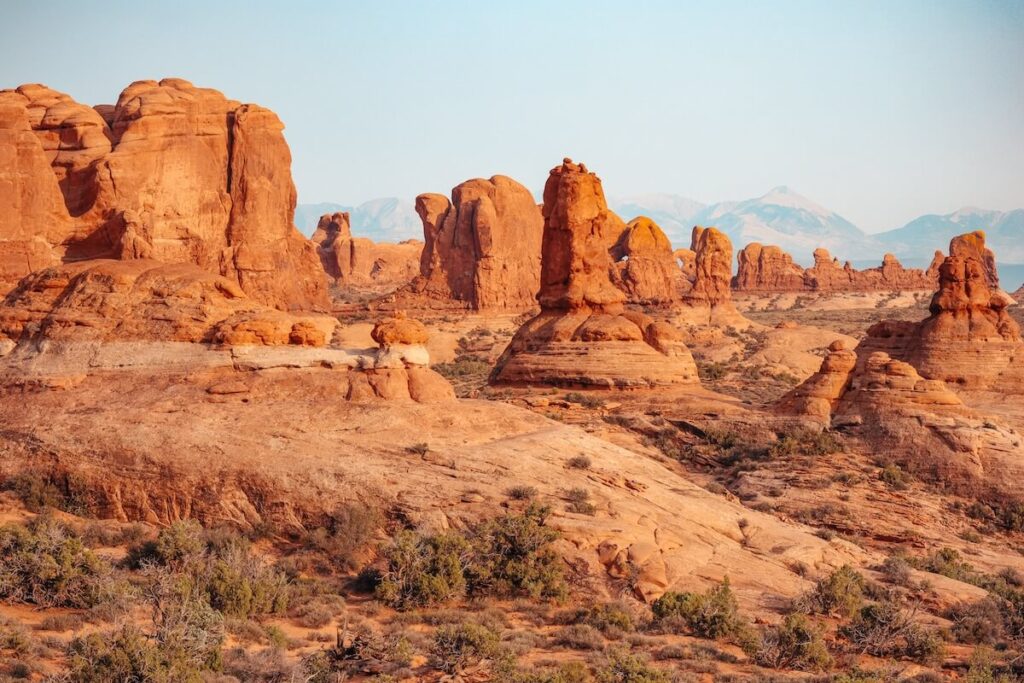
When editing my photos from Arches National Park, I was drawn to a particular style. I loved enhancing the reds and even giving them a slight pink hue.
In some photos, I made the shadows more dramatic to make it more interesting.
I also enhanced some of the green so that there was some color contrast among the red rock formations.
Sometimes I would decrease the exposure on the background areas to make the rocks pop even more!
Only have one day to Photograph arches National Park?
Conclusion on This Photography Guide for Arches National Park
Arches National Park is truly a photographer’s paradise, offering stunning landscapes and incredible opportunities to capture nature’s artistry.
Whether you’re an amateur looking for easy wins or a seasoned pro ready to push creative boundaries, this park has something for everyone. From sunrise arches to star-studded night skies, your camera will never stop clicking!
I’d love to see the shots you create—share them with me on social media (@thebucketlistmermaid) or send them my way via email.
Let’s celebrate the magic of Arches together! Happy photographing! 📸✨
Find More to Photograph in Moab
More Travel Resources
Adventure Bucket List Resources
I am here to help your travel adventures go as smoothly as possible! That way you can check off that bucket list with minimal complications and spending!
SHOP – Shop the best adventure gear and essentials on my Amazon Storefront – handpicked by a full-time adventuring mermaid!
AIRFARE – There are a few I use, but Aviasales is normally my go-to for flights without any extra fees or markups.
ACCOMMODATION – My two favorites are Booking.Com for hotels and VRBO for rentals.
GUIDED TOURS – If you are looking for quick and easy tours, check out GetYourGuide and Viator.
MULTI-DAY TOURS – For more in-depth tours that span several days, TourHub has many great options with reputable travel companies. Use my code (ALEXANDRA1GURU) for up to 5% off your next bucket list adventure.
TRANSPORTATION – You can either rent a car yourself with Discover Cars or do a guided bus tours like Big Bus Tours.
CREDIT CARD – I always use my Chase Freedom Unlimited card for all of my purchases. There is no annual fee and you get 1.5% cash back and 5% cash back on travel purchased through Chase Travel.
SIM CARDS – Avoid expensive roaming charges with an eSim card with Airalo. Personally, I prefer wifi boxes, and recommend WiFi Candy (get 10% of with the code THEBUCKETLISTMERMAID).
TRAVELER’S INSURANCE – Check out VisitorsCoverage for affordable insurance plans.
See Some PHotos You Like?
Check out my full photography page for a full gallery and prices.

