Canyonlands Photography for Adventurers: Don’t Just Hike It—Shoot It!
This website contains affiliate links from trusted partners. If you purchase through a link on this site, I may earn a commission at no extra cost to you. As an Amazon Associate, I earn from qualifying purchases. See my Privacy Policy and Disclosure for more information.
The first time I stood on the edge of Canyonlands National Park, camera in hand, I was completely gobsmacked.
My shutter finger was twitching with excitement—but I’ll be honest… I didn’t know where to start. There was too much beauty. Too many overlooks. Too many options.
And with light changing fast, I quickly realized: this isn’t the kind of place you can just wing it.
Honestly, it’s easy to get good pictures of Canyonlands. But we want GREAT pictures.
Canyonlands is wild, rugged, and jaw-droppingly photogenic—but it’s also massive, remote, and a bit of a logistical puzzle.
Without a plan, it’s easy to miss the best shots or waste time in the wrong light. That’s exactly why I created this Canyonlands photography guide: to help you capture bucket list–level photos without the stress, guesswork, or post-trip regrets.
Whether you’re a DSLR-slinging landscape photographer, an iPhone adventurer chasing desert magic, or a traveler who just wants to make your Instagram grid look like a page out of Nat Geo—this guide is for you.
Let’s dive in and turn that photo wish list into a portfolio of stunning shots you’ll be proud of forever.
Adventure awaits. Let’s frame it right!
Key Takeaways
- Canyonlands is a landscape photographer’s dream, but with four distinct districts, dramatic light shifts, and remote terrain—you need a solid plan to capture its full magic.
- Timing, location, and gear matter: from sunrise at Mesa Arch to Milky Way shots in The Needles, knowing when and where to shoot makes all the difference.
- Pack smart, shoot creatively, and stay safe, because the best Canyonlands photography tell a story of both adventure and awe.
Why Canyonlands is a Photographer’s Playground
If the desert had a greatest hits album, Canyonlands would be the deluxe collector’s edition.
Canyonlands is divided into three districts (plus the rivers) and here’s the catch: they’re not connected by road.
Each district is like its own mini national park, with a totally different vibe, look, and photo strategy.
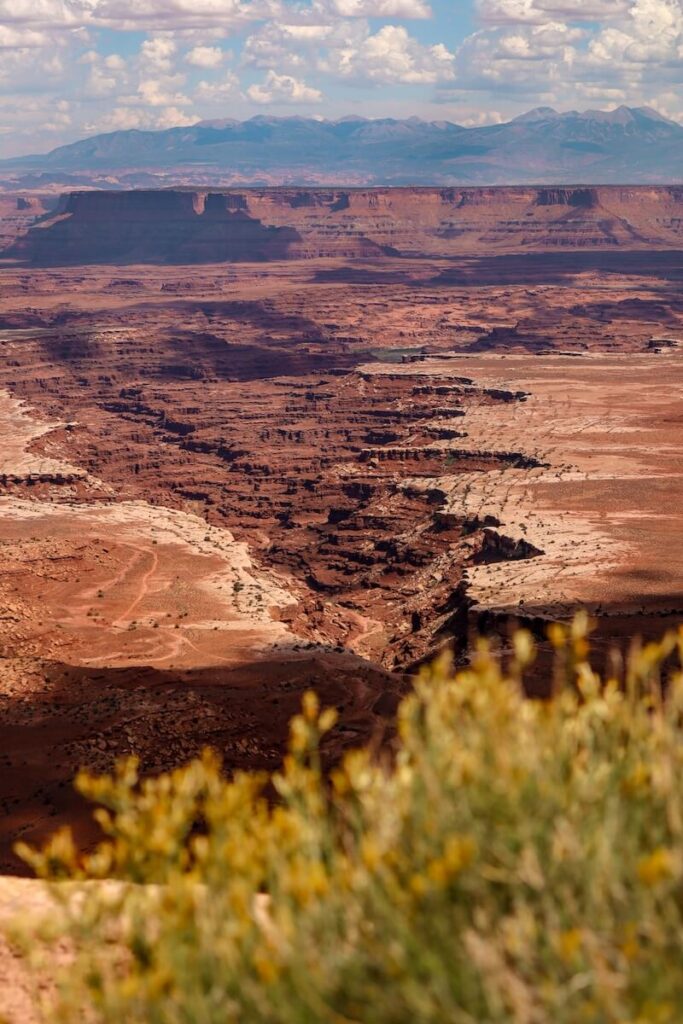
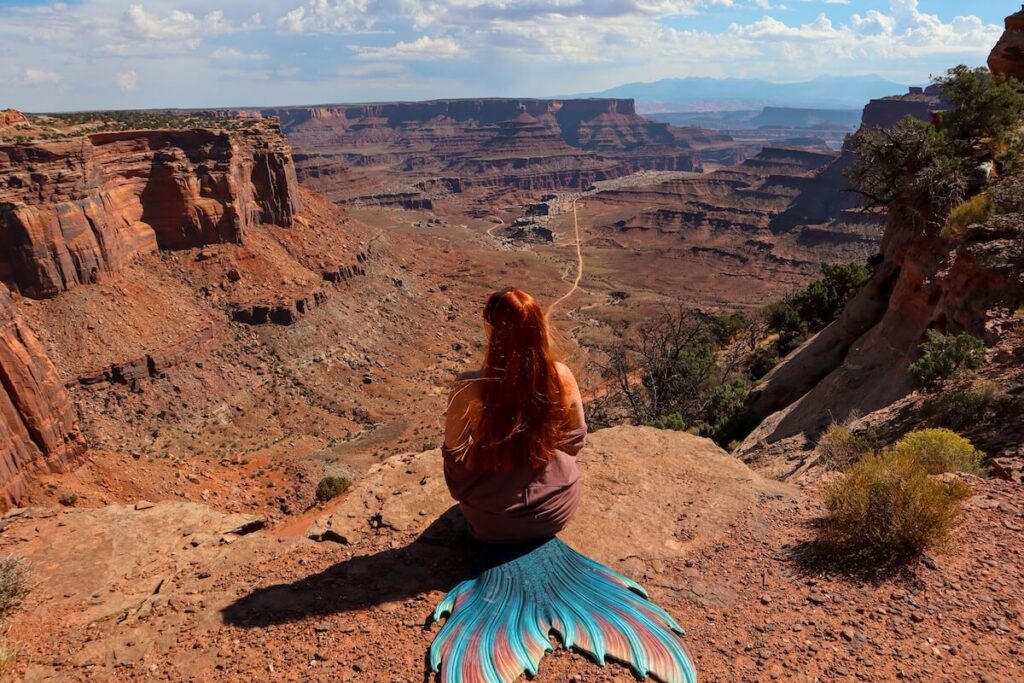
Island in the Sky
Perched atop a massive mesa, this is where you’ll find those jaw-dropping edge-of-the-world panoramas that look like a Bob Ross painting on steroids.
- The most accessible district—perfect for first-timers and sunrise chasers.
- Iconic views like Mesa Arch, Grand View Point, and Green River Overlook.
- Most spots are easy to drive to with short hikes = high photo payoff, low effort.
- Great for wide-angle landscapes, layered canyon shots, and dramatic skies.
The Needles
This part of the park is all about vibrant spires, slot canyons, and surreal landscapes that feel like something out of a dream.
- Rugged, colorful, and ideal for hikers and backcountry photographers.
- Expect fewer crowds, but longer trails and more physical effort.
- The best place for intimate desert compositions, interesting rock textures, and unique formations.
- Don’t miss Chesler Park, Druid Arch, and Elephant Hill.
The Maze
If you’re the kind of adventurer who lives for off-grid exploration, this rugged wilderness is calling your name.
- This is the “bring a satellite phone and a week of food” kind of wild.
- Remote, technical 4WD roads, and often multi-day trips are required.
- Best for seasoned photographers who love solitude and don’t mind a challenge.
- Your reward? One-of-a-kind photos few others will ever capture.
Bonus Features: Rivers, Mesas, and Arches, Oh My!
Don’t sleep on the mighty Colorado and Green Rivers, which snake their way through the canyons and offer reflections, movement, and rich colors for contrast.
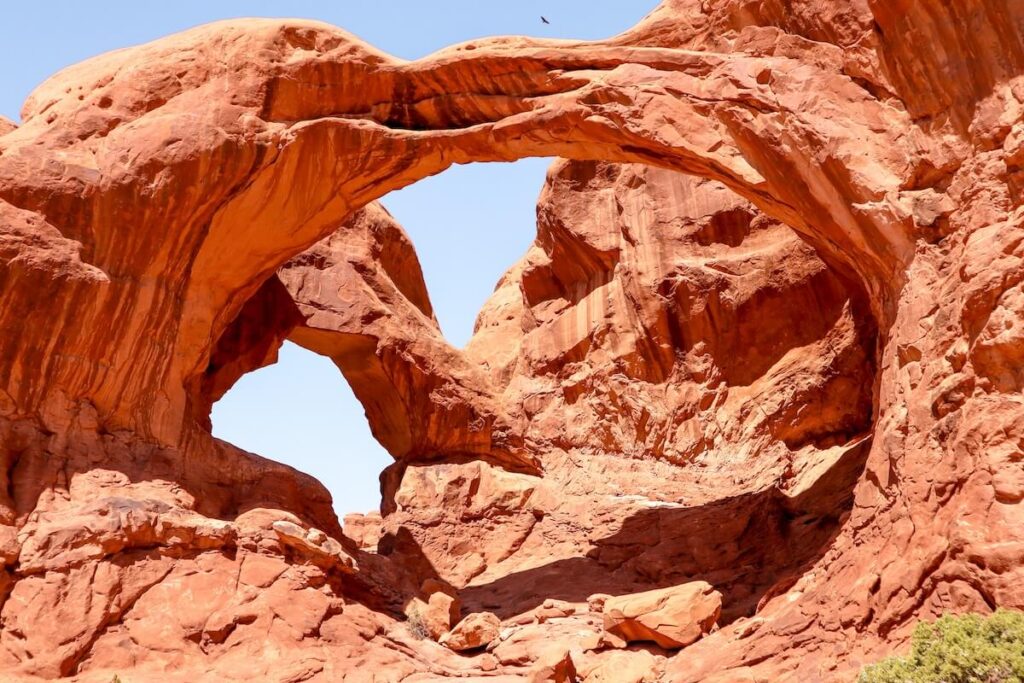
And yes, while Canyonlands may not be as arch-famous as its neighbor next door, it still has stunners like Mesa Arch—arguably one of the most iconic sunrise shots in the Southwest.
Read More – Full Canyonlands Guide for Adventurers
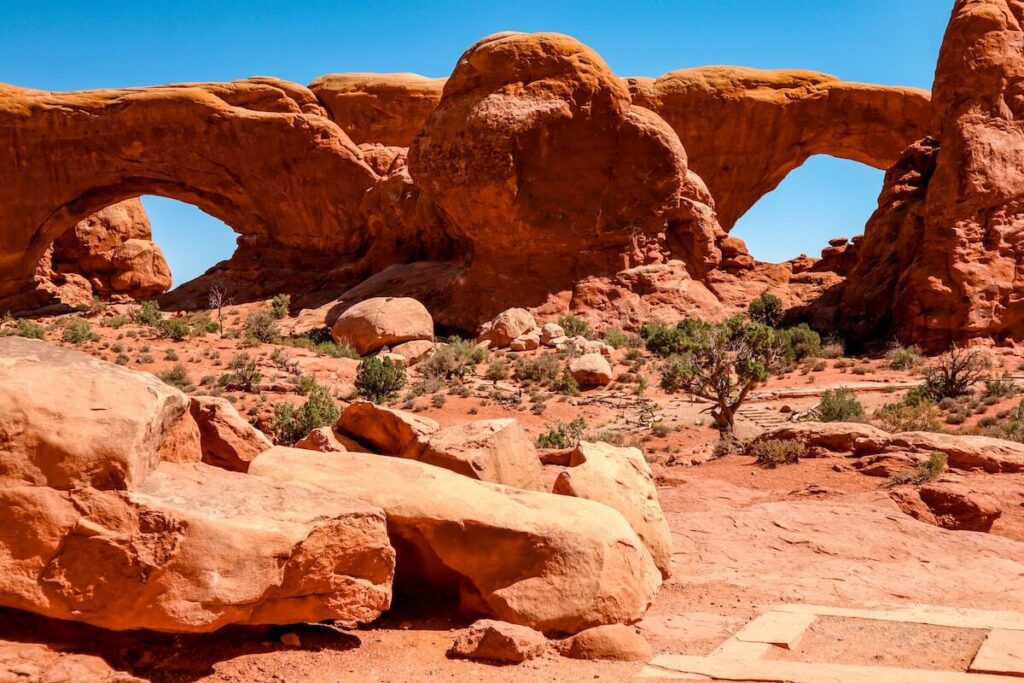
How Canyonlands Differs From Arches or Zion
Let’s get real—Arches is photogenic, but it’s also compact and often crowded.
Zion? Breathtaking, but your lens competes with vertical walls and high traffic.
Canyonlands? It’s wild, wide, and less trafficked, giving you room to breathe (and compose).
- Space to create: Canyonlands offers epic depth, perfect for layering your shots with foregrounds, midgrounds, and dreamy distant vistas.
- Moody minimalism: The remote vibe means cleaner shots with fewer distractions, great for storytelling and mood.
- Diverse terrain: From towering rock formations to winding rivers and sun-scorched mesas—you can photograph an entire portfolio without leaving the park boundaries.
Essential Planning Tips for Canyonlands Photography
Best Time of Year for Canyonlands Photography
Here’s your seasonal cheat sheet to shoot smarter, not harder:
- Spring (March–May): Wildflowers bloom, temps are mild, and skies are dramatic. Great for hiking AND shooting.
- Fall (September–November): Gorgeous soft light, fewer people, and crisp golden-hour conditions.
- Summer (June–August): Harsh midday light + blazing heat = shoot only at sunrise/sunset. Midday can be tough, but monsoon clouds can add drama!
- Winter (December–February): Quiet, cold, and occasionally snowy. Snow-capped red rock = photographer’s dream. But shorter days and potential road closures require planning.
✨Pro Tip: To avoid a ton of people in your shot, avoid weekends and holidays.
Best Times of Day to Shoot
Canyonlands is a park where light is everything. The right light turns “meh” into “OMG.”
- Sunrise: The holy grail—especially at Mesa Arch, where the sun peeks through the arch and lights up the underside in glowing orange. Get there at least an hour before sunrise for a good spot!
- Golden Hour (sunrise + sunset): The low-angle light adds texture, glow, and drama to your shots. Shoot facing east in the morning and west in the evening.
- Midday: Not ideal for wide landscapes, but the harsh shadows? Use them for contrasty, bold compositions (especially in The Needles).
- Backlighting: Shoot into the sun (with a flare or silhouette) for emotion and mystery.
- Shadow Play: Try converting high-noon shots to black and white to highlight textures and shadows instead of color.
- Night Photography: Canyonlands is a designated International Dark Sky Park, and it is phenomenal for astrophotography. You can catch the Milky Way arcing over rock formations from spring through fall. Time it with a new moon!
Permits + Regulations (Read This Before You Go)
Don’t get caught off guard—Canyonlands has some rules you need to know:
- Drones: Not allowed. Period. This is true in all U.S. national parks.
- Tripods: Totally allowed, but be respectful and don’t block trails or overlooks.
- Backcountry Camping: Requires a permit. Book early if you’re shooting sunrise/sunset deep in the wilderness.
- Night Photography: No permit required for night sky photography in frontcountry areas, but always double-check if you’re in a backcountry zone or staying overnight.
- Commercial Photography: If you’re making money from your shoots (e.g. selling prints or conducting workshops), you may need a special use permit.
How Long to Stay in Canyonlands for Photography
Spoiler alert: You’ll always wish you had more time. But here’s how to make it count:
1 Day
- Stick to Island in the Sky
- Sunrise at Mesa Arch, mid-morning at Grand View Point, sunset at Green River Overlook
- Easy walks + jaw-dropping views
2 Days
- One day in Island in the Sky, one in The Needles
- Hike to Chesler Park or Druid Arch
- Perfect balance of overlooks and immersive adventure
3+ Days
- Add backpacking or night photography in The Needles
- OR go big and plan a remote trip into The Maze with proper 4WD and permits
- Great for serious photographers building a full Canyonlands photography portfolio
Navigation & Cell Signal Warnings
Here’s the deal: cell service is almost non-existent. Don’t count on your phone for help.
- Download offline maps: Use Google Maps offline + an app like Gaia GPS, AllTrails, or Topographic Maps+
- Paper maps: Old school? Yes. Smart? Also yes. Grab one from the visitor center.
- No signal = no updates: Always check trail and weather conditions before you leave town.
💡Bonus Tip: Bring a compass or GPS device if you’re venturing into The Maze or doing sunrise hikes in low light.
Can’t-Miss Canyonlands Photography Spots
With specific tips for time of day, composition, and crowd control—because you deserve more than the same postcard everyone else has.
Island in the Sky
This is where most visitors go—and for good reason. The vistas are chef’s kiss, the access is easy, and the golden light? Unreal.
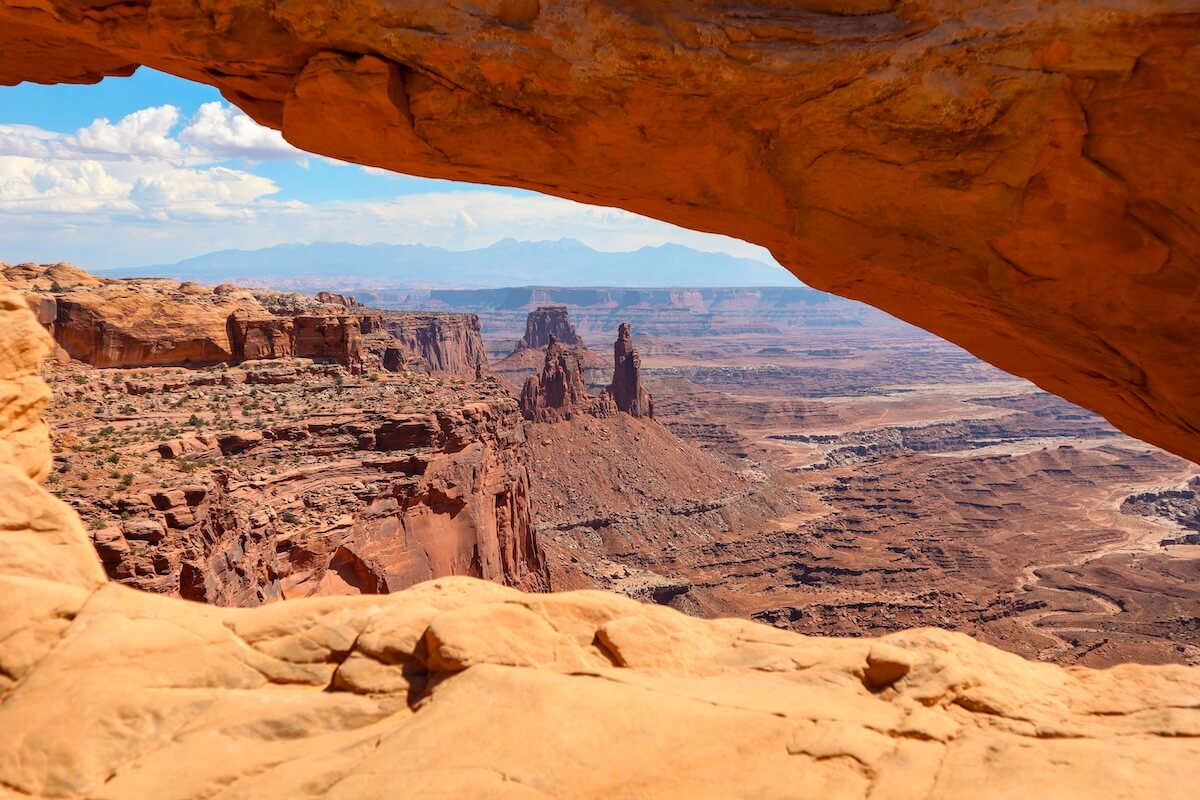
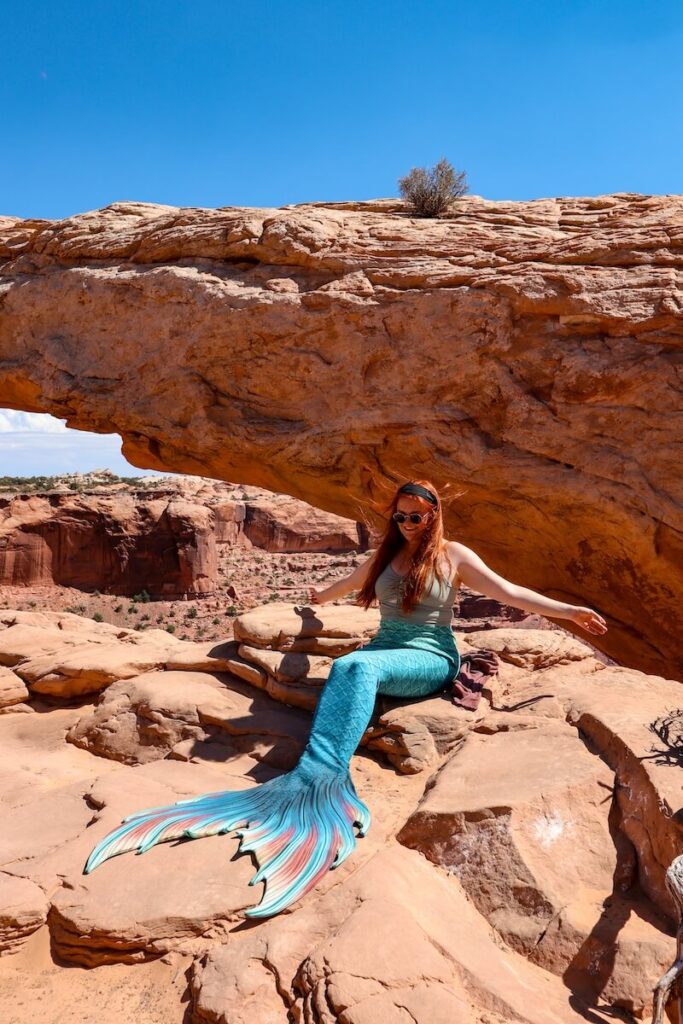
Mesa Arch
Mesa arch is an iconic landmark that is relatively accessible and easy to get to. It makes for jaw-dropping photography, especially at sunrise.
When to Shoot
- Sunrise. Seriously—it’s the moment.
- Arrive at least 1 hour before sunrise to claim a good tripod spot. It’s popular and packed.
Crowd Tip
- Want the shot without the elbows? Visit in winter or shoulder seasons (late fall/early spring).
- OR shoot after sunrise—when the light hits the landscape and the crowds leave, you’ll get unique, peaceful shots.
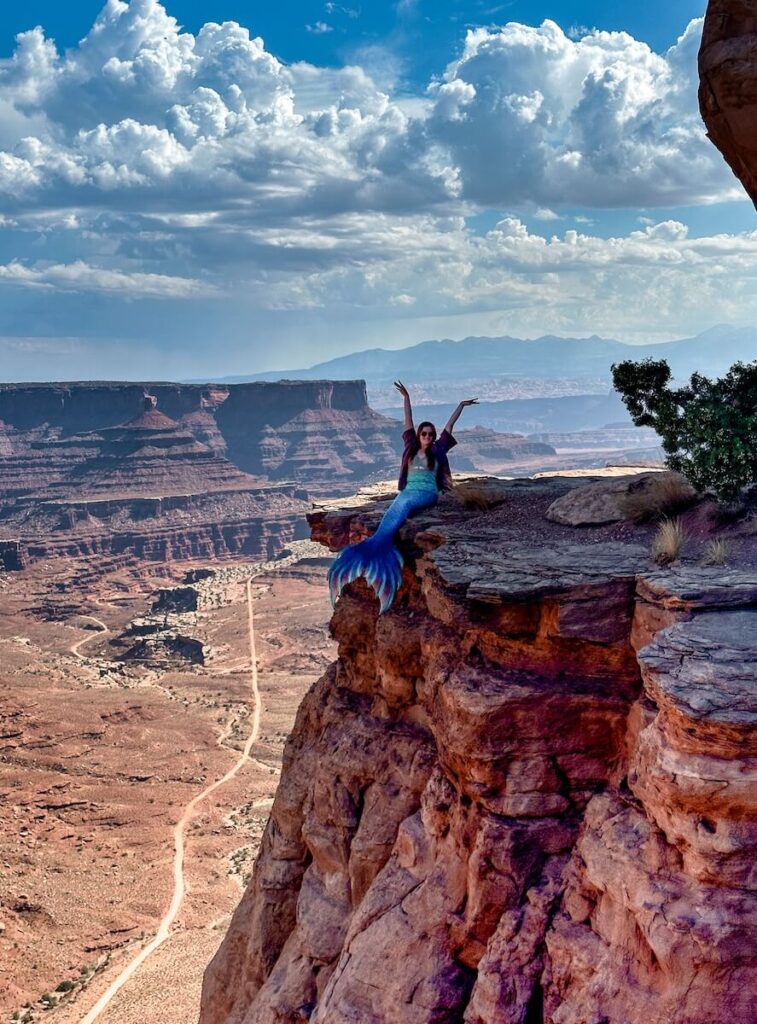
I shot some mermaid photos midday. Although it wasn’t ideal, it still was an incredible backdrop.
Creative Composition Ideas:
- Shoot from low and left to include the glowing arch and distant canyon.
- Use the arch as a frame for the La Sal Mountains in the distance.
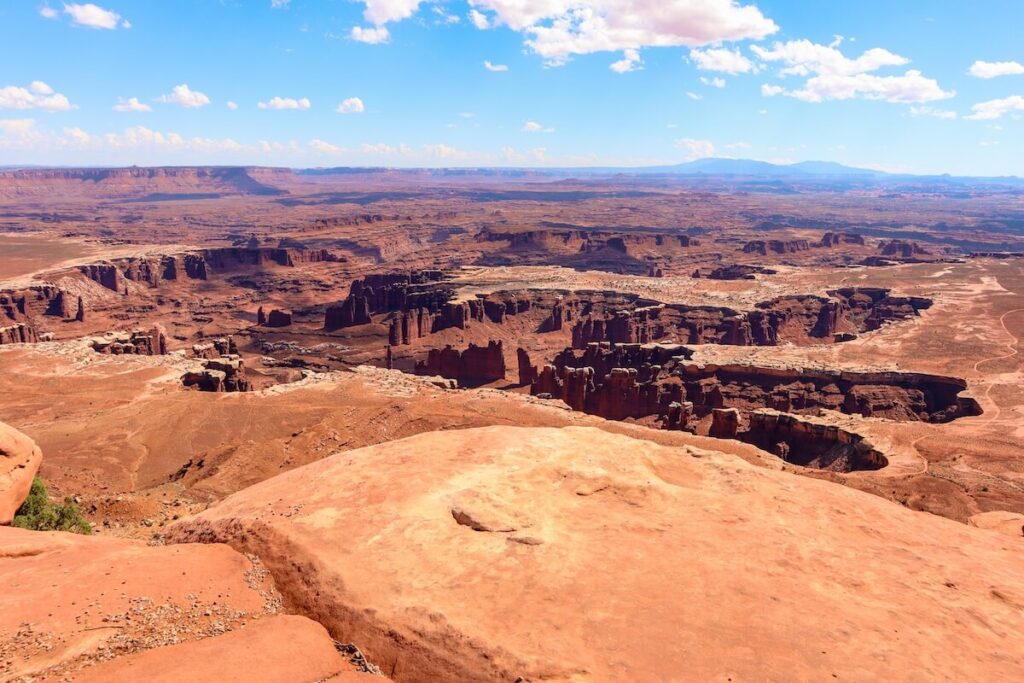
Grand View Point
A jaw-dropping panorama where the canyon seems to stretch to infinity—perfect for capturing layers of desert in soft morning or golden evening light.
When to Shoot
- Sunset is pure magic!
- Midday light can flatten the landscape, but works for B&W or detailed textures.
Photo Tips
- Bring a telephoto lens to compress layers of canyons and play with depth.
- Consider panorama stitching to capture the vastness—it’s called “Grand View” for a reason!
Green River Overlook
A dramatic view of the winding river carving through the canyon floor, ideal for sunset shots with glowing cliffs and endless shadow play.
When to Shoot
- Golden hour to sunset is best. The light turns everything golden-orange with dramatic shadows.
Photo Tips
- Bring your ND filters for long exposures to smooth out any clouds.
- The Green River makes a great leading line if you can find a high vantage point to show its snaking curves.
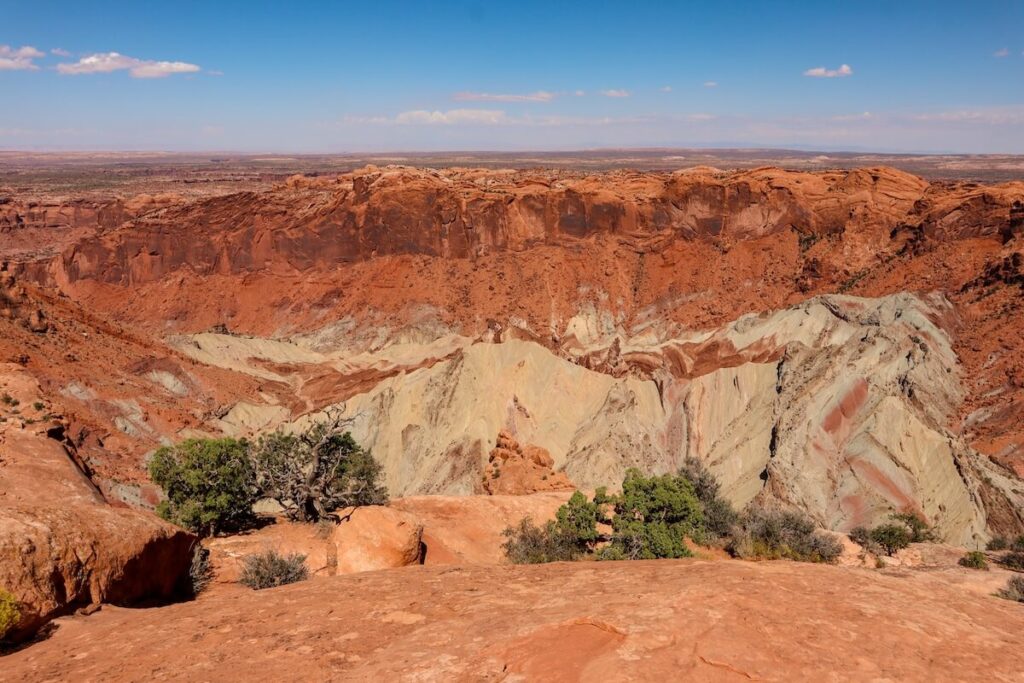
Upheaval Dome
This geological mystery is unlike anything else in the park—a possible meteor crater, surrounded by colorful swirls of rock.
When to Shoot
- Early morning light hits the dome’s west side beautifully.
- Try late afternoon for unique light across the ridges.
Composition Tips
- Use the rim trail to gain different angles—play with height and foreground elements like plants or rocks.
- A polarizing filter helps bring out the swirling colors in the rock layers.
The Needles District
Less trafficked, more dramatic—this is where the real adventurers go. And the photos? Chef’s kiss with extra spice.
Chesler Park Loop
A photographer’s dream with sandstone spires, glowing layers, and unbelievable textures.
Best Time to Shoot
- Morning light for soft tones on the spires.
- Golden hour adds warm contrast and dramatic shadows.
Pro Tips
- Pack light but smart: wide-angle + zoom lens + plenty of water.
- Stay overnight in the backcountry for sunrise/sunset solitude.
- Use the trail’s curves to create leading lines.
Roadside Pull-Offs + Elephant Hill
Quick-access gems with vibrant rock formations and sweeping desert views—perfect for spontaneous golden hour shots or scouting compositions without the long hike.
Elephant Hill is one of the most technical 4-wheel drives in Utah!
Best Light
- Afternoon to golden hour works best for shadows and contrast.
Photo Tips
- Great place to shoot after rain—colors pop and you may catch reflections.
- Bring a telephoto to isolate details in the spires and patterns.
Druid Arch
How to Get There
- This is a strenuous 10.8-mile hike round trip, but so worth it.
- Pack for a full day: snacks, water, GPS/map, sturdy shoes, and extra batteries.
Photo Goldmine
- Druid Arch is like a Gothic cathedral in the desert!
- Use a person for scale in the shot – it’s that massive.
- Arrive mid-to-late morning for the sun to hit the front face.
Night Photography Locations
Because what’s better than one epic shot? A sky full of stars to top it off.
Top Locations for Astrophotography
- Mesa Arch – Framed night sky, but mind the trail and don’t disturb the silence.
- Grand View Point – Wide views, minimal light pollution.
- The Needles backcountry – The ultimate Milky Way setting.
Best Time of Year for Star Trails + Milky Way:
- April to September for Milky Way core (peak visibility May–July).
- New moon nights for the darkest skies.
- Use apps to plan.
Settings & Tools
- Lens: wide-angle full-frame focal lengths (between 14mm and 35mm and at least f/2.8)
- ISO: Start around 3200–6400. Try to stay as low as possible.
- Shutter: 15–25 sec depending on focal length (use the 500 Rule!).
- Take 500 and divide it by the focal length of your lens.
- Example: If you have a 20mm wide lens – 500/20=25. Therefore, you can shoot for 25 seconds before the stars start to streak.
- Take 500 and divide it by the focal length of your lens.
- Tripod: Non-negotiable.
- Remote shutter or timer: For zero shake.
- Light pollution maps and star charts
Find A Tour for Canyonlands Photography
Canyonlands Photography Gear Guide
The gear you’ll wish you brought… and the gear you’ll be glad you left behind.
Camera + Lens Recommendations
DSLR vs. Mirrorless
- DSLR: Reliable, rugged, and proven, but heavier to lug around.
- Mirrorless: Lighter, quieter, often better for night shots due to live exposure preview.
- The Verdict: Go mirrorless if you’ve got it – those extra ounces matter on 10-mile hikes in the desert sun.
My Camera in Canyonlands: Canon EOS m50 mark ii
Must-Have Lenses
- Wide-Angle (14–24mm or 16–35mm)
Perfect for Mesa Arch, sweeping panoramas, and epic skies. - Standard Zoom (24–70mm)
Versatile, great for hiking when you want one lens to rule them all. - Telephoto (70–200mm or longer)
Ideal for compressing distant canyons, isolating formations, and adding drama. - Fast Prime (f/1.4–f/2.8)
Clutch for night photography and creamy bokeh.
✨Pro Tip: If you’re hiking The Needles, bring one lens only (or two tops) to save weight and simplify your setup.
Extra Gear to Level Up Your Shots
- Tripod – a non-negotiable if you want sharp sunrise shots or killer astro photos. Pro tip: Use a carabiner and your backpack as a weight to stabilize it in wind.
- Filters to consider:
- Extra batteries – Batteries drain faster in extreme temps—hot days, cold nights = camera drama.
- Memory cards – Bring several in case one fails. 128GB or higher is your friend if you’re bracketing or filming 4K.
- Dust protection – Ziplock bags, a rain cover, or a lens pen.

Smartphone Photography Tips
Yes, you can get epic shots with just your phone—if you know the tricks.
- Use Grid Lines to follow the rule of thirds.
- Tap to Focus + Slide for Exposure: Control your light like a pro.
- Shoot RAW if your phone allows (iPhone Pro, Samsung, Pixel, etc.).
- Use Night Mode or Long Exposure Apps (like Spectre or NightCap) for low-light scenes.
Read More – How to Play with Light in Travel Photography
Framing and Composition in Canyonlands National Park
In Canyonlands, it’s easy to get wide-eyed and forget to compose intentionally—those massive vistas can be overwhelming!
Here’s how to make sense of the epic scale through your lens:
- Rule of Thirds: Basic but gold. Place the horizon in the upper or lower third—not smack dab in the center. Or…break the rule of thirds intentionally (oh, the horror!)
- Foreground Interest: A boulder, a plant, your backpack, your dog—anything to anchor your shot and create depth.
- Leading Lines: Use trails, river bends, or canyon edges to guide the viewer’s eye.
- Layering: Frame your scene with natural elements (like shooting through an arch or between rock spires).
- Play With Negative Space: Sometimes, the vastness is the point—lean into those big, open skies.
💡 Pro Tip: Crouch down low for foregrounds or climb up high for bird’s-eye drama. Movement = magic.
Capturing Scale in Your Canyonlands Photography
Photos don’t always do the size justice—unless you give the viewer a reference point.
- Add a Human Element: A hiker on a ridge, a person under Mesa Arch, or your silhouette with arms wide open. Boom. Scale = delivered.
- Use Tiny Details: A gnarled tree, a cairn, or your boots in the frame to hint at perspective.
Include Yourself in the Frame
You’re part of the story—so step in front of that lens!
- Use a Tripod + Timer/Remote: Set up and strike a pose like the adventure icon you are.
- Ask a Buddy: Don’t be afraid to direct! Frame the shot, show them the vibe, and let them snap.
- Silhouettes at Sunset: Arms wide open, facing the canyon? Iconic.
- Shoe Shots, Shadow Play, and Reflections: Subtle ways to include yourself without it being a full portrait.
Mermaid Mode Tip: Flowing skirts, wide-brim hats, or capes (yes, capes) can add motion and magic to your self-portraits.
Read More – 500+ Ready-to-Use Travel Photography Hashtags
Photographing in Harsh Conditions
Canyonlands isn’t just a pretty face—it’s wild and rugged. Here’s how to keep your gear and yourself happy:
- Dust Protection: Use lens hoods and keep your gear in zippered bags when not in use. Never change lenses in windy spots!
- Lens Cloths on Hand: You’ll need them often.
- Hydrate & Shade: Carry more water than you think you need. A buff or wide-brim hat helps keep the sun off your face (and lens).
- Plan for Sweat: Use a camera strap or harness that doesn’t become a slip-n-slide on your back. I prefer using the Peak Design camera clip for hiking.
Safety Tips While Shooting
Look, no photo is worth a tumble into a 2,000-foot canyon. Let’s keep it epic but also alive, okay?
- Watch Your Step: Don’t walk backwards without looking. Ever.
- Avoid Cliff Edges in Windy Conditions: Wind in Canyonlands can be brutal—especially near edges.
- Pack a Headlamp: Sunrise and sunset missions mean hiking in the dark—light up! I prefer a red light headlamp mode if you are going to be out in the moonlight.
- Tell Someone Your Plan: Especially if you’re venturing into The Needles or (gasp) The Maze.
Editing Your Photographs from Canyonlands
Let’s give those desert shots the moody glow or crispy clarity they deserve.
- Boost Texture & Clarity: Perfect for rocky surfaces and craggy layers.
- Drop the Blacks + Lift the Shadows: Helps bring out contrast without losing detail.
- Play with Split Toning: Warm highlights + cool shadows = cinematic AF.
- Dehaze Tool: A lifesaver after dusty or foggy sunrise shoots.
If you are new to editing, I created a full adventure editing ebook just for you!

Read More – How to Edit Adventure Photos
Final Word on This Canyonlands Photography Guide
You’ve got the gear, the game plan, and the grit—now it’s time to chase the light and tell your story.
Canyonlands isn’t just a national park. It’s a canvas. A wild, untamed, jaw-dropping, soul-shaking place that will challenge and inspire you at every turn.
Yes, planning ahead is key—because epic shots don’t just “happen.”
But also? Leave space for the magic. That split second when the light hits just right. That unplanned detour that leads to your favorite photo of the trip. That moment when you realize the sky is literally sparkling above you.
So whether you’re hauling a DSLR and three lenses or just your trusty smartphone—get out there and create something magical.
Tell the story only you can tell. Frame those moments, soak in the adventure, and leave with a memory card (and a heart) full of awe.
Call to Adventure
When you’ve snagged that glowing Mesa Arch sunrise or captured the Milky Way from a hidden pullout—I want to see it!
Tag me on Instagram @TheBucketListMermaid
Drop your favorite shots in our Adventure Photography FB Group
Or tell me your photo tale on my podcast, “Tick It Before You Kick It”!
Let’s swap stories, share tips, and celebrate your bucket list bangers together.
✨Happy snapping, wild ones! Your Canyonlands photography adventure is waiting.✨
Travel Resources
Adventure Bucket List Resources
I am here to help your travel adventures go as smoothly as possible! That way you can check off that bucket list with minimal complications and spending!
SHOP – Shop the best adventure gear and essentials on my Amazon Storefront – handpicked by a full-time adventuring mermaid!
AIRFARE – There are a few I use, but Aviasales is normally my go-to for flights without any extra fees or markups.
ACCOMMODATION – My two favorites are Booking.Com for hotels and VRBO for rentals.
GUIDED TOURS – If you are looking for quick and easy tours, check out GetYourGuide and Viator.
MULTI-DAY TOURS – For more in-depth tours that span several days, TourHub has many great options with reputable travel companies. Use my code (ALEXANDRA1GURU) for up to 5% off your next bucket list adventure.
TRANSPORTATION – You can either rent a car yourself with Discover Cars or do a guided bus tours like Big Bus Tours.
SIM CARDS – Avoid expensive roaming charges with an eSim card with Airalo. Personally, I prefer wifi boxes, and recommend WiFi Candy (get 10% of with the code THEBUCKETLISTMERMAID).
TRAVELER’S INSURANCE – Check out VisitorsCoverage for affordable insurance plans. If you are a nomad or remote worker, I would check out SafetyWing.
SEE MORE – Adventure Resources | Photography Resources
More Photography Guides
Don’t Photograph Arches National Park Without These Tips
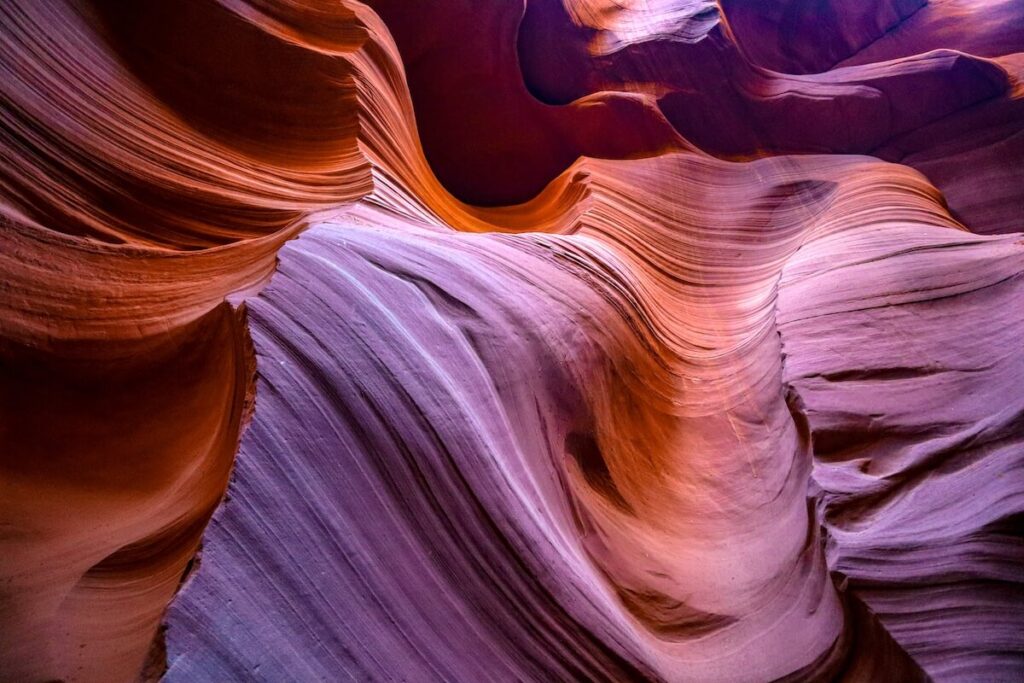
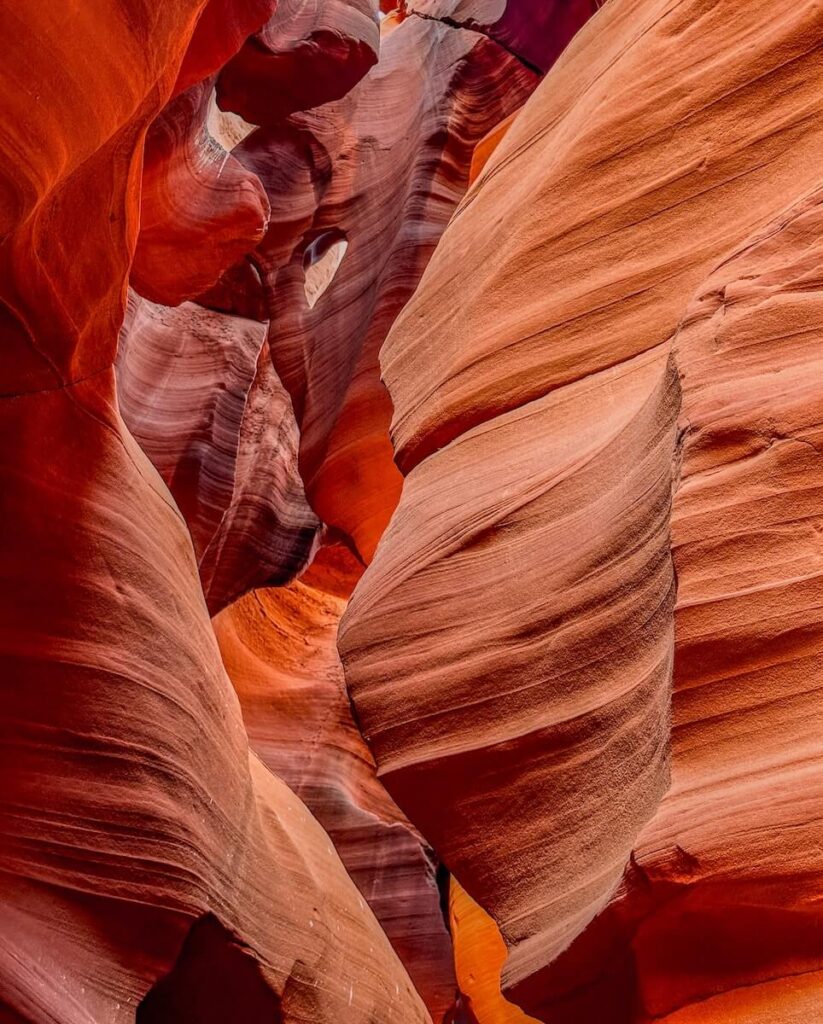
Antelope Canyon Photography Guide (Pro Camera Tips for Jaw-dropping Shots)
Alaska Cruise Photography Guide (Because Whales Won’t Wait for You to Adjust Settings!)
How to Photograph Antelope Canyon with a Phone
See Some PHotos You Like?
Check out my full photography page for a full gallery and prices.