Zion National Park Photography Guide: Best Photo Spots, Tips & Gear
This website contains affiliate links from trusted partners. If you purchase through a link on this site, I may earn a commission at no extra cost to you. As an Amazon Associate, I earn from qualifying purchases. See my Privacy Policy and Disclosure for more information.
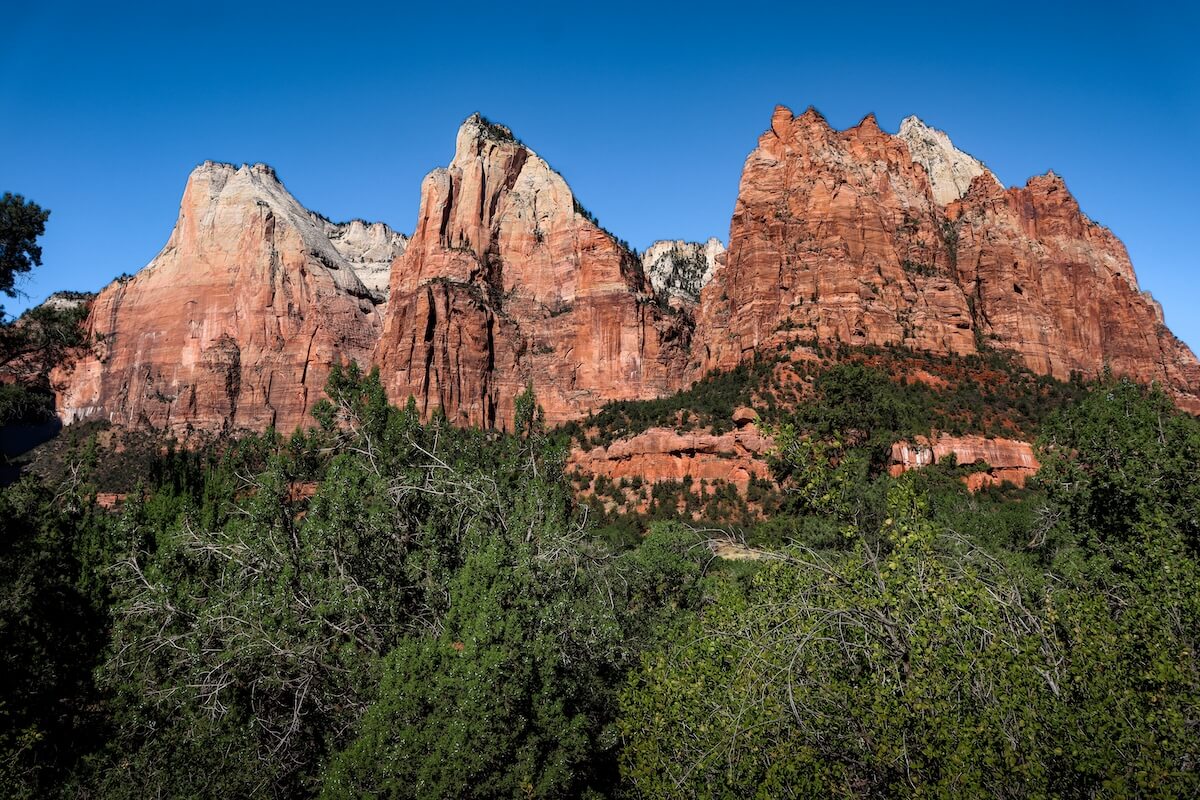
Zion National Park is one of those rare places that makes photographers drool and cry at the same time.
The red cliffs glow like fire, the canyons twist like they were hand-sculpted by giants, and the light? Oh, the light is dramatic, but sometimes too dramatic.
When I first visited Zion as an adventure photographer, I thought I had it all figured out: golden hour plans, tripods ready, camera batteries charged.
Then I met the canyon shadows. One minute my composition was glowing, the next it was swallowed by darkness. My camera’s histogram looked like it was having a panic attack.
Photographing Zion isn’t just about being at the right place at the right time. It’s about learning where the light actually reaches and how to dance with it.
In this Zion National Park photography guide, I’m sharing my favorite shooting locations, real camera settings, gear tips, and lessons learned from chasing light through one of Utah’s most dramatic landscapes.
⚡️ Are You in a Hurry? Here Are the Highlights
If you just want the quick hits, here’s your Zion photography cheat sheet – the best places to stay, shoot, and gear up before you hit the park.
| Category | My Top Pick | Why I Love It |
|---|---|---|
| Best Place to Stay | Cable Mountain Lodge | You can literally walk to the park entrance. |
| Best Photo Spot for Sunrise | Canyon Overlook Trail | Easy hike + iconic view = guaranteed golden hour magic. |
| Best Sunset Location | The Watchman | The classic Zion shot — glows like fire at golden hour. |
| Best Hidden Gem | Kolob Canyons or The Subway | Fewer crowds and incredible stargazing potential. |
| My Go-To Cameras | Canon 5D Mark IV Canon M50 Mark II Best Travel Lenses | The lightweight and the sturdy! Perfect for adventures! |
| Editing Resources | My Presets Editing Services Editing Guide | Saves every “oops, the light betrayed me” shot. |
| Want My Exact Shot Map? | [Download My Free Zion Shot List →] | Includes lighting times, GPS pins, and quick camera settings. |
Zion Photography Map + Best Photo Spots
Zion is basically a candy store for photographers, but instead of sugar highs, you get light highs.
Every turn looks like it belongs on a postcard, which is both thrilling and overwhelming.
To make it easier, I built a Zion Photography Map to visualize where everything sits and how light moves through the canyons.
Although this map has significantly more spots, here are my favorites:
Canyon Overlook Trail
A short, rewarding sunrise hike with a panoramic canyon view. You’ll often catch a soft pink glow brushing the cliffs before the sun fully crests.
📸 Photo Tip: Use a wide lens and a graduated ND filter to balance the bright sky and shadowy canyon floor.
The Watchman (Pa’rus Trail or Canyon Junction)
If you’ve ever seen a photo of Zion at sunset, this is probably it. The Watchman glows in the last light of the day, reflected beautifully in the Virgin River.
📸 Photo Tip: Frame the river as a leading line and bracket exposures if the sky is fiery.
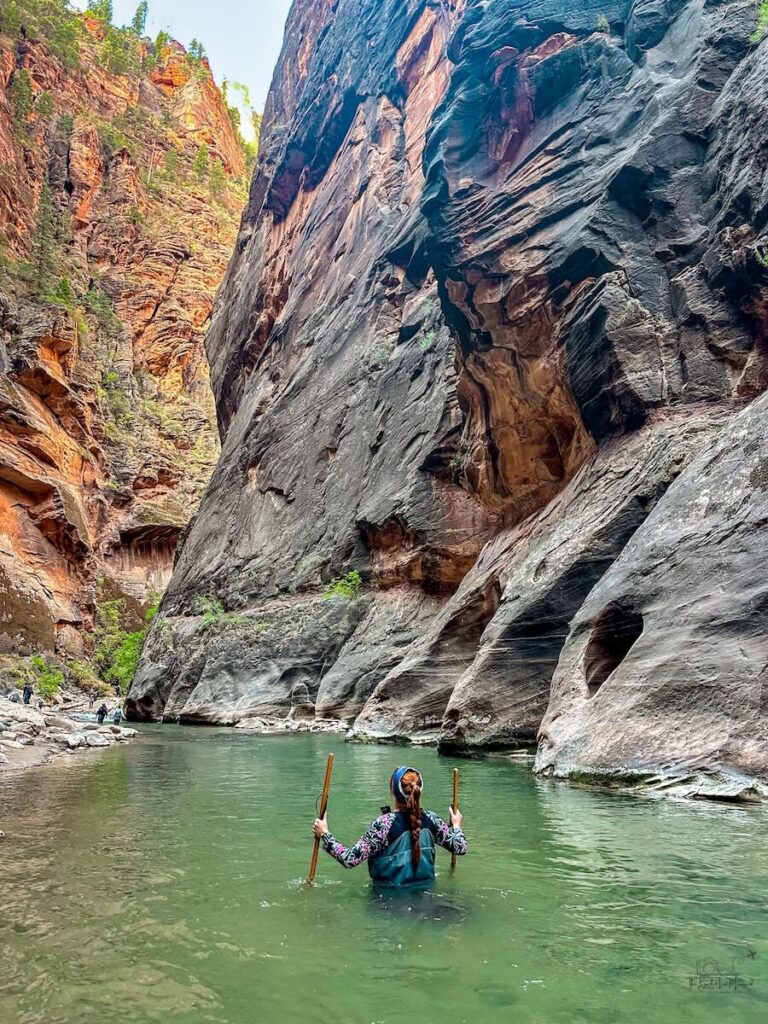
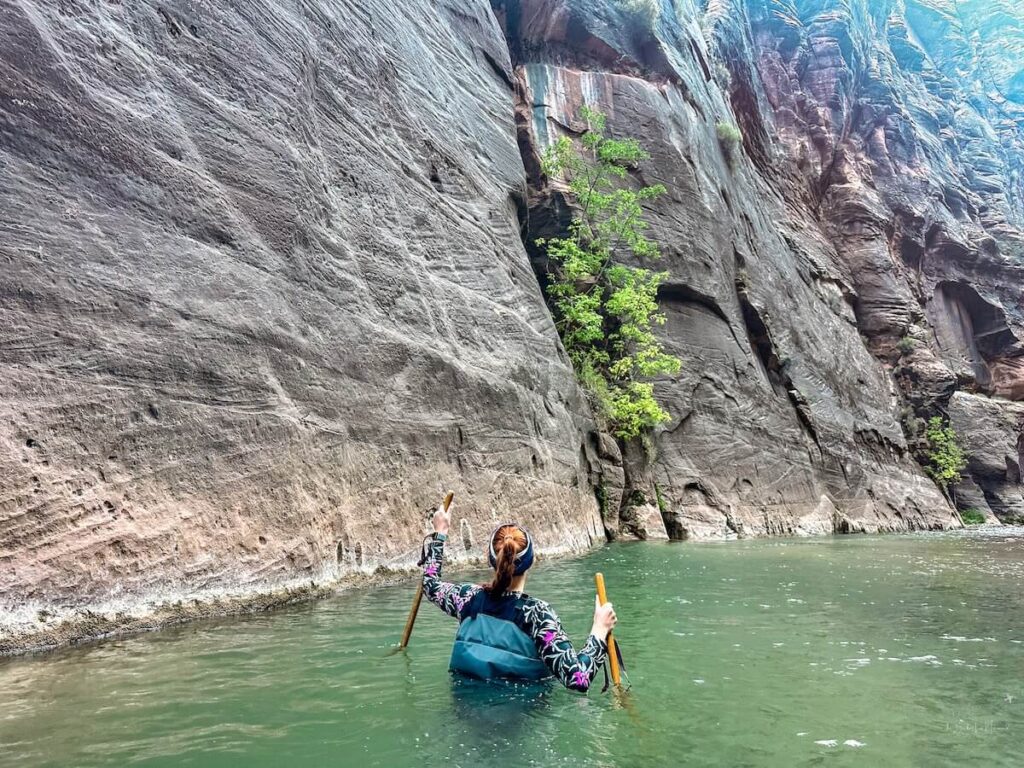
The Narrows
Part hike, part water ballet. It’s dim, reflective, and full of moving water. It’s tricky but rewarding.
📸 Photo Tip: Use a polarizer to cut glare and slow your shutter for that dreamy, silky water effect. Waterproof your gear if you value your sanity.
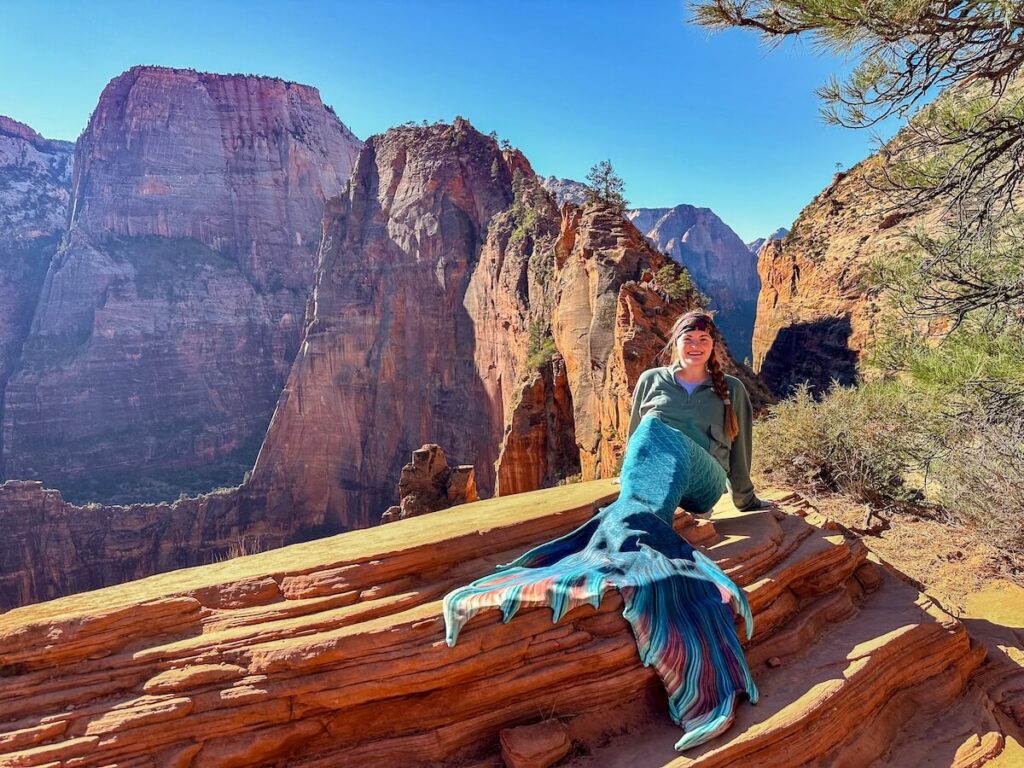
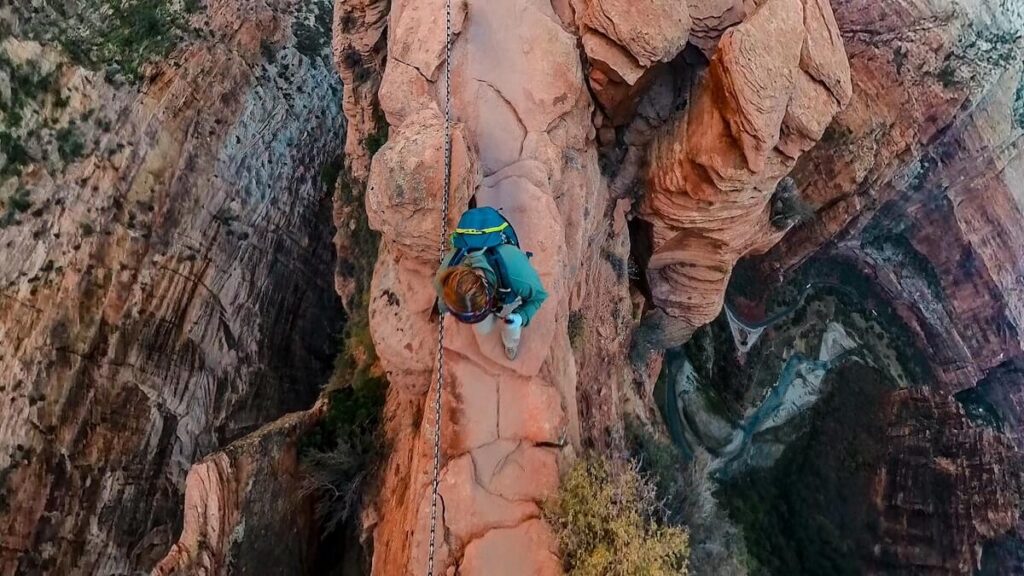
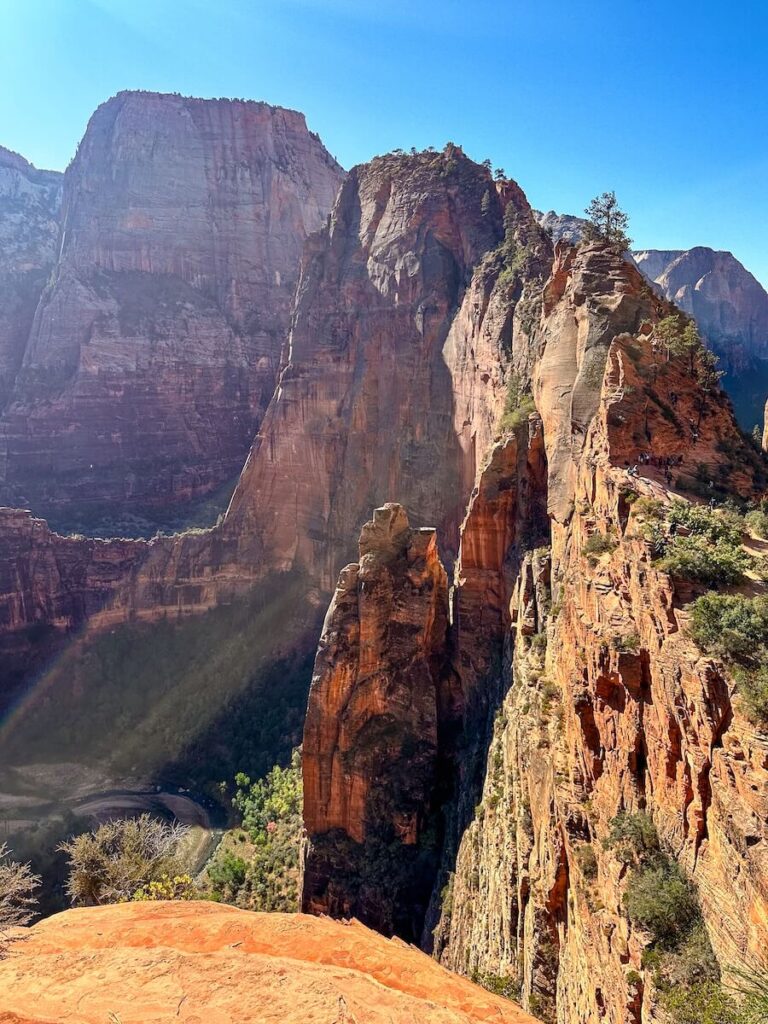
Angels Landing
For the bold and balanced. The view from the top is breathtaking, but even the switchbacks below the chains offer incredible compositions.
📸 Photo Tip: Shoot early or late; mid-day light here is pure punishment and the crowds make it a death-defying conga line.
Kolob Canyons
A quieter corner of Zion with wide-open skies and a perfect setup for astrophotography.
📸 Photo Tip: Bring a tripod and check the moon phase before you go — dark skies make all the difference.
If you’d like to see how I plan my light, shooting order, and lens choices, I put together a detailed Zion Photo Itinerary + Map Bundle with exact times, GPS pins, and gear notes. It’s what I wish I had before my first trip.

Camera Settings for Zion National Park Photography + My Mistakes
Zion’s light is moody, fast-changing, and occasionally cruel.
When I first arrived, I thought I’d nailed my timing – sunrise, check; tripod, check; perfect glow… not quite.
In fact, my photos of Zion were not my favorite, even as a professional photographer.
The canyon walls delay the light, and when it finally arrives, it’s fierce.
Here’s a peek at what worked (and what didn’t) with my photography settings.
Note that these settings are just a starting point. You will need to experiment depending on your camera and conditions.
Canyon Overlook at Sunrise
Settings: ISO 800 | f/8 | 1/30 sec | 24 mm
I got there too early, and the canyon was still asleep in shadow. My photo looked flat and lifeless.
By the time I figured out where I went wrong, it was too late.
💡 Quick Fix: Zion’s light creeps. If sunrise is 6:45 a.m., expect real glow closer to 7:15–7:30. Use the early minutes for long exposures or detail shots.
The Watchman at Sunset
Settings: ISO 200 | f/11 | 1/5 sec | 35 mm
In person, the sky was on fire. My RAW file? Washed out and hazy. My white balance was too cool, and the shadows ate the contrast.
💡 Quick Fix: I warmed the highlights, added local contrast, and brought back the drama in post.
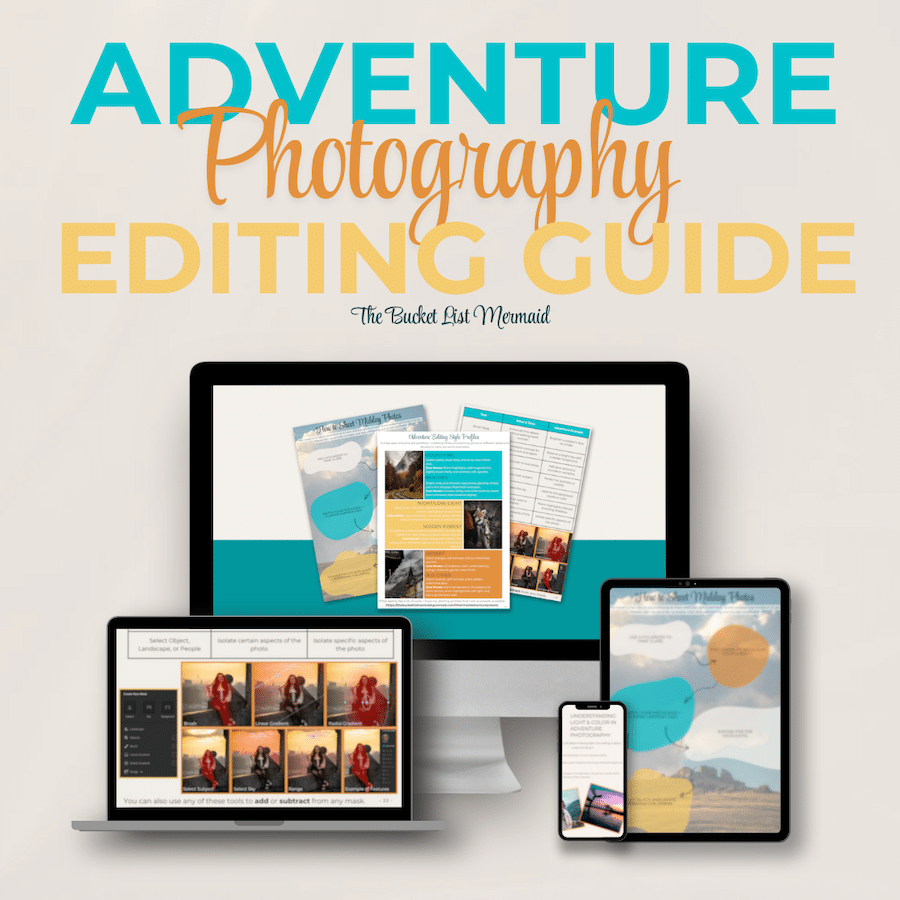
If you’ve ever struggled with this kind of edit, I walk through the exact color-balance process inside my Adventure Editing Guide. It’s the the same one I built after this trip taught me some humility.
The Narrows
Settings: ISO 1600 | f/4 | 1/15 sec | 24 mm
Low light, moving water, soft focus = a recipe for frustration.
This place kicked my 🍑. I walked in with all the confidence of an adventure photographer and left feeling like a defeated tourist with my tail between my legs.
💡 Quick Fix: I was so annoyed with The Narrows that I wrote an entire guide analyzing what went wrong and how you can learn from my mistakes. You can read it 👉 here.
Angels Landing
Settings: ISO 100 | f/10 | 1/250 sec | 50 mm
This is the ultimate photography test because it forces you to get creative, navigate crowds, and deal with harsh lighting… all while being an inch from death and questioning your sanity.
💡 Quick Fix: Again, I was so obsessed with capturing Angels Landing. Here is everything I learned from my epic quest 👉 here.
Note: Angels Landing requires permits.
Gear for Zion National Park Photography: What Worked and What I’d Change
Every trip to a national park starts with good intentions to pack light… and somehow ends with me carrying enough gear for a small expedition.
Here’s what actually earned its place in Zion, and what I’d tweak next time.
Camera Bodies
I shot with a Canon EOS 5D Mark IV and a Canon M50 Mark II. The full-frame handled dynamic range beautifully, but the M50 was a back-saver on hikes like The Narrows.
If you’re hiking long distances or balancing on wet rocks, a small mirrorless setup can make the difference between “fun challenge” and “emotional damage.”
If you are going on short hikes, driving to pull-outs, or attempting some astrophotography… go big or go home with the full-frame!
Lenses
- 24–105 mm f/4L: My do-everything lens.
- 100–400 mm f/4.5–5.6L: For canyon compression shots.
- 50mm Prime f/1.8 STM: Fantastic in low light, but next time I’ll pack an ND filter for The Narrows.
Tripods & Accessories
I would go as light as you can!
I would use a bigger tripod if you are doing astrophotography. Other than that, I just used a mini travel one.
A dry bag and remote trigger are going to be lifesavers on wet hikes like The Narrows or The Subway.
Other Tools
I have to also mention that I spent a good amount of time with my Insta360 here, especially when hiking The Narrows and Angels Landing.
It sacrifices quality, but it is a safer alternative when you are hiking for dear life!
Plus, it gives drone-like shots and unique perspectives that you can’t get with a camera.
It is also great for solo adventurers who don’t have a photo buddy.
Editing Tools
Even with the best gear, the real magic happened later:
- My Adventure Preset Pack – especially “Desert Mermaid” for warming red-rock tones without going cartoon-orange.
- Topaz Photo AI – my go-to for sharpening and noise cleanup.
- Lightroom Classic – for fine-tuning color and contrast. (I break down this workflow in the Adventure Editing Guide if you want to peek behind the curtain.)
Read More – How to Edit Adventure Photos
What I’d Do Differently
- Bring an ND filter for long-exposure water shots.
- Swap to a lighter tripod for big climbs.
- Leave mid-day shooting for exploring. Get the money shots during sunrise/sunset.
Zion Photo Shot List Preview
Zion is overflowing with photo opportunities, and without a plan, it’s easy to chase the light and miss it entirely.
I created a shot list to keep things organized and here’s a small preview.
The Watchman at Sunset
📍 Canyon Junction Bridge 🎯 6:30–7 p.m.
💡 Bracket your shots to balance glowing sky and shadowy river.
The Narrows Reflections
📍 Riverside Walk 🎯 9:30–11 a.m.
💡 Use a polarizer to enhance red rock reflections.
Canyon Overlook at Sunrise
📍 East Side Platform 🎯 7:15 a.m. (summer)
💡 Include the winding road for depth and scale.
If you’d like the complete 12-spot itinerary (with GPS pins, lens suggestions, and light timing) I’ve bundled everything together in a Zion Photo Itinerary + Shot List.
It’s the same plan I now use whenever I revisit the park.
Final Thoughts on Your Zion National Park Photography Journey
Zion humbled me in the best way.
I came chasing postcard perfection and found myself learning patience, timing, and a deep respect for light that doesn’t care about your schedule.
If I could redo it, I’d shoot fewer frames and spend more time just watching the glow on the cliffs, the color shifting minute by minute.
That’s the heart of photography: not perfection, but presence.
If you’re heading to Zion soon, I hope this guide helps you avoid my mistakes and find your own rhythm with the light.
And if you want to dive a little deeper:
- Zion Photo Itinerary + Shot List: everything I wish I’d known before my first sunrise here.
- Adventure Editing Guide: my workflow for rescuing tough canyon lighting.
- Shutterbugs Gone Wild: our free Facebook lounge for adventure photographers — come share your shots and swap ideas.
You don’t need flawless gear or perfect conditions. You just need curiosity, patience, and a willingness to chase the glow… even when it gets away from you.
Here’s to your next adventure and every wild, beautiful photo it brings. 🌄
More Zion National Park Inspiration
Angels Landing Tips: How Not to Panic, Plummet, or Pee Yourself
Photographing The Narrows: What I Did Wrong (and How You Can Do Better)
How to Get Epic Angels Landing Pictures (Without Risking Your Life)
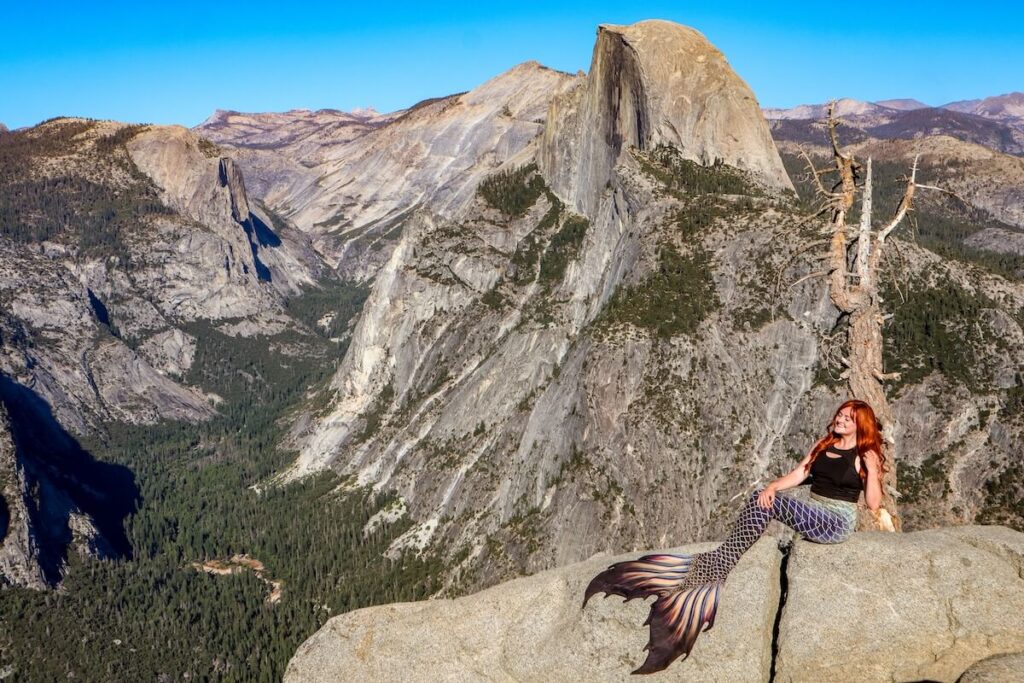
Half Dome Vs Angels Landing: Showdown of America’s Scariest Hikes
Adventure Travel Resources
Adventure Bucket List Resources
I am here to help your travel adventures go as smoothly as possible! That way you can check off that bucket list with minimal complications and spending!
SHOP – Shop the best adventure gear and essentials on my Amazon Storefront – handpicked by a full-time adventuring mermaid!
AIRFARE – There are a few I use, but Aviasales is normally my go-to for flights without any extra fees or markups.
ACCOMMODATION – My two favorites are Booking.Com for hotels and VRBO for rentals.
GUIDED TOURS – If you are looking for quick and easy tours, check out GetYourGuide and Viator.
MULTI-DAY TOURS – For more in-depth tours that span several days, TourHub has many great options with reputable travel companies. Use my code (ALEXANDRA1GURU) for up to 5% off your next bucket list adventure.
TRANSPORTATION – You can either rent a car yourself with Discover Cars or do a guided bus tours like Big Bus Tours.
SIM CARDS – Avoid expensive roaming charges with an eSim card with Airalo. Personally, I prefer wifi boxes, and recommend WiFi Candy (get 10% of with the code THEBUCKETLISTMERMAID).
TRAVELER’S INSURANCE – Check out VisitorsCoverage for affordable insurance plans. If you are a nomad or remote worker, I would check out SafetyWing.
SEE MORE – Adventure Resources | Photography Resources
See Some Photos You Like?
Check out my full photography page for a full gallery and prices.