How to Take Pictures in a Museum: Photography Tips for Travelers
This website contains affiliate links from trusted partners. If you purchase through a link on this site, I may earn a commission at no extra cost to you. As an Amazon Associate, I earn from qualifying purchases. See my Privacy Policy and Disclosure for more information.
Are you taking pictures in a museum and slowly losing your mind? I don’t blame you.
Odds are if you are traveling, you will most likely stop in a museum or two.
And you will soon realize that this is the photography version of an escape room: dim lighting, glass that loves to throw your reflection back at you, no-flash rules, and crowds that move slower than molasses.
I’m a full-time adventure blogger and photographer, and I’ve wrestled with museum lighting from the Louvre to the British Museum, attempting to turn chaotic, shadowy halls into galleries of my own.
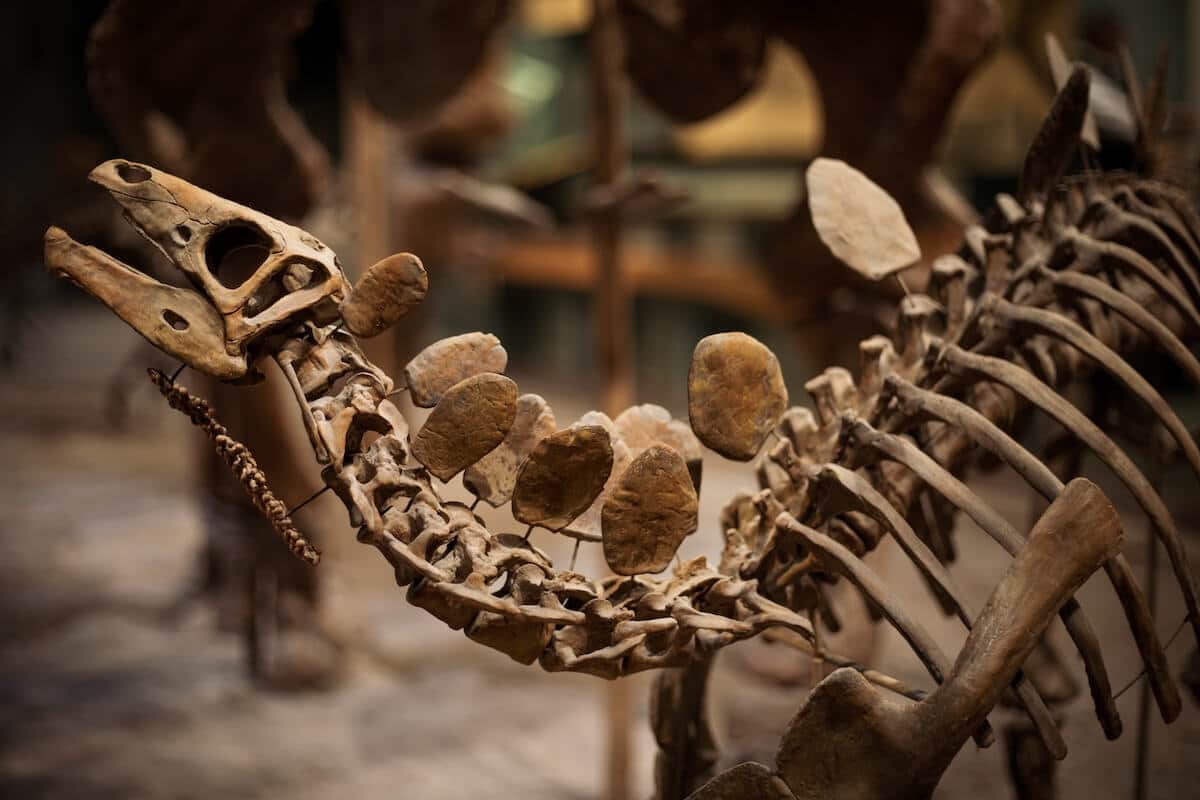
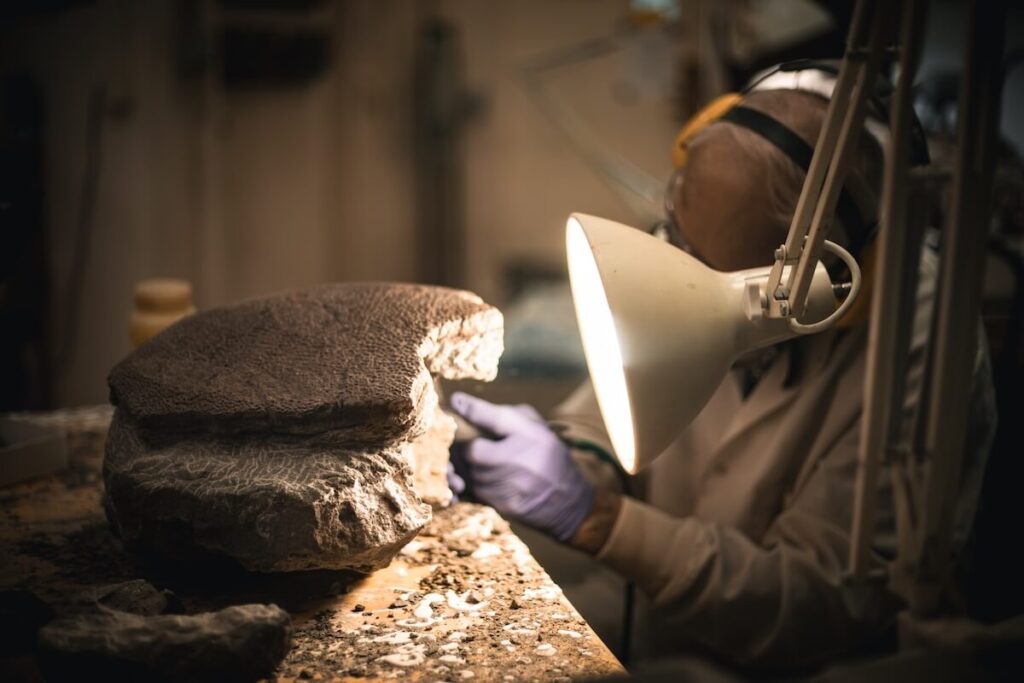
So, if I can make a dusty dinosaur skeleton look cinematic, you can too.
I’ll spill the best museum photography tips: camera settings that actually work in low light, hacks for shooting through glass without glare, stealth strategies for dodging crowds, and even how to score those Instagram-worthy frames without ticking off the guards.
If museums aren’t on your bucket list yet, let your camera be the reason they are!

Key Takeaways
- ✅ Check the rules before you shoot. Don’t let security kill your vibe.
- 📸 Light gear > heavy gear when you’re three floors deep.
- ⚡ Flash = nope. ISO is your best friend in low light.
- 🪞 Glass is tricky—angles, patience, and dark clothing win the battle.
- 👥 Respect the crowd. Blend in, don’t block, and sometimes let people be the story.
- 🎨 Get creative. Play with symmetry, reflections, silhouettes, and storytelling shots.
Museum Photography Etiquette & Rules
Before you even lift your camera, pause.
Museum photography isn’t the Wild West. It’s a chess game where the guards always win.
You want those shots, but you also want to leave with your dignity (and your gear) intact.
Is Photography Allowed in Museums?
Let’s address the elephant in the room: are you allowed to take photographs in museums?
Not every museum rolls the same way.
Some welcome cameras with open arms, some allow only phones, and others give you the death glare if you so much as reach for your lens cap.
Why? It usually boils down to:
- Preservation (light can damage delicate art).
- Copyright/licensing issues (think special exhibits).
- Crowd control (tripods turn into people magnets).
Bottom line: always check the rules before you go.
Flash = Public Enemy #1
Rule #1 of museum photography: flash is banned.
Not just because it’s annoying (and wow, is it annoying), but because repeated flash can actually degrade pigments and materials over time.
Plus, nothing kills the vibe faster than someone lighting up the David statue like a paparazzi swarm.
Tripods, Monopods & Selfie Sticks
Museums are tight spaces with heavy foot traffic.
That’s why bulky setups (tripods, monopods, selfie sticks) are usually prohibited. Instead:
- Use a fast lens + image stabilization.
- Get creative with bracing your camera on benches, walls, or even your bag.
- Smartphone shooters? Congrats! You’re automatically less suspicious.
Respect the Flow of the Crowd
Yes, you want the perfect angle.
But standing in the middle of a bottleneck while people are trying to shuffle past? Rude.
Position yourself off to the side, take the shot, then step back. Think stealthy, not statue.
Cultural Sensitivity Counts
Not all artifacts are meant for social media.
Religious relics, sacred sites, or items tied to trauma deserve extra care. When in doubt, photograph respectfully…or skip it altogether.
Regional Differences
- Europe: Most major museums (Louvre, Prado, Vatican) allow photography without flash, but temporary exhibits can be stricter.
- US: Many museums allow photography in permanent collections but ban it in rotating exhibits. Guards are very attentive here.
- Asia: Photography is often banned in temples, shrines, and museums with sacred artifacts. Always check signs.
Temporary Exhibits = Extra Rules
Special exhibitions often involve loaned works, and lenders dictate the rules.
That’s why you might be free to shoot the main collection but barred from snapping in the visiting wing.
When Photography Is Banned Entirely
Sometimes the answer is just…no. No photos, period. But that doesn’t mean the experience is wasted.
- Soak It In: Sketch, take notes, or simply enjoy with your eyes.
- Buy the Book: Museum shops often sell gorgeous exhibit catalogs which are way better than sneaky, blurry shots.
- Memory Mode: Not every moment needs to live on Instagram. Sometimes the story you tell later is stronger than the photo.
Respect the rules. The guard isn’t being a killjoy…they’re protecting priceless art. And honestly? Getting escorted out mid-photo is not the vibe.

Museum Photography Gear: Cameras, Lenses, and Phones! Oh, my!
When it comes to museum photography, gear isn’t about flexing, it’s about survival.
You’re maneuvering through dim lighting, tight hallways, and guards who give you side-eye if your setup looks even remotely professional.
Let’s break down what actually works.
Best Camera for Museum Photography
- DSLRs: Powerful, but chunky. Hauling one around all day in a museum feels like dragging a toddler that doesn’t want to walk. Pro: great image quality. Con: heavy, noisy shutter, and attention-grabbing.
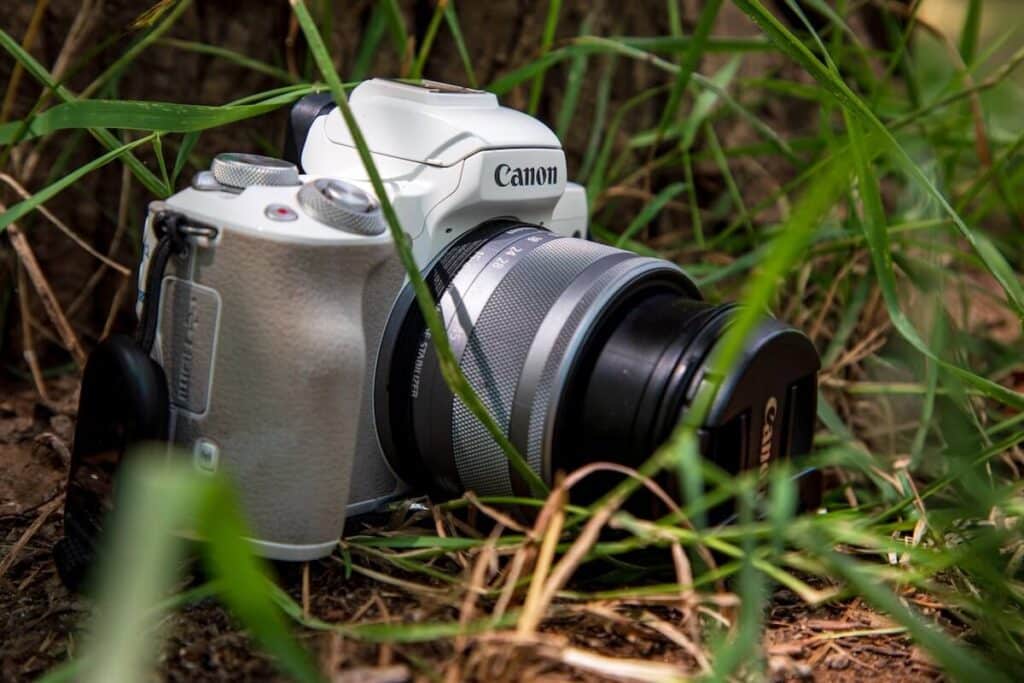
- Mirrorless: Sleek, quiet, compact. The silent shutter won’t echo like a gunshot in a marble hall. They’re stealthy, light, and crush low-light performance.
- Smartphones: Museum lighting plays nice with newer phone sensors, especially if you know how to finesse settings. Plus, guards rarely care if you’re shooting on your phone.
My Go-To Travel Cameras: Canon EOS M50 mark II | Canon EOS 5D mark IV | What’s in My Camera Bag?
When traveling to the Natural History Museum in Denver, I decided to take my 5D mark IV.
Read More – Expensive vs Cheap Camera Showdown
Best Lens for Photographing Art & Exhibits
- Wide-Angle Lens (16–35mm): Essential for big architecture shots like sweeping cathedral ceilings or grand staircases.
- Prime Lens (35mm or 50mm): The MVP in low light. Fast, sharp, and perfect for capturing detail without cranking your ISO into grain-city.
- Zoom Lens (24–70mm): Handy for versatility, but anything larger (70–200mm) often gets flagged by security as “too pro.” And honestly? They’re awkward in crowds.
For my museum photos shown here, I actually found a surprisingly cheap 50mm prime for my canon. I thought it was great! No complaints!
Smartphone Photography in Museums
My camera is pretty much attached to me at this point. Seriously, I think it’s fusing to my hand bones.
Therefore, I will always photograph with a camera over a phone. However, I do think that is is handy if you know how to use it.
- Night Mode Hacks: Hold steady, breathe out slowly, and let the phone work its magic.
- Grid Lines On: Keeps your framing clean, especially for paintings and symmetrical displays.
- Editing Apps: Lightroom Mobile, VSCO, Snapseed are all great for fixing shadows and white balance on the fly.
- When Phones Win: Tight crowds, strict rules, or when you’re three hours in and your arms are jelly.
Photography Gear Accessories
You don’t need a whole studio setup to crush museum photography.
Again, always ask for permission, but these small accessories will help your photos shine from your trip to the museum.
- Press it right up against glass cases to block out reflections.
- Flexible, light, and cheap.
- Also doubles as a mini bumper if you accidentally bump your lens (the staff loves that).
This was what I wish I would have had! Because, honestly, I bumped my camera into more glass than I care to admit…
- Neck Strap: Safer in crowded galleries and keeps things hands-free when you’re flipping through a guidebook or sipping coffee in the café. I prefer the one by Peak Design.
- Wrist Strap: Minimal, discreet, and keeps your camera ready to shoot. Great for smartphones too. Again, the one by Peak Design is so far above the rest!
Best Lightweight Bags for Museums
- Go compact and anti-theft: think crossbody or sling bag that hugs your body.
- Keep it to one lens + essentials. Security hates bulky bags, and your shoulders will thank you.
Pro Tip: Always assume your bag might get searched at entry.
Pack light, organized, and with nothing you’d be embarrassed to pull out at security (snack stash: fine. Full lens lineup: maybe not).
Best Camera Settings for Museum Photography
Museums are like the boss level of photography.
But don’t stress…I’ll walk you through the exact settings that save your butt in a museum.
Need a refresher on shutter speed, aperture, and ISO? Check out my beginner’s guide to the exposure triangle for adventurous photographers.
Read More – How to Become an Adventure Photographer
ISO Settings for Museums
ISO is your secret weapon in low light…but crank it too high, and suddenly your photos look like a snowstorm of grain.
- Why ISO matters: It brightens your shot without extra light.
- Suggested ranges: Start around ISO 800 for decently lit museums, bump up to ISO 1600–3200 for darker halls.
- Newer cameras handle noise like champs, so don’t be afraid to push higher if needed.
If you do get some grain, I would recommend shooting in RAW and applying the “Denoise” feature in Lightroom. This has saved me soooo many times!
Aperture (f-stop)
Think of aperture as your light gateway. Wide = more light, narrow = less light.
- Wide aperture (f/1.4–f/2.8): Perfect for dim rooms and spotlighted art.
- Balancing depth of field: Wide apertures give you that buttery background blur, but for paintings, keep it a little narrower (f/4–f/5.6) so the whole artwork stays sharp.
Unless you want everything in focus (like a painting) and don’t mind bumping up the ISO, I would keep it wide to get as much light as possible.
Shutter Speed
Your camera is not a statue, and shaky hands love to ruin museum shots.
- Handheld rule of thumb: Stay above 1/60 sec for still life (paintings, statues). Faster (1/125+) if you’re shooting moving crowds.
- Hack: Turn on image stabilization (in-lens or in-body). And don’t be afraid to brace against walls, rails, or even your knee if needed.
White Balance
Museum lighting is…weird. You’ll get a mix of tungsten, fluorescent, and random spotlights that turn your photos orange, green, or ghostly blue.
- Auto White Balance (AWB) usually does fine, but not always.
- Custom WB: If colors look funky, switch to Tungsten (for warm light) or Fluorescent (for cool light).
- Shooting RAW? You can fix this later (which is why RAW is a lifesaver).
RAW vs JPEG
If there’s ever a time to shoot RAW, it’s in a museum.
- RAW: Keeps all the detail, so you can fix exposure, shadows, and white balance in editing.
- JPEG: Saves space, looks fine for casual shots, but gives you way less flexibility if the lighting betrays you.
Personally, I shot in both when I was at museums for ultimate flexibility. But, if I had to choose one, I would choose RAW without even thinking about it.
If you are learning or need a refresher on camera settings, I have a FREE adventure photography cheat sheet👇
How to Beat Low Light and Glass When Taking Pictures at a Museum
Museums are basically where good lighting goes to die.
One room feels like a cave, the next blasts you with a rogue spotlight, and then you’ve got the glass cases (aka Reflection City).
Trust me…it is the most annoying feeling ever when you get an epic shot…only to look at it later and there is a massive reflection over all of it. Or, it’s underexposed and grainy.
Let’s break down how to handle each battle.
Low Light Photography in Museums
Tripods are generally banned everywhere (or at least heavily frowned upon), so you’ve gotta have record stability.
- Steady Hands: Hold your camera with elbows tucked in, exhale slowly, and press the shutter at the end of the breath. (Yes, like a sniper. Minus the drama.)
- Brace Yourself: Lean against a wall, railing, or even sit on a bench and use your knees as a tripod.
- Burst Mode Trick: Fire off three shots in a row. Odds are the middle one will be sharpest.
Spotlight Drama
Museums love dramatic spotlights, but your camera hates them.
- Don’t Blow the Highlights: Expose for the brightest area, even if it means the background falls into shadow.
- Spot Metering: Switch to spot or center-weighted metering so your camera measures the light on the art, not the entire dark room.
- Bonus: Shadows can actually add mood. Don’t fight them…use them.
Glass & Reflection Battles
The bane of every museum photographer’s existence: glass cases. Half your shots will look like a ghostly selfie if you don’t fight back.
- Angle Game: Shoot slightly from the side instead of dead-on.
- Lens-to-Glass Trick: Press your lens hood right up against the glass. This blocks reflections and gives a clean shot.
- Dark Clothing Hack: Wear black or dark colors so you’re not reflected in the display.
- Polarizing Filters: Outdoors, lifesavers. Indoors? Meh. They work sometimes, but museum lighting is usually too mixed for reliable results.
Pro Tip: If you can’t beat the reflection, use it. A faint ghost image of you against an ancient artifact? Creepy-cool storytelling shot.

How to Take Photos in Museums Without Flash
Flash is banned for a reason. It’s harsh, it damages sensitive art, and it screams “rookie move.”
The good news? You don’t need it.
With the right tricks, you can walk out with sharp, glowing shots without blinding the subjects in the art.
Boost ISO + Steady Hands
- Don’t be afraid to crank your ISO. Yes, higher ISO = noise, but a grainy shot beats a blurry one every time.
- Hold your camera like it’s sacred: two hands, lens supported, elbows tucked, stance solid, breath out slowly as you click.
Use Benches & Railings as Makeshift Tripods
Museums are filled with sneaky stabilizers. Rest your camera on a railing, bench, or even press it against a wall to lock it steady for slower shutter speeds.
Burst Mode = Hidden Sharpness
Fire a quick burst of 3–5 shots in a row. Odds are one will be tack-sharp, even if the others blur.
Phone Night Mode vs Pro Mode
- Night Mode: Let your phone’s brain do the heavy lifting. Just hold still while it layers multiple exposures.
- Pro/Manual Mode: Gives you control over ISO, shutter, and white balance.
- If your phone has both? Test them side by side. Sometimes Night Mode nails it, sometimes Pro Mode wins.

How to Handle Crowds Like a Ninja
Crowds are inevitable in big museums.
Everyone and their grandma wants that Mona Lisa shot (and spoiler: it’s the size of a lunch tray).
But with the right strategy, you can slip through the chaos like a stealth operator and still snag clean frames.
Timing Is Everything
- Early Mornings: Be at the doors when they open. You’ll get a glorious 15–30 minutes of breathing room before tour groups descend.
- Weekdays: Tuesdays and Wednesdays are usually calmer. Saturdays? Forget it.
Strategic Patience
Sometimes the best tool isn’t gear…it’s patience.
Wait for the moment the crowd shifts or someone steps aside.
Two minutes of waiting can mean a people-free masterpiece.
Shoot Above Heads or From the Side
If the floor is packed, go higher.
Raise your camera (live view helps) or find a staircase/balcony to change your angle.
Shooting slightly from the side also avoids the “wall of backs” problem.
Long Exposure Tricks
Want to get creative? Slow your shutter speed (think 1–2+ seconds) so the moving people blur into ghostly streaks while the art stays sharp.
Just make sure you’ve braced your camera on something solid when tripods are a no-go.
The Walk-Away Strategy
Some rooms are hopelessly jammed. Don’t waste your energy fighting it.
Circle back later when the herd moves on. You’ll be shocked how empty a “packed” room gets once a tour group clears out.
If you’re really stuck, include the crowd on purpose. A shot of dozens of people staring at the same tiny painting can tell a stronger story than the art alone.

Creative Composition Tricks for Museum Photography
Sure, you can point and shoot a painting straight on.
But if you want photos that sing (or at least get more than two likes on Instagram), you’ve gotta play with composition.
Museums are a goldmine for lines, textures, and drama…if you know how to look.
Leading Lines in Hallways
Use those long marble corridors, tiled floors, and staircases as built-in runways for your shots.
Leading lines pull the viewer’s eye straight into the frame and bonus points if there’s a person at the end for scale.
Symmetry & Reflections
Museums are basically catnip for symmetry lovers.
Frame doorways, domes, and arches dead center for maximum drama.
If the floors or display glass are shiny, work those reflections for an otherworldly vibe.
Negative Space = Less Clutter
Crowded galleries? Embrace it.
Step closer, angle up, or isolate one piece of art against a clean wall.
Negative space keeps the frame breathing instead of looking like a Where’s Waldo spread.
Close-Ups for Texture
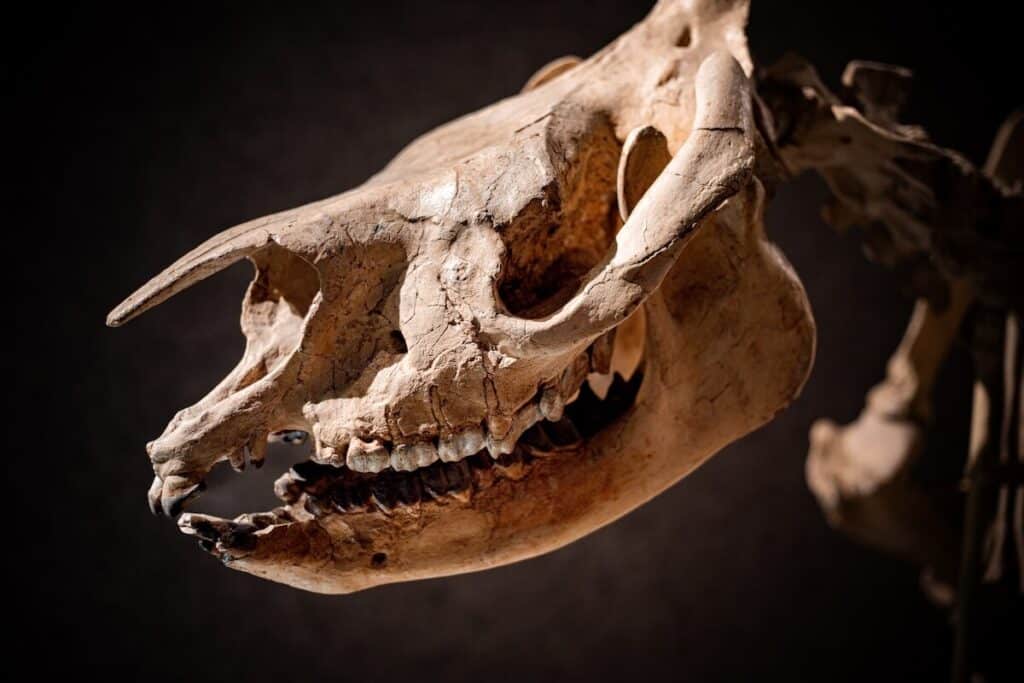
Zoom in on a statue’s hand, the brushstrokes of a painting, or the worn edges of an artifact.
These tight shots give viewers a more intimate connection, and look cinematic in a photo series.
Some of my best shots were actually zoomed in and cropped.
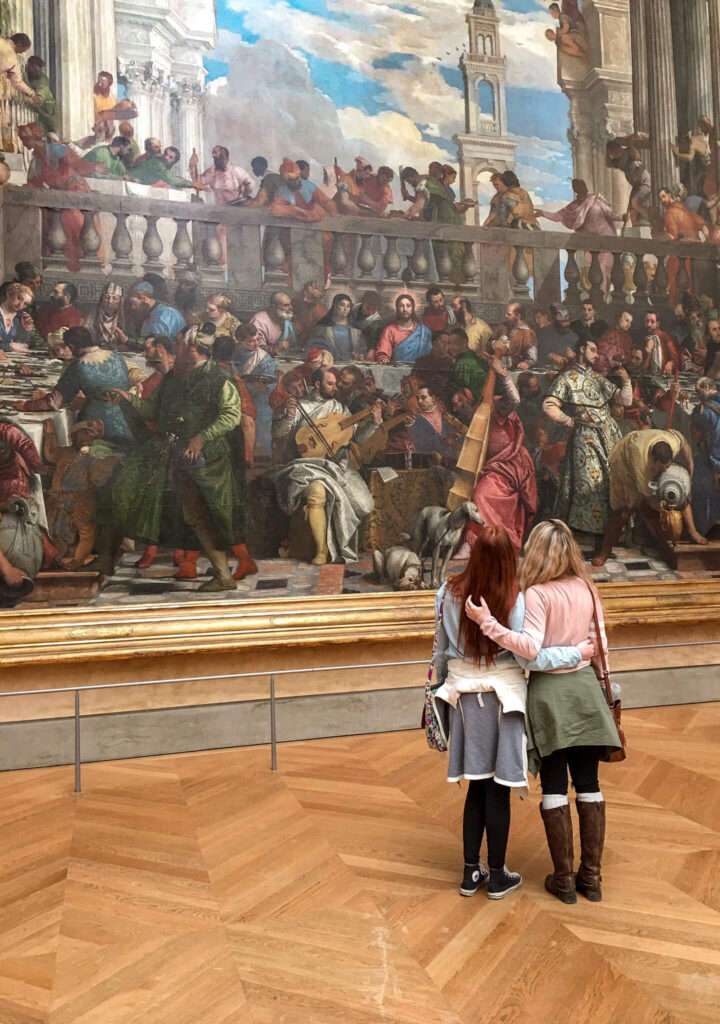
People = Scale + Storytelling
Don’t cut out the humans.
A tiny person under a massive dinosaur skeleton or someone studying a painting adds drama and tells the story of the space.
(Just…ask your travel buddy to stand still for 2 seconds, please.)
Shoot both wide and tight in the same room. The wide shot shows off the grandeur, while the detail shot adds intimacy and together, they tell a way stronger story.
How to Take Pictures in a Museum with You in the Frame
Want to make your shots aesthetic and scroll-stopping? Try these:
- Frame Yourself or Friends with Art: Stand just far enough away to create balance in the frame. Never touch the art!
- Silhouettes Against Light: Stained glass windows, glowing exhibit cases, or doorway light can turn you into a striking silhouette.
- Aesthetic Detail Shots: Focus on museum ceilings, ornate door handles, exhibit signs, or even the shadows cast by sculptures. These tiny details add variety to your feed or photography portfolio.
10 Creative Museum Photo Ideas You Haven’t Tried Yet
You don’t need to settle for the “stand in front of the painting and smile” shot.
Museums are packed with sneaky opportunities to flex your creativity.
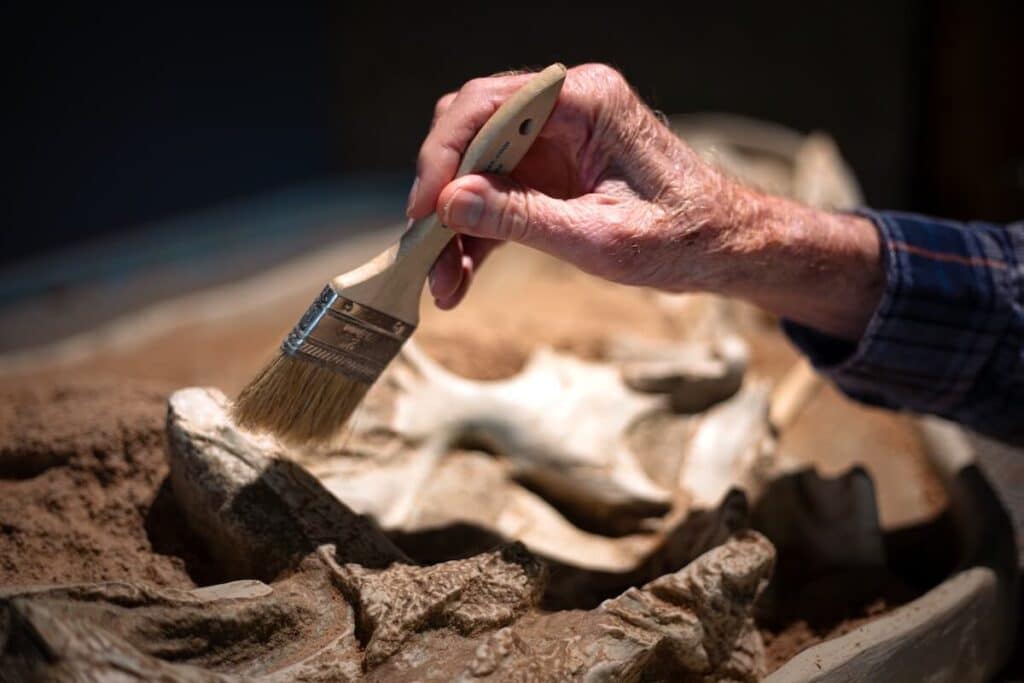
- Hands Framing an Exhibit → Hold your hands (or a friend’s) in the frame, “cradling” a statue, artifact, or even a dinosaur skull. Adds depth and playfulness.
- Shooting Through Doorways → Use doorways, arches, or hallways as natural frames that draw the eye straight to your subject.
- Reflections in Sunglasses or Glass → Tilt your sunglasses or find reflective cases/floors to double the scene in one shot.
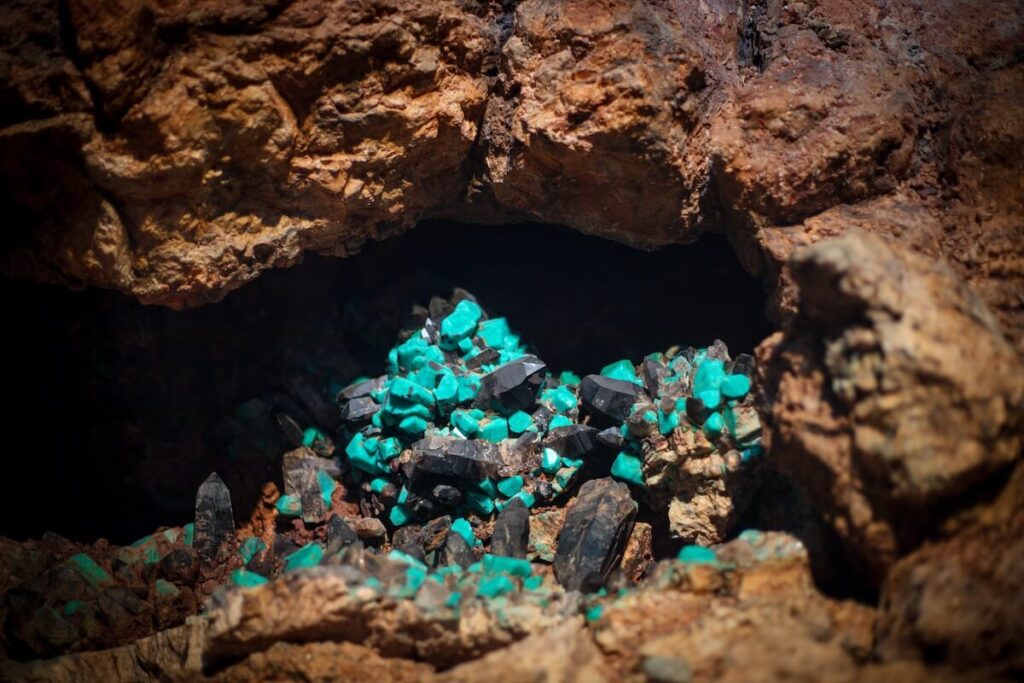
- Macro Magic → Zoom in on textures like stone carvings, brushstrokes, fabrics, ancient inscriptions. It’s like looking at history under a magnifying glass.
- The Ceiling Shot → Museums often hide their best art above your head. Point your lens skyward for ornate ceilings, skylights, or dramatic domes.
- Crowd Contrast → Frame a piece of art with a sea of people in front of it. It tells the story of just how iconic the work is.
- Negative Space Drama → Isolate one small artifact against a big blank wall for that modern, minimalist vibe.
- The Shadow Game → Spotlights cast killer shadows—use them as part of the composition instead of editing them out.
- Staircase Aesthetics → Spiral staircases, marble steps, or even escalators can become architectural art in your photos.
- Museum Lifestyle Moments → Don’t sleep on the cafés, gift shops, or reading rooms. They’re often beautifully designed—and make for aesthetic lifestyle shots.

Editing Museum Photos Like a Pro
You’ve survived the dim lighting, the glare, the crowds, and now your SD card is full of moody-but-messy shots.
Don’t panic. Editing is where you clean things up and give your museum photos that polished, professional glow.
Read More – How to Edit Adventure Photos
Lightroom & Photoshop Basics
- Noise Reduction: Cranked your ISO to 3200? Totally fine…just run a little noise reduction to smooth things out without turning your shot into wax.
- Again, my favorite tactic is to shoot in RAW and then use the Denoise slider.
- Correcting White Balance: Museum lights are notorious for turning art yellow, green, or orange. Use the WB slider to bring colors back to life.
- Dehaze for Glass Shots: Got a hazy, milky look from shooting through glass? The Dehaze slider can be a lifesaver.
Using Presets for Consistent Vibes
Editing each photo one by one is extremely time consuming (trust me – I know).
Presets speed up the process and give your photos a cohesive look. This is perfect if you’re curating for Instagram, a blog/portfolio, or a print series.
- Warm and moody?
- Clean and true-to-life?
- Dreamy and cinematic?
- Choose your vibe, then apply across the board.
My Presets & Services
I use my own custom Lightroom presets to streamline editing because nothing makes a series of museum photos sing like consistency.
You can grab my premade presets, or if editing isn’t your jam, I also offer editing services to bring your shots to life without the headache.
Best Museums Around the World for Photography
Not every museum is camera-friendly, but some of the world’s most famous ones do welcome photography (with a few restrictions).
As always, check that rules haven’t changed before you lug a bunch of camera gear through security.
1. The Louvre (Paris, France)
Yes, you can photograph the Mona Lisa…just be ready for the crowd chaos.
The Louvre’s sprawling galleries are a playground for photographers: think symmetry in the long corridors, dramatic spotlighting on sculptures, and architectural masterpieces like the glass pyramid.
Rules: No flash, no tripods, no selfie sticks.
Read More – France Bucket List
2. The British Museum (London, UK)
Home to the Rosetta Stone and Egyptian mummies, this museum is a dream for detail shots.
The soaring glass ceiling of the Great Court is reason enough to bring your wide-angle lens.
Rules: Photography allowed in permanent collections (flash-free), but temporary exhibits sometimes restrict cameras.
Read More – London Bucket List
3. The Metropolitan Museum of Art (New York City, USA)
The Met combines epic staircases, iconic paintings, and stunning installations like the Temple of Dendur.
It’s an Instagrammer’s delight, whether you’re shooting grand halls or tiny details.
Rules: Photography is permitted in permanent collections, banned in special exhibitions.
Read More – USA Bucket Lists
4. Rijksmuseum (Amsterdam, Netherlands)
Rembrandt’s The Night Watch, Vermeer’s Milkmaid, and more Dutch Golden Age masterpieces make this museum a photographer’s dream.
The architecture itself (arched windows and vaulted ceilings) adds even more drama.
Rules: Photography allowed (no flash or tripods).
5. Vatican Museums (Vatican City, Rome)
While you can’t photograph inside the Sistine Chapel (strictly forbidden), the rest of the Vatican Museums allow photography. Spiral staircases, classical sculptures, and ornate hallways are perfect subjects.
Rules: Photography allowed in most areas, banned in the Sistine Chapel.
6. Pergamon Museum (Berlin, Germany)
Part of Berlin’s Museum Island, this museum is famous for massive reconstructions like the Ishtar Gate of Babylon. The scale is mind-blowing and perfect for wide-angle shots.
Rules: Photography allowed without flash.
Read More – Europe Bucket Lists
7. Art Institute of Chicago (USA)
From American Gothic to Monet’s water lilies, this museum mixes world-class collections with modern, airy architecture. Its natural light makes shooting a little easier than most.
Rules: Allowed in permanent galleries; check signs for restrictions in loaned exhibits.
Museum Photography FAQ
All of your questions answered on how to take stunning pictures in a museum.
Final Thoughts on Taking Pictures in a Museum
Here’s the truth: museum photography isn’t supposed to be easy.
The shadows, the reflections, the no-flash rules, the people wandering into your frame…that’s all part of the ride.
But that’s what makes it epic. If you can capture the mood of a dim gallery, the glow of an ancient artifact, or the hush of a grand hall, you’re not just taking pictures, you’re bottling time.
So go stealthy. Go bold. Embrace the quirks, roll with the chaos, and come home with photos that feel alive.
Because museum photography? It’s not just documentation….it’s storytelling….it’s memory-making…it’s your own private time capsule. 🖤
About The Author
Hi! I’m Alexandra – The Bucket List Mermaid. I live full-time in an RV and swim around the world as an adventure travel blogger and photographer. It is my goal to help adventurers check off their bucket list and get epic photos while doing it!
More Adventure Photography Inspiration
More Travel Resources
Adventure Bucket List Resources
I am here to help your travel adventures go as smoothly as possible! That way you can check off that bucket list with minimal complications and spending!
SHOP – Shop the best adventure gear and essentials on my Amazon Storefront – handpicked by a full-time adventuring mermaid!
AIRFARE – There are a few I use, but Aviasales is normally my go-to for flights without any extra fees or markups.
ACCOMMODATION – My two favorites are Booking.Com for hotels and VRBO for rentals.
GUIDED TOURS – If you are looking for quick and easy tours, check out GetYourGuide and Viator.
MULTI-DAY TOURS – For more in-depth tours that span several days, TourHub has many great options with reputable travel companies. Use my code (ALEXANDRA1GURU) for up to 5% off your next bucket list adventure.
TRANSPORTATION – You can either rent a car yourself with Discover Cars or do a guided bus tours like Big Bus Tours.
SIM CARDS – Avoid expensive roaming charges with an eSim card with Airalo. Personally, I prefer wifi boxes, and recommend WiFi Candy (get 10% of with the code THEBUCKETLISTMERMAID).
TRAVELER’S INSURANCE – Check out VisitorsCoverage for affordable insurance plans. If you are a nomad or remote worker, I would check out SafetyWing.
SEE MORE – Adventure Resources | Photography Resources
See Some Photos You Like?
Check out my full photography page for a full gallery and prices.