Waterfall Photography 101: How to Nail Every Shot (Even If You’re a Beginner)
This website contains affiliate links from trusted partners. If you purchase through a link on this site, I may earn a commission at no extra cost to you. As an Amazon Associate, I earn from qualifying purchases. See my Privacy Policy and Disclosure for more information.
Let’s be real – waterfall photography sounds easy…until your shots come out looking like a blurry mess or a touristy postcard gone wrong.
If you’ve ever stood in front of a roaring cascade thinking “Why doesn’t this look as epic on camera as it does in real life?” – you’re not alone.
As an adventure photographer who’s lugged camera gear (and yep, sometimes a mermaid tail) across rivers, cliffs, and slippery boulders, I’ve figured out exactly what it takes to turn a waterfall photo from meh to masterpiece.
In this guide, I’m sharing everything you need to know to shoot jaw-dropping waterfall photos – whether you want to freeze the action mid-splash or capture that silky-smooth, long exposure magic.
You’ll learn the best settings, gear, techniques, and pro tips for staying dry while your camera gets the perfect shot.
Let’s turn your waterfall photography into something frame-worthy.
Key Takeaways
- 🕒 Freeze or Flow? Decide your vibe: use a fast shutter speed (like 1/1000s) to freeze every droplet, or a slow shutter speed (like 1–2 seconds) to create that dreamy, silky water effect.
- 📷 Gear Up for Greatness: A tripod is non-negotiable for long exposures. Add ND filters to shoot in daylight without blowing out highlights, and don’t forget a lens cloth — waterfalls love to spray.
- ⚙️ Manual Mode = Maximum Control: Master shutter speed, aperture, and ISO for full creative control, and check your histogram in the field to avoid overexposure or loss of detail.
What to Bring To a Waterfall Photoshoot
Before you even think about pressing the shutter button, let’s talk waterfall photography gear.
You don’t need a $3,000 setup or a rolling suitcase full of lenses – but having the right essentials can make the difference between “meh” and “museum-worthy.”
Here’s what to pack before heading into the splash zone:
Camera Body
No need to drop pro-level cash, but there are a few features that’ll make your life a lot easier:
- Manual Mode: You’ll want full control over shutter speed, aperture, and ISO.
- Good ISO Performance: Especially helpful in low-light forest situations.
- Weather Sealing: A major bonus when you’re shooting near heavy mist, drizzle, or splash-happy waterfalls.
What do I photograph with? I shoot with a Canon ESO 5D Mark IV and a Canon ESO M50 Mark II.
Does an Expensive Camera Make a Difference?
If you are wondering if you need an upgrade, here is the ultimate showdown between the two cameras above.

Lenses
Your lens can totally change the vibe of your shot.
- Wide-Angle Lens (10–24mm): Perfect for capturing that grand, cinematic waterfall scene with rocks, trees, and moody skies.
- Telephoto Lens (70–200mm): Ideal for isolating details—think close-up shots of water crashing over rocks, or compressing layers of waterfalls and foliage for a powerful punch.
- A prime lens with a wide aperture can also help if you’re shooting in lower light without a tripod.
Read More – Best Lenses for Travel Photography
Tripod
If you’re going for that dreamy, creamy water flow look (and trust me, you will), a sturdy tripod is non-negotiable.
Look for:
- Lightweight but durable materials (carbon fiber is great if you’re hiking).
- Water-resistant or spiked feet for rocky, wet terrain.
- Flip-lock legs (not twist locks) if you’ll be working around sand or water.
ND Filters (Neutral Density Filters)
These are the secret sauce for long exposure waterfall photography in daylight.
ND filters reduce the amount of light hitting your sensor so you can slow your shutter down without blowing out your image.
Here’s what you need to know:
- ND8 or ND64: Great for moderately bright scenes.
- ND1000: For full sun or max silky drama.
- Variable ND Filters: A versatile option if you don’t want to carry a whole filter wallet.
Budget pick: K&F Concept makes great ND filters for under $50.
Remote Shutter Release or Timer
The goal is zero camera shake, especially for long exposures. Use:
- Remote shutter to trigger the shot without touching the camera.
- Or simply set a 2-second timer if you don’t have one handy.
Check out my entire photography Amazon Storefront if you want more gear recommendations.

Gear to Keep Your Camera Dry
Let’s get real – waterfalls are not just “pretty nature stuff.”
They’re wild, splash-happy beasts with no respect for your expensive gear. Waterfalls are not known for respecting personal space.
Here are some ideas for keeping your gear dry:
Rain Covers
If you’re serious about shooting waterfalls, get a proper rain cover for your camera.
These aren’t just plastic ponchos – they’re fitted, breathable, and actually let you access controls while staying splash-free.
Think of it as a raincoat tailored for your DSLR or mirrorless baby.
Plastic Bag Hack (For When You’re in a Pinch)
Forgot your fancy rain cover? A trusty ol’ Ziploc and a hair tie can be your last-minute lifesaver.
Cut a hole for your lens, stretch the bag over your camera body, and secure it. Is it glamorous? No. Is it effective? Shockingly, yes.
Microfiber Towel
Mist is sneaky – it creeps onto your lens in tiny droplets that ruin sharpness.
Keep a microfiber towel (or five) in your bag.
Wipe your lens before every shot. Then again. Then one more time. Especially if you’re getting up close and personal with the waterfall.
Also, if you drape it over the camera, it can help keep it dry if you don’t have a rain cover.
Lens Hoods
Lens hoods are like tiny shields that fight off stray sunlight and stray water droplets.
They help prevent flare and splash chaos. Just make sure they fit your camera before you buy!
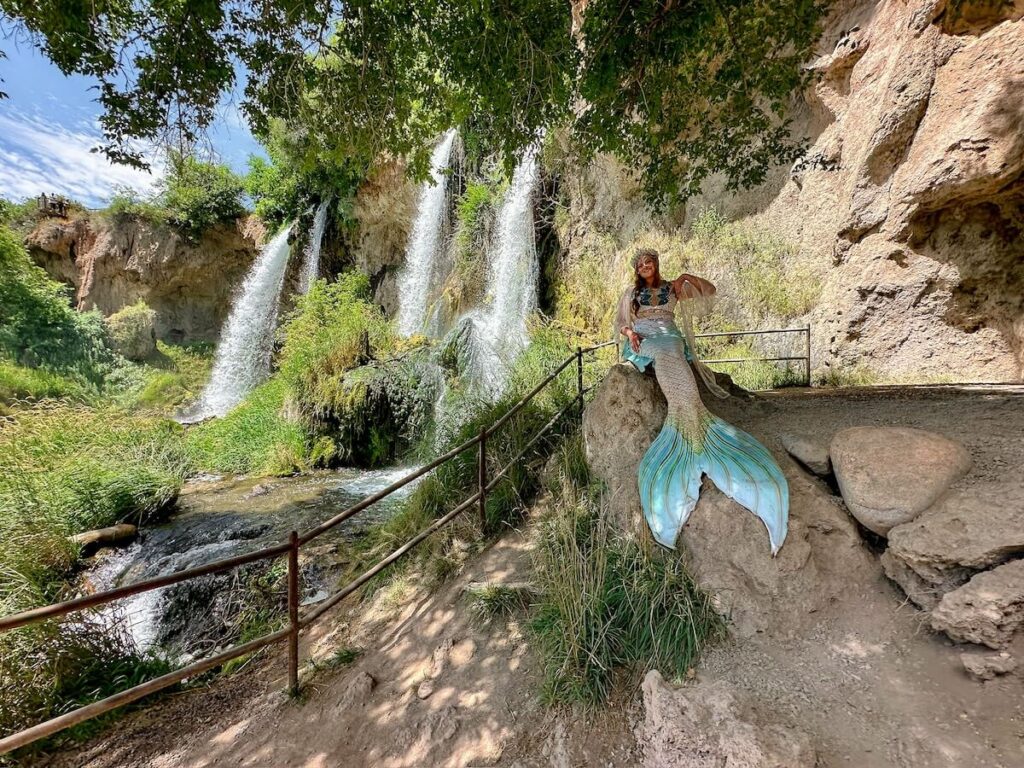
BONUS: Shooting Underwater (or Semi-Underwater) Like a True Mermaid
Ready to go full aquatic? Waterproof camera housings let you dip your lens under a cascade, half-in, half-out style.
This is next-level creativity – perfect for those magical “mermaid perspective” shots where the waterline bisects your frame.
Just make sure your gear is fully sealed and that you’re not just playing mermaid…you’re prepped like one.
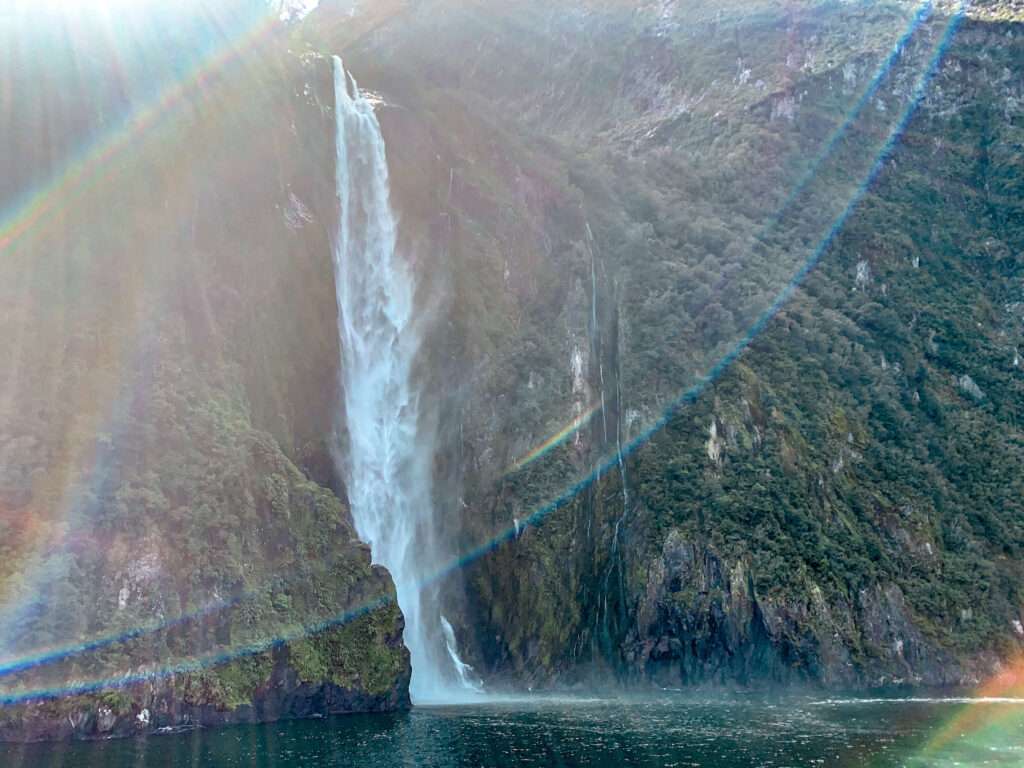
Long Exposure vs Fast Shutter: Two Vibes, One Waterfall
Waterfalls are mood machines – and your shutter speed is the magic wand that controls the mood.
Want to capture every dramatic droplet mid-air? Or create a soft, dreamy veil of mist? Let’s break it down:
- Freeze the Action (Fast Shutter Speed)
Think crisp, punchy, high-energy. Use a fast shutter speed like 1/1000 sec or higher to capture every splash and droplet mid-flight. Perfect for showcasing the raw power of rushing water or creating a “stop time” moment. - Flow and Glow (Slow Shutter Speed)
This is your classic long exposure look — silky smooth, romantic, and ethereal. To get that dreamy effect, slow your shutter way down to 1/10 sec, 1 sec, or even up to 30 seconds. Just don’t forget your tripod (or rock-steady surface)!
Still confused about shutter speed, aperture, and ISO? Check out my beginner’s guide to the exposure triangle for adventurous photographers.
If you are still getting familiar with the main settings of a camera, I would recommend grabbing my FREE photography cheat sheet.
How to Do Long Exposure Waterfall Photography
So, you want that creamy, silky, hypnotic waterfall goodness that looks like a portal to a fantasy realm? You’re in the right spot.
Long exposure waterfall photography is pure magic – but it’s also one of those genres that’ll expose every weak link in your setup if you don’t go in prepared.
Read More – How to Play with Light in Travel Photography
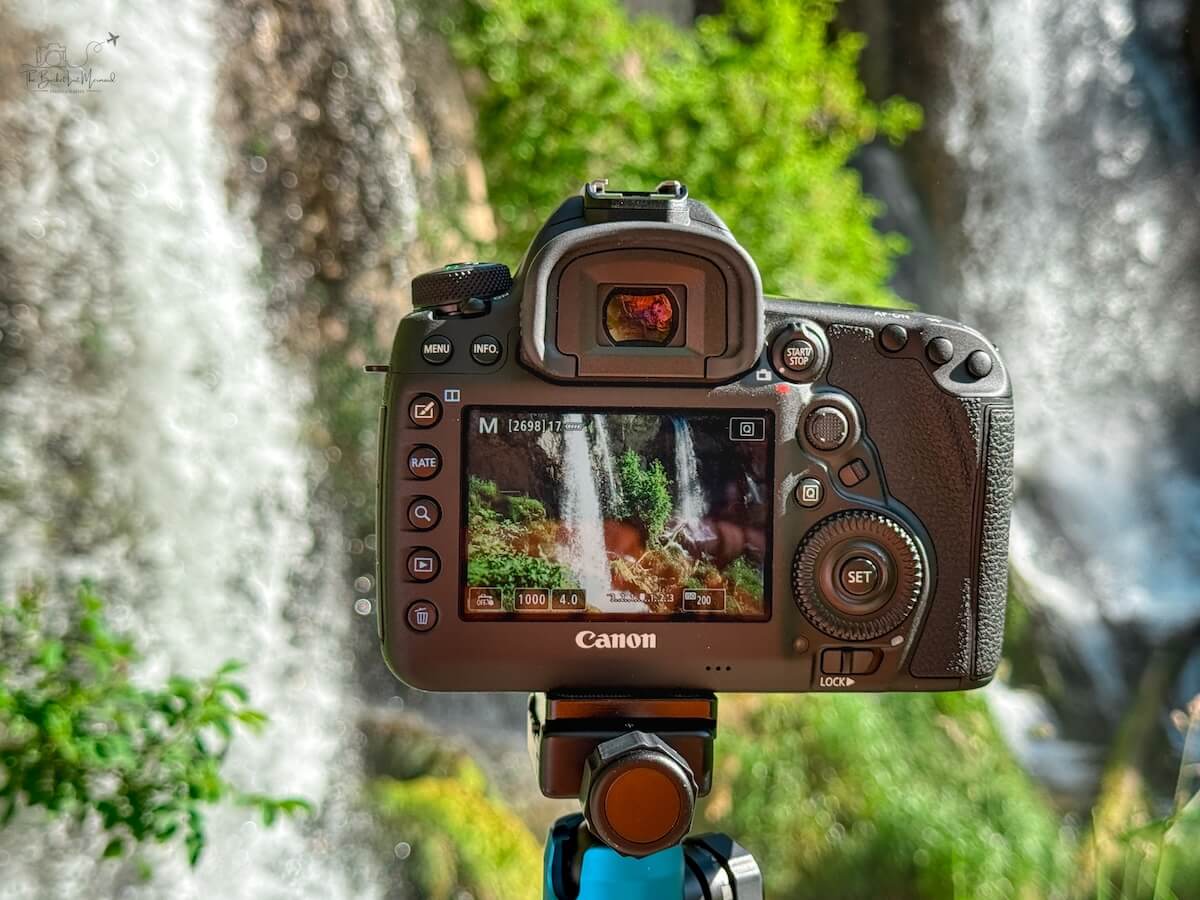
Long Exposure Waterfall Photography Settings
ISO: Keep It Low and Clean
Set your ISO to 100 or 200 (or as low as your camera goes).
Long exposures naturally bring in a lot of light over time, and cranking the ISO just adds unwanted noise to your dreamy image.
Keep it chill. Low ISO = clean, crisp shots.
Aperture: Find That Sweet Spot
Stick with f/8 to f/22.
This gives you sharp focus across the landscape and enough depth to keep foreground rocks or leaves crisp while still capturing that soft water flow.
f/11 is often a golden middle ground, but honestly, I had to CRANK that baby up just to compensate for all the light hitting my camera.
Shutter Speed: Slow It Down, Baby
Start with 1/10 second to 2 seconds and experiment. The longer the shutter is open, the silkier the water becomes. BUT:
- If it’s too fast, you’ll still get texture in the water and it will look choppy.
- If it’s too slow, you might lose detail and risk overexposure—especially in bright light.
- Take a few test shots, zoom in, and adjust. Every waterfall dances differently.
Some photographers open the shutter up to 30 seconds. You might have to be in “bulb” mode for this.
Read More – How to Become an Adventure Photographer
Keeping Your Shot Stable
Your Tripod Is Your BEST Friend
You could have the best settings in the world, but if your tripod wobbles? Trash shot.
- Use a sturdy tripod with grippy rubber or spiked feet.
- Nestle it between rocks, or push it into mud/sand for added security.
- Hang a weighted bag or your backpack from the center column for extra stability.
- I prefer a tripod with a quick release plate so that I save time between shots if I want different things.
And please, whatever you do, don’t set it on wet moss unless you’re aiming for an accidental waterfall time-lapse slide show.
Below is a video of me attempting to do a long exposure water shot with no tripod.
Wind Warning: The Silent Shot Killer
You get everything perfect… but the trees or bushes in your shot are blurred and ghosty. That’s wind, baby.
Here’s how to tame it:
- In-camera: Wait for a lull in the wind. Use shorter shutter speeds if it’s breezy.
- In post: Take two shots – one long exposure for the water, and one faster exposure for the foliage. Then mask and blend them in Lightroom or Photoshop. Game-changer.
Bonus Ninja Tips
- Turn off Image Stabilization when on a tripod. It can cause micro-vibrations.
- Use a lens hood to help reduce stray light or water droplets from sneaking in.
- Double-check your focus—switch to manual focus if your camera struggles with low contrast areas.
How to Fix Overexposure in Long Exposure Waterfall Photography
So, you’re chasing that dreamy silky-water look, but your image is coming out blindingly bright?
Welcome to the overexposure club – don’t worry, we’ve all been there.
Shooting long exposures in daylight can flood your sensor with too much light, washing out your highlights and leaving you with an image that looks more like a ghost story than a waterfall fantasy.
But fear not, here’s how to take control to the best of your ability:
Use an ND Filter (Neutral Density Filter)
This is your secret weapon. ND filters act like sunglasses for your lens, cutting down the light without affecting your colors.
The darker the filter (ND8, ND64, ND1000), the longer you can keep that shutter open without blowing out the highlights.
Lower Your ISO
Start at ISO 100 or lower – this minimizes your camera’s sensitivity to light and helps keep that exposure in check.
Close Down Your Aperture
Use a higher f-number like f/11 or f/16 to reduce the amount of light hitting the sensor.
Bonus: this also increases depth of field, which can make more of your scene crisp and sharp.
Shoot in Shade or Wait for Cloud Cover
Bright sunlight and long exposures don’t mix well.
Cloudy skies, golden hour, or even shooting in a canyon can naturally reduce the light in your scene.
Use the Histogram
Your LCD might lie, but the histogram won’t.
Keep an eye on it to make sure you’re not clipping your highlights. If your graph is pushed all the way to the right, it’s time to dial it back.
Reduce Your Exposure Time
If you don’t have a strong enough ND filter, consider a shorter long exposure – maybe 1/2 or 1 second instead of 5+. You’ll still get that flowy feel, but with more balanced lighting.
Shoot in RAW
You’ll have way more wiggle room to fix any overexposure issues during editing.
Read More – Best Travel Photography Hashtags to Use | How to Edit Adventure Photos
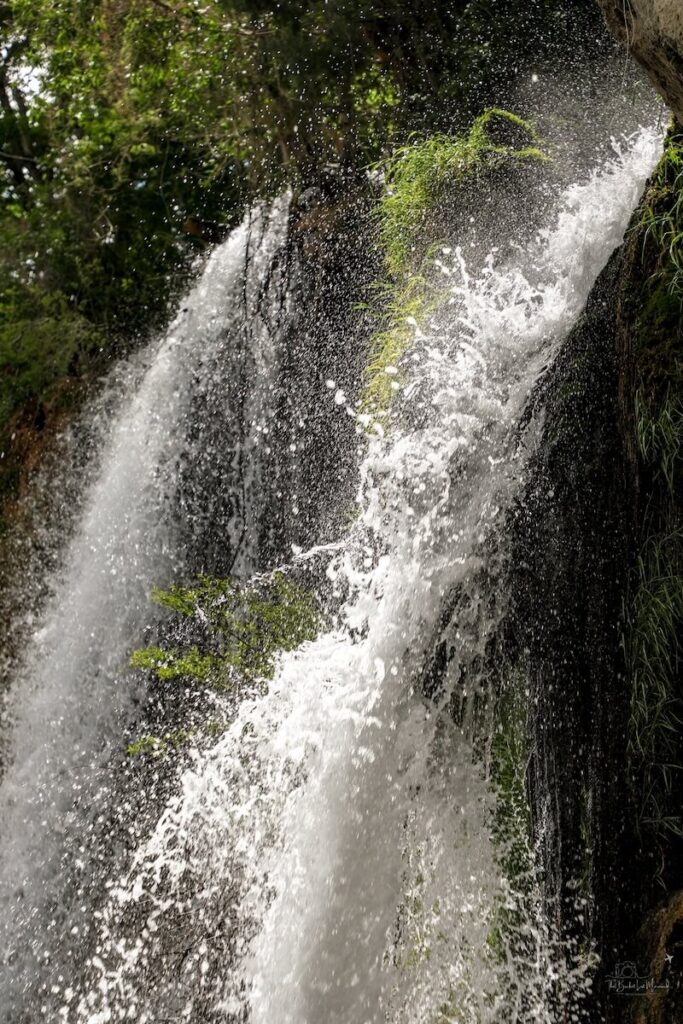
How to Shoot High Shutter Speed Waterfalls
Alright, now let’s flip the script. Long exposure shots are dreamy and ethereal, but what if you want to feel the roar of the waterfall in your bones?
That crisp splash, the frozen droplets mid-flight, the raw power in a single frame? That’s where high shutter speed magic comes in.
Best Settings for Fast Shutter Waterfall Photography
Let’s get your camera prepped like it’s ready to catch Aquaman in action.
Shutter Speed: 1/500 and faster
This is the money maker.
Freeze that water mid-tumble like time just stopped.
If it’s a particularly wild fall or you’re shooting from up close where water is gushing, go even faster—1/1000+ to really lock it in.
Aperture: f/2.8–f/5.6
You’ll want to let in more light to compensate for that fast shutter.
A wider aperture also helps isolate the water action from the background, adding a bit of drama and separation to your subject.
In most of my waterfalls I have shot, I have kept the f-stop pretty low to compensate for the faster shutter speed.
ISO: Adjust as needed
You’re walking a tightrope here: keep the ISO as low as possible for clean shots, but don’t be afraid to push it if your lighting’s not ideal.
Today’s cameras can handle ISO 800–1600 like champs.
For these waterfall shots mid-day, I didn’t have to go above 800.
Burst Mode
When you’re using a fast shutter speed (think 1/1000s or faster), switching to burst mode lets your camera rapid-fire a sequence of shots – perfect for capturing that exact millisecond when the water explodes off a rock or crashes into a pool below.
It’s especially handy when you’re photographing powerful falls or unpredictable splashes, where the most epic frame might only last a blink.
When to Use fast shutter waterfall Photography
- Big dramatic waterfalls with powerful plunges
- Exploding splashes or crashing cascades
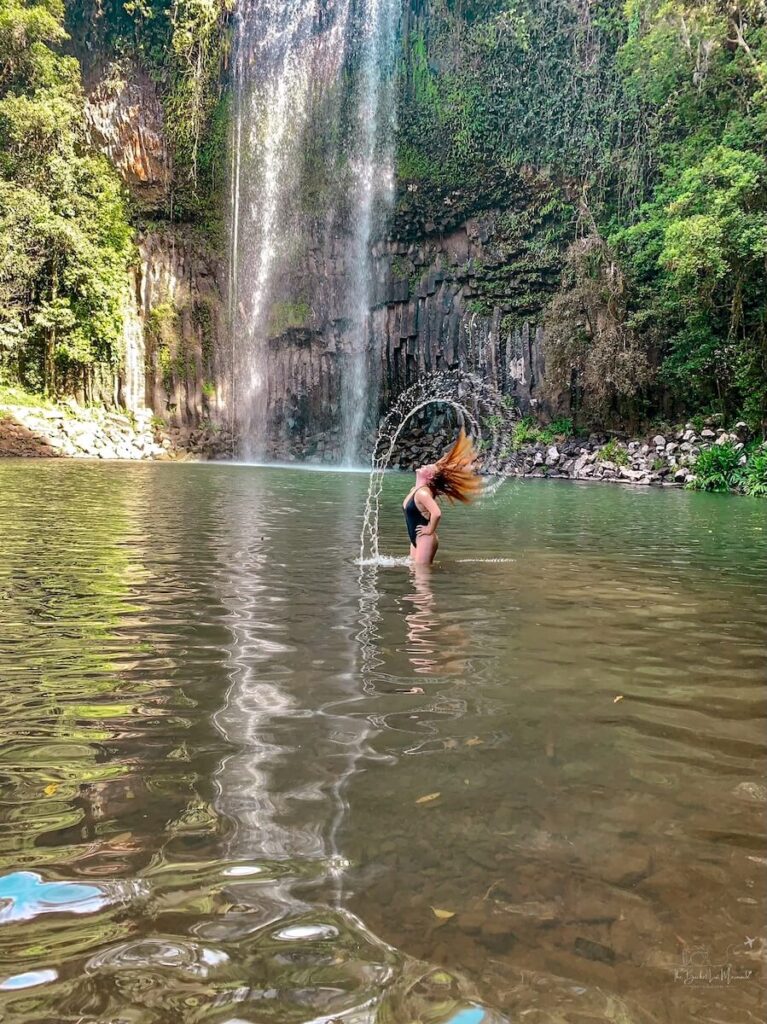
- Adventure shots: kayaking, cliff jumping, or a mermaid flipping her hair back (guilty 🙋♀️)
- Midday shoots, when the light is strong and you’re working without an ND filter
Lighting Tips for Fast Waterfall Photography
Fast shutter speeds need light – lots of it.
- Golden hour? Gorgeous, but be ready to bump ISO.
- Midday sun? Ideal for crisp freezes. Just watch those highlights!
- Overcast skies? Still doable! Widen that aperture, or bring a reflector if you’ve got someone to help.
I would consider shooting with a histogram up so that you can check the highlights and shadows in real time.
Continuous Shooting Mode/AI Servo
Want that stop-action splash plus a sharp subject (like a person or animal in the shot)?
Use continuous shooting mode and AI Servo/Continuous AF to keep tracking moving subjects.
It’s like burst mode for epic moments – because sometimes you only get one chance at the splash.
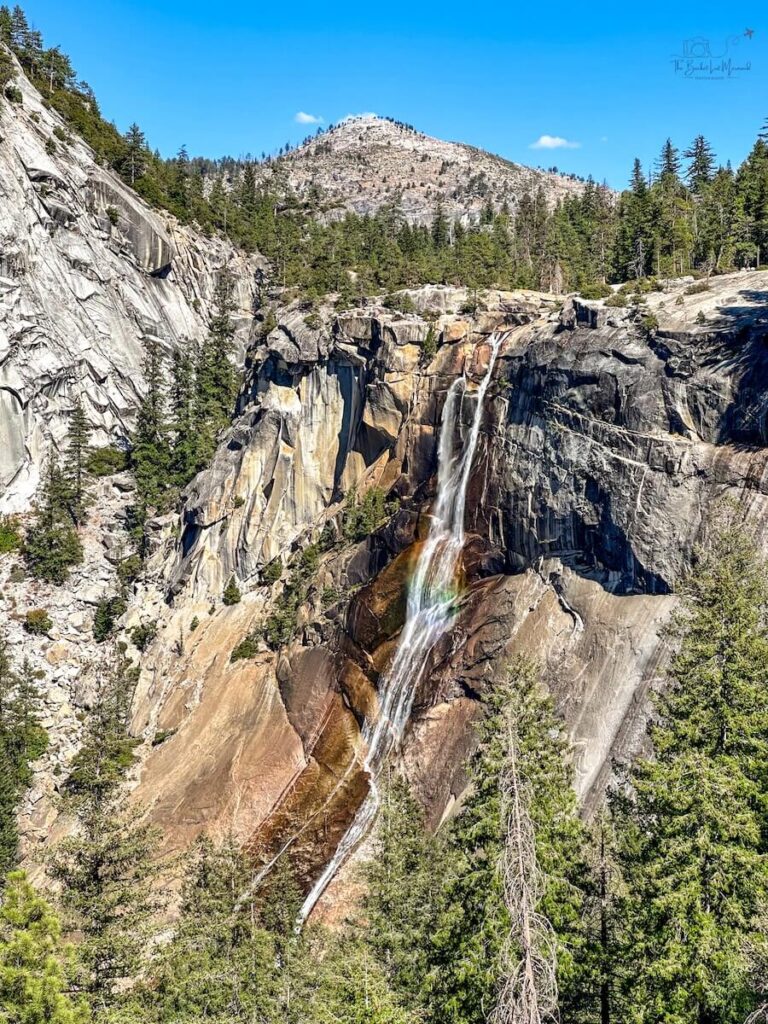
Waterfall Photo Composition & Creativity Ideas
Turn your waterfall photos from “meh” to “whoa, frame that!”
Sure, camera settings matter – but how you frame your shot? That’s the secret sauce that takes a good photo and makes it unforgettable.
Rule of Thirds (aka: Not Everything Needs to Be Centered, Karen)
Imagine your frame sliced into a tic-tac-toe board.
Now don’t slap the waterfall dead center — unless you’re going for a very symmetrical look.
Place the falls along one of those vertical thirds. This adds tension, movement, and visual interest without screaming “I just found the rule of thirds on Google.”
💡 Pro tip: Turn on your grid lines in-camera or phone to nail this with zero guesswork.
Leading Lines
Rocks, rivers, logs, mossy banks – they’re not just pretty, they’re powerful visual guides.
Use them to draw the viewer’s eyes into the frame and straight toward the waterfall. Like a trail of breadcrumbs…but better!
💡Bonus tip: Diagonal lines add energy and movement. Hunt for them like a creative detective.
Foreground Interest = Instant Depth
Don’t let your shot fall flat. (Pun intended.)
Toss in something juicy in the foreground – a textured rock, leafy branch, or even a muddy footprint. It adds dimension and helps the viewer step into your scene.
Wanna go full drama? Shoot low and wide with a foreground object inches from your lens.
Try Vertical Shots (Tall Falls Deserve Tall Frames)
If your waterfall’s more skyscraper than slip-n-slide, shoot vertical!
This helps emphasize height, drama, and the full cascade from top to plunge pool.
Perfect for Instagram Stories or magazine-style travel shots.
🧜🏻♀️ Include a Human Element (aka Mermaid Vibes)
Want to show scale and spark emotion? Add a person. Tiny hiker. Adventurous couple. Or, ya know, a mermaid with a camera.
Human elements instantly give your audience a sense of size, awe, and story.
If you don’t want to become a model, don’t worry. Faces not needed! Silhouettes and back-facing poses = mystery and magic.
Bonus Tips & Tricks for Waterfall Photography
Best Time to Shoot
Timing is everything, my friend.
- After rain: The falls are feeling extra and dramatic.
- Golden hour: Soft, warm light = instant fairy tale. Ability to
- High flow days: The more drama in the water, the more drama in your shot (the good kind).
Watch the Weather
Overcast skies are your BFF when it comes to long exposures. Why?
- No harsh shadows.
- No blown-out highlights.
- Just dreamy, evenly lit magic.
Don’t Skip Post-Processing
You got the shot – now polish that gem.
- Boost contrast to make the textures pop.
- Use selective clarity on the water to enhance that silky effect.
- Cool down the white balance if your shot feels too warm.
- Add a hint of dehaze if the mist muted your colors.
- Use masks to isolate and edit certain parts of the photo.
Your camera captures data. You create the mood.
Bring a Buddy
Waterfall zones can be slippery AF.
- Mossy rocks? Death traps.
- Fast-moving streams? Sneaky strong.
- Remote areas? No cell service = no bueno.
Having a friend nearby isn’t just safer – it’s also an excuse to make them carry your gear, let’s be honest.
Best Places to Practice Waterfall Photography
Ready to put all this waterfall photo wisdom to the test?
Here are some splash-tacular spots that are beginner-friendly, wildly photogenic, and Bucket List Mermaid–approved:
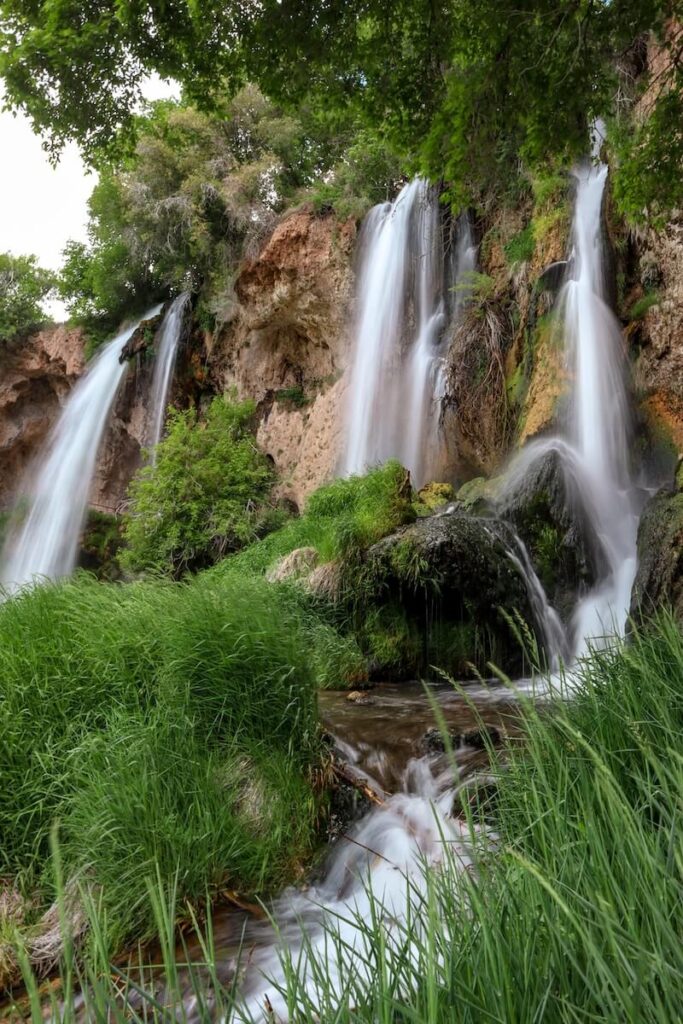
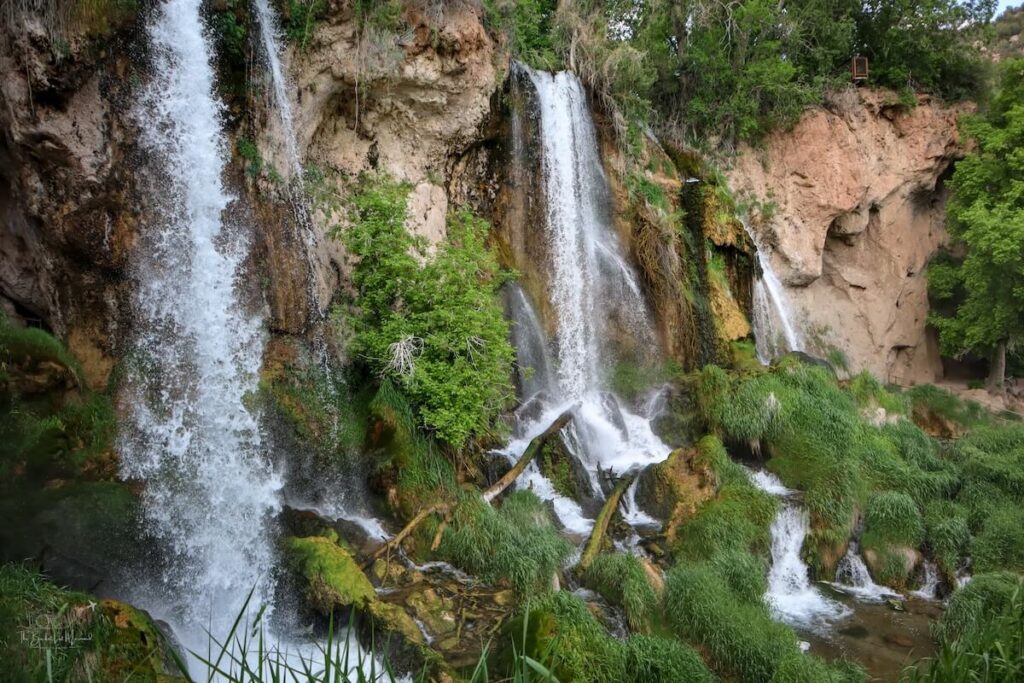
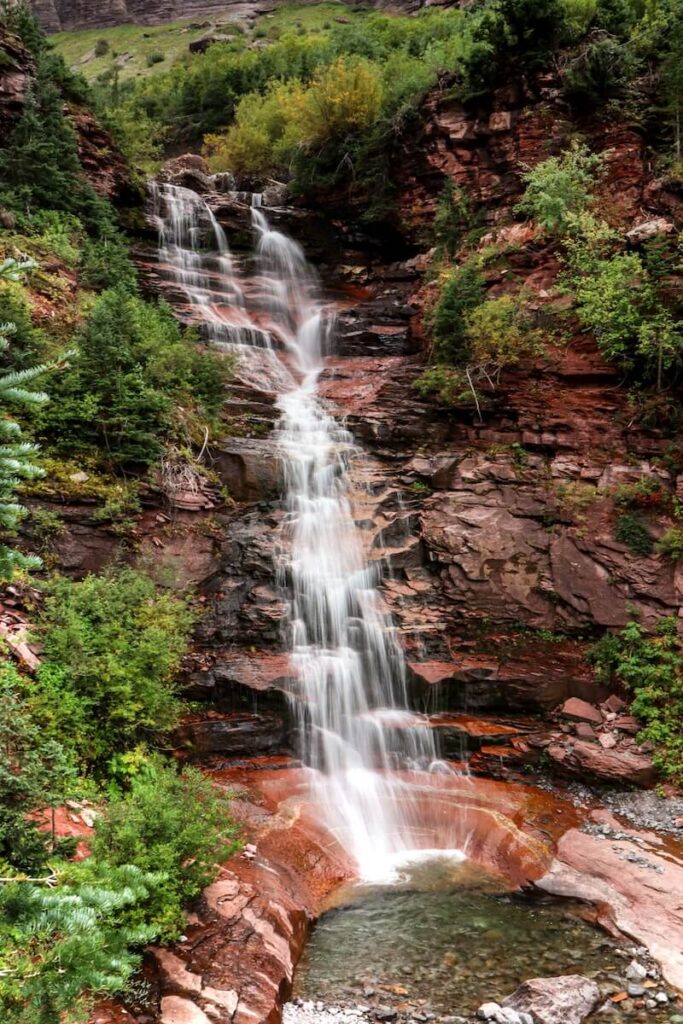
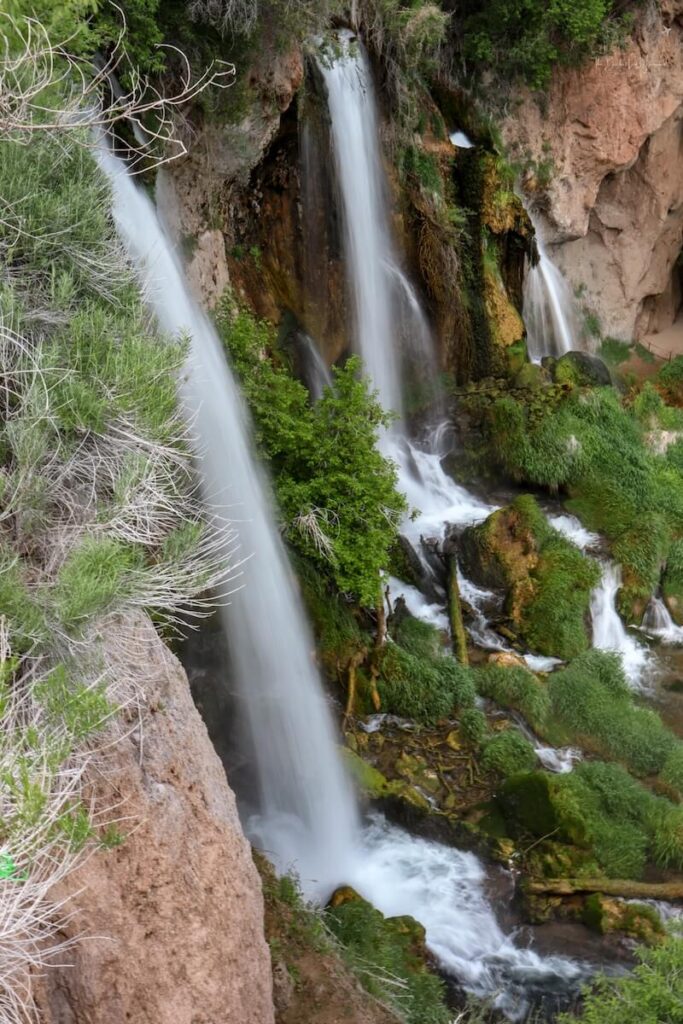
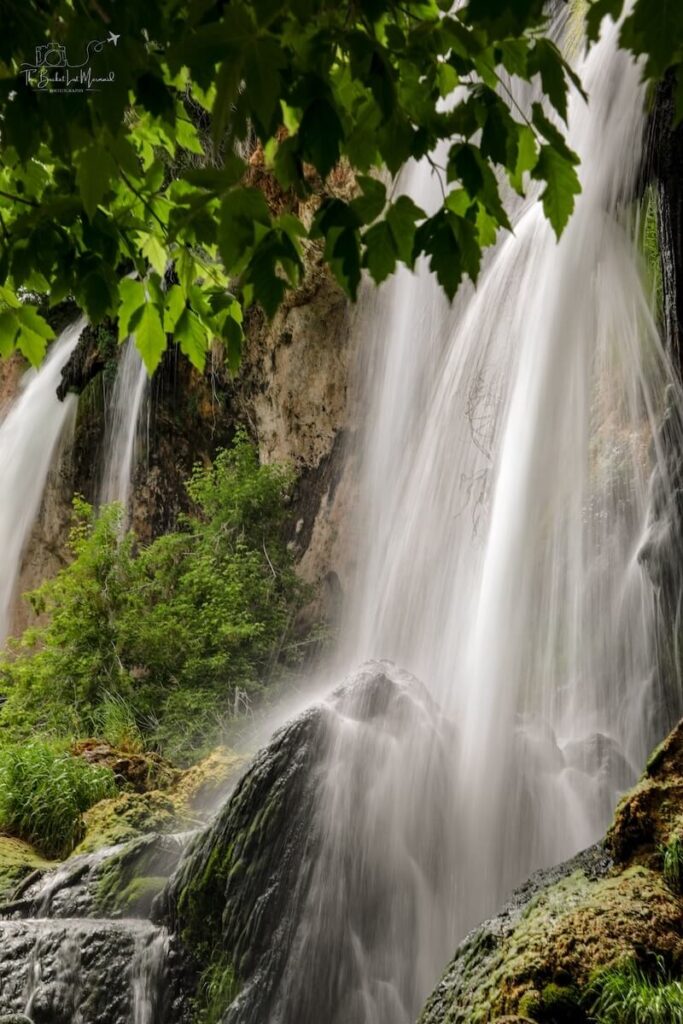
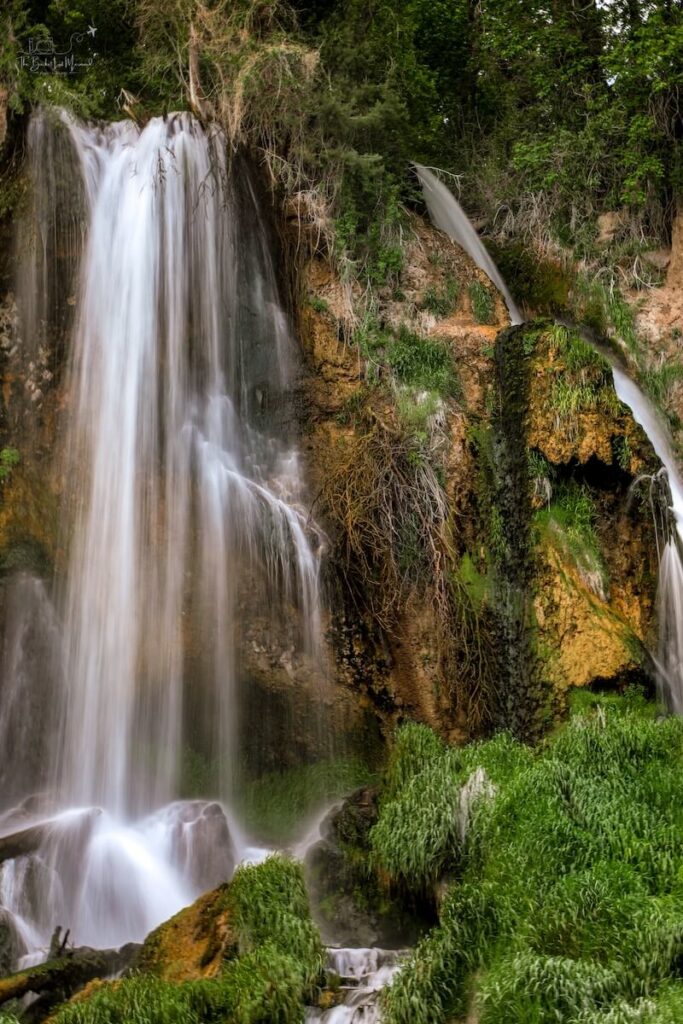
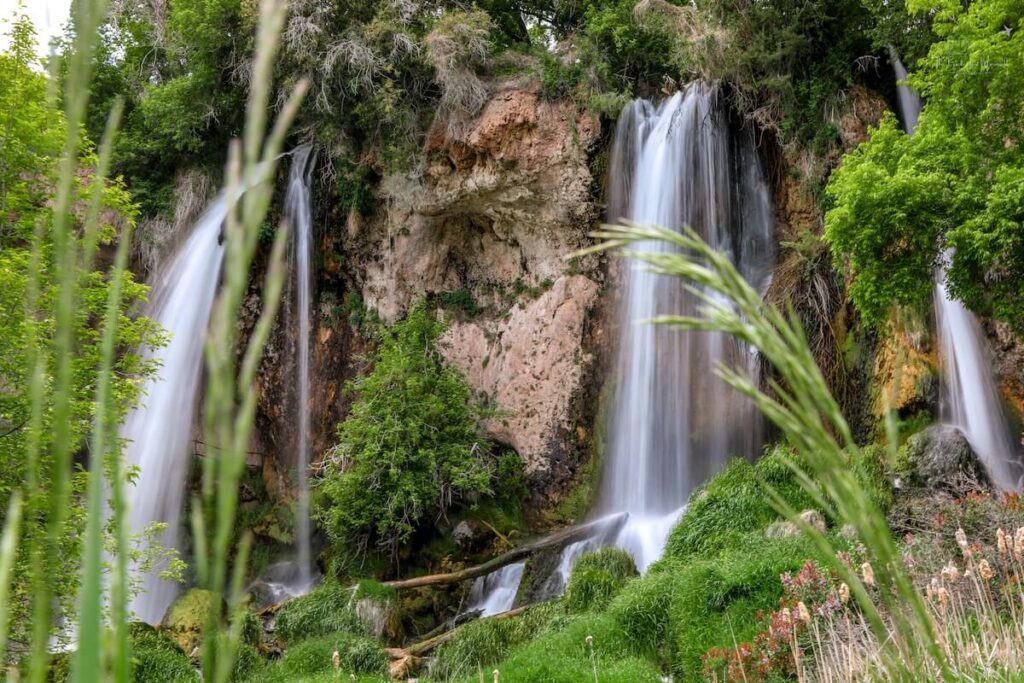
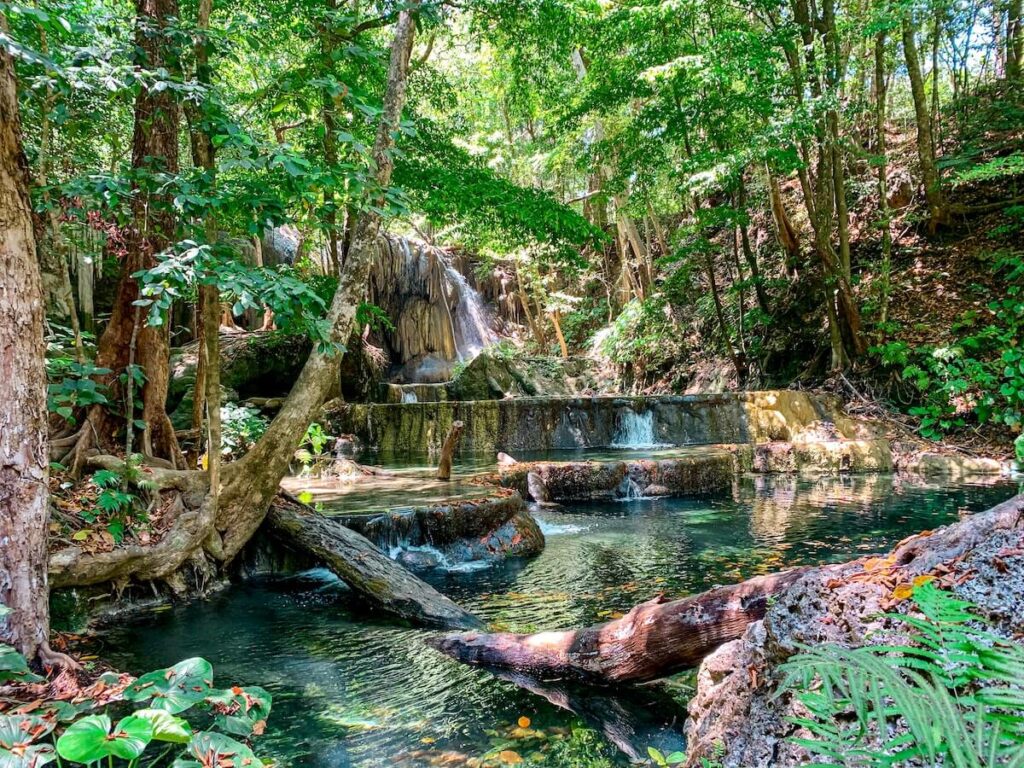
Rifle Falls, Colorado – Triple the waterfalls, triple the fun! This lush little state park looks like it was plucked from a fairytale, and it’s perfect for long exposure practice with layers. The majority of the photos from this article are from Rifle Falls.
Multnomah Falls, Oregon – Iconic and ultra-accessible. Great for silky shots from the bridge or base.
Bridal Veil Falls, Colorado – Colorado’s tallest free-falling waterfall! Nestled near Telluride, it’s dramatic, photogenic, and definitely bucket-list-worthy.
Amicalola Falls, Georgia – A towering cascade with a variety of viewing platforms. Shoot from the base, mid-hike, or all the way up top.
Hanging Lake, Colorado – A stunning turquoise lake with delicate waterfalls cascading into it. The hike is steep but 1000% worth it — just be ready to follow the rules and pack light!
McWay Falls, California – A waterfall that drops right into the ocean. You can’t get super close, but it’s wildly photogenic and great for practicing composition.
Your Favorite is…?
Got a favorite waterfall you swear by? Tag me in your epic shots or slide into my DMs with your secret splash spot!
I just might feature it in the next post – and credit your gorgeous work. Let’s make this a traveling waterfall photo bucket list we build together. 💦💫
Conclusion: Make a Splash with Your Waterfall Photography
Waterfall photography isn’t just about pointing and shooting – it’s about feeling the flow, mastering the gear, and embracing a bit of patience (plus a splash of adventure).
With the right setup, creative vision, and insider tips you’ve just learned, you’re fully equipped to capture those scroll-stopping, jaw-dropping waterfall shots that deserve to be framed – and shared.
So, what are you waiting for? Grab your camera, chase that next cascade, and let your creativity run wild!
Share Your Photos
💬 Got questions or want to show off your latest waterfall masterpiece? Dive into my Shutterbugs Gone Wild Facebook group or the newsletter, where fellow adventure photographers swap tips, tricks, and epic shots.
I’m there cheering you on (mermaid tail optional, but highly encouraged).
And hey – if you want to keep these tips handy on your next shoot, I’m cooking up a downloadable waterfall photography checklist to make sure you don’t miss a single shot-worthy moment.
MOre Travel Resources
Adventure Bucket List Resources
I am here to help your travel adventures go as smoothly as possible! That way you can check off that bucket list with minimal complications and spending!
SHOP – Shop the best adventure gear and essentials on my Amazon Storefront – handpicked by a full-time adventuring mermaid!
AIRFARE – There are a few I use, but Aviasales is normally my go-to for flights without any extra fees or markups.
ACCOMMODATION – My two favorites are Booking.Com for hotels and VRBO for rentals.
GUIDED TOURS – If you are looking for quick and easy tours, check out GetYourGuide and Viator.
MULTI-DAY TOURS – For more in-depth tours that span several days, TourHub has many great options with reputable travel companies. Use my code (ALEXANDRA1GURU) for up to 5% off your next bucket list adventure.
TRANSPORTATION – You can either rent a car yourself with Discover Cars or do a guided bus tours like Big Bus Tours.
SIM CARDS – Avoid expensive roaming charges with an eSim card with Airalo. Personally, I prefer wifi boxes, and recommend WiFi Candy (get 10% of with the code THEBUCKETLISTMERMAID).
TRAVELER’S INSURANCE – Check out VisitorsCoverage for affordable insurance plans. If you are a nomad or remote worker, I would check out SafetyWing.
SEE MORE – Adventure Resources | Photography Resources
See Some Photos You Like?
Check out my full photography page for a full gallery and prices.