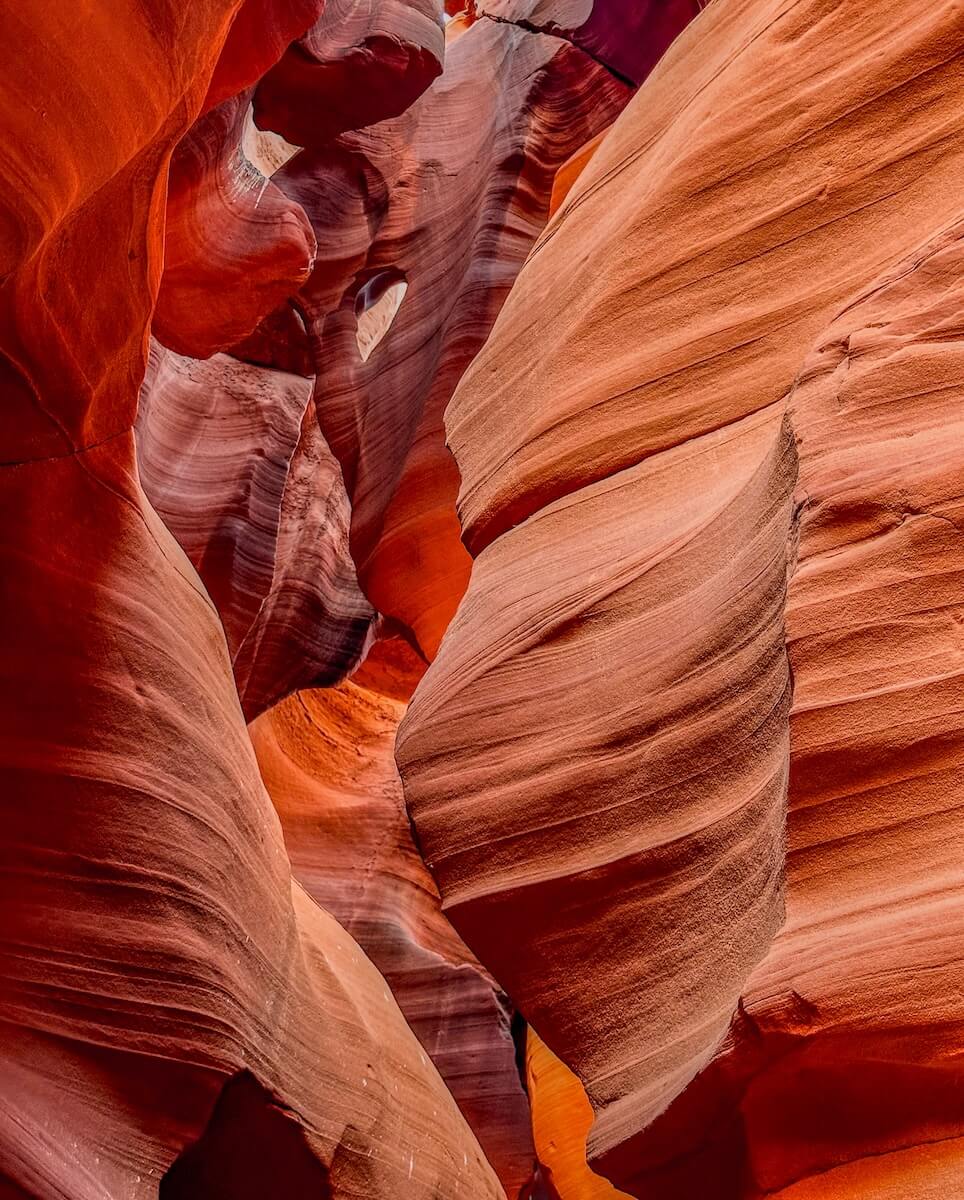
How to Photograph Antelope Canyon with a Phone
This website contains affiliate links from trusted partners. If you purchase through a link on this site, I may earn a commission at no extra cost to you. As an Amazon Associate, I earn from qualifying purchases. See my Privacy Policy and Disclosure for more information.
Are you going to Antelope Canyon? Odds are your eyes won’t believe what you are seeing and you will want to take some pictures! But what if you don’t have an expensive camera?
You don’t need a high-end DSLR to capture the breathtaking beauty of Antelope Canyon—smartphones, especially the latest iPhone and Android models, can produce stunning images with the right settings and techniques.
In this guide, I will be going over everything you need to know to take the best possible pictures with a phone in Antelope Canyon.
Inspired? Share Your Photos!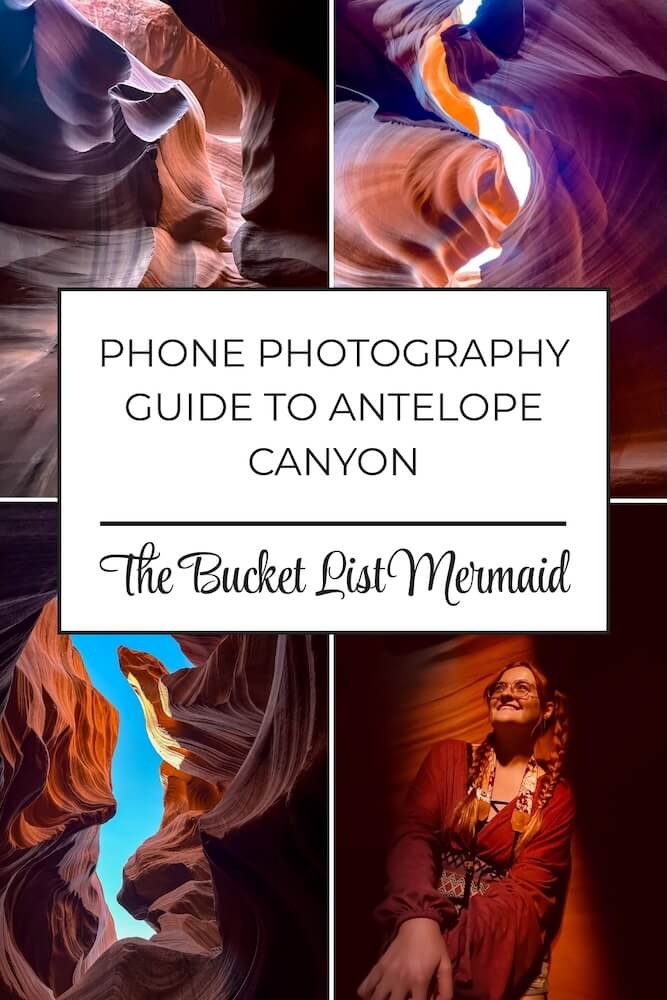
Key Takeaways
- 📸Antelope Canyon can be photographed with a phone. However, it comes with its challenges and might not be the same quality of a camera.
- ✈️There are several photo tricks that you can use to boost your chances of success: playing with exposure and focus, HDR mode, compositional tricks, or asking your guide to take a picture for you.
Book an Antelope Canyon Tour
Unlike many other natural attractions, Antelope Canyon is only accessible through a guided tour—and for good reason.
It’s on Navajo land, subject to flash floods, its a maze of narrow passages, and crowd control is an issue.
Antelope Canyon is divided into two major tourist sections: upper and lower Antelope Canyon.
You can book your desired section below👇
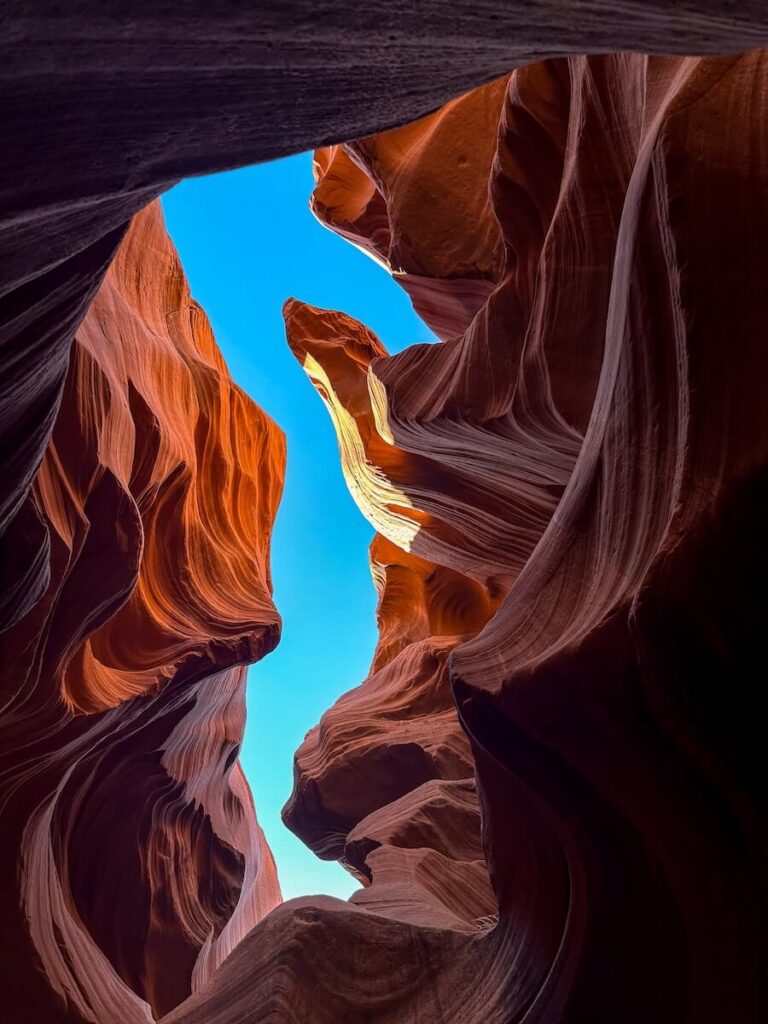
Please note that I had better luck photographing with a smartphone in the Lower Antelope Canyon.
Why You Need This Guide
I am gonna hold your hand when I say this…Antelope Canyon is absolutely brutal on photographers.
You can’t just “point and shoot” and hope for magic. You need to step up your game!
Is it easy to snap some pictures in Antelope Canyon quickly? Absolutely. Is it easy to get great pictures with a phone? No.
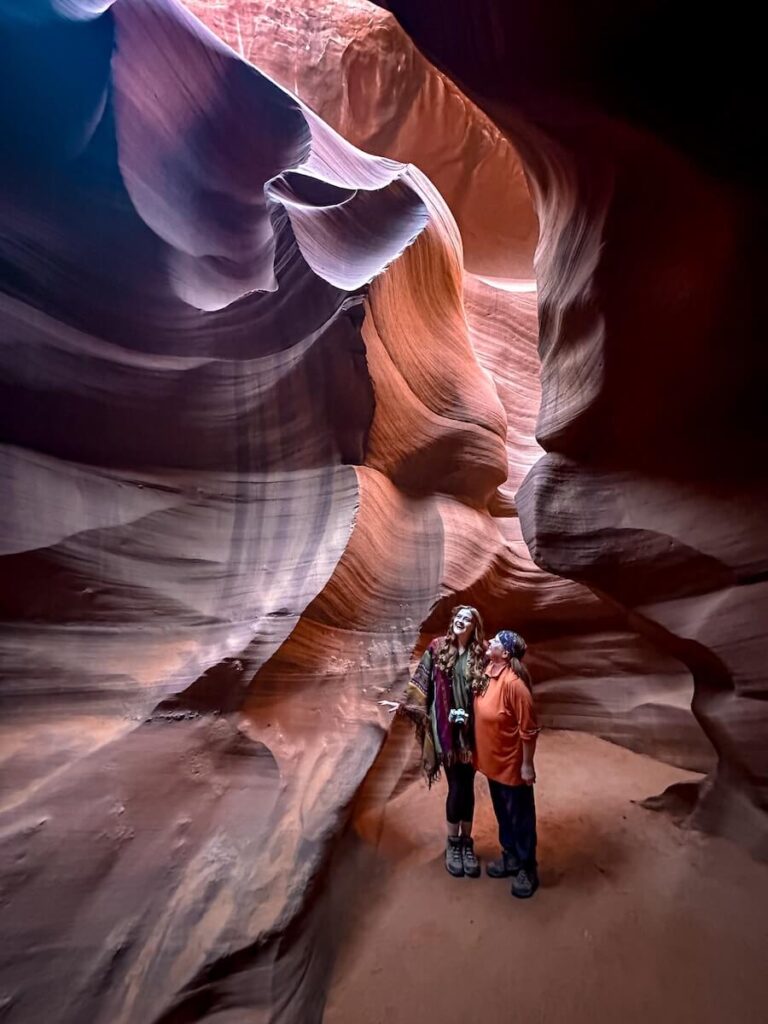
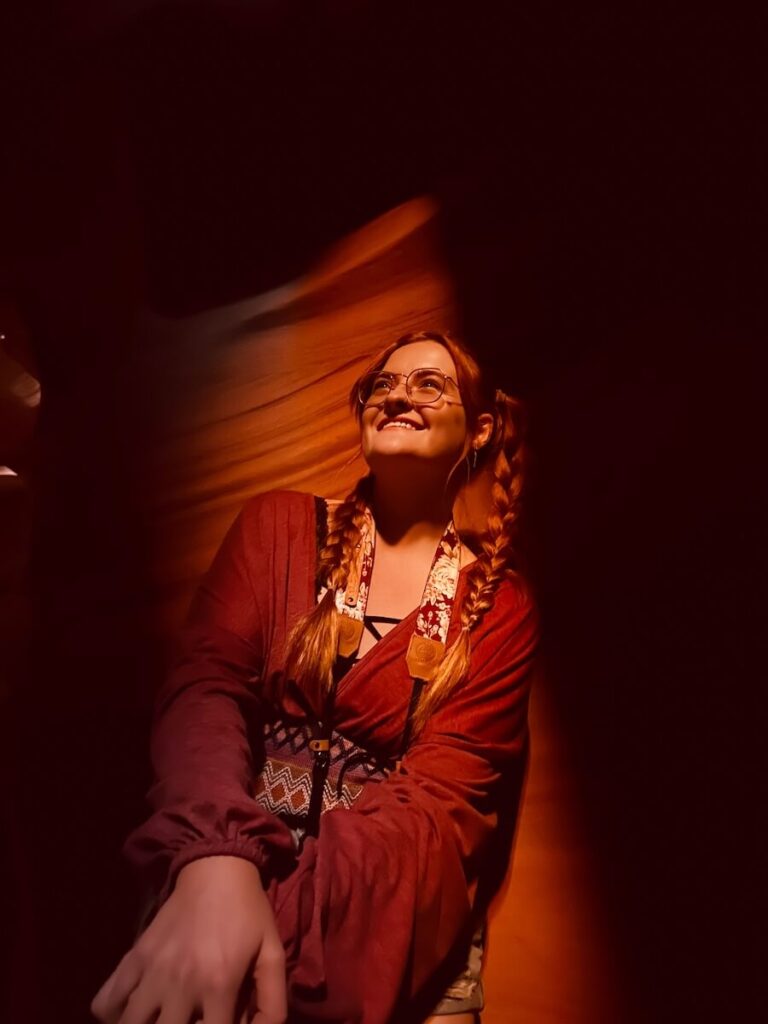
To prove my point. I am going to put two pictures side by side.
The first one is totally raw, unedited, and with a phone. The next one is, no joke, taken with the same phone and a little bit of technique and love.
Get the picture? 📸
What’s Better? Camera or Phone in Antelope Canyon?
When it comes to capturing Antelope Canyon’s stunning beauty, both cameras and phones have their pros and cons.
Phone Photography
Pros
- Portability & Convenience: Phones are small, light, and easy to carry, making them perfect for the narrow, crowded spaces of Antelope Canyon. You won’t need to worry about bulky gear.
- Ease of Use: Phones are designed to be user-friendly, allowing you to quickly adjust settings like exposure, focus, and HDR, even on the go.
- Instant Sharing: With a phone, you can instantly view, edit, and share your photos, making it a convenient choice for quick results.
- Wide Range of Apps: You have access to a variety of editing apps to enhance your photos right from your device.
- Pano Mode: iPhones are equiped with “panorama mode”. This is an epic way to photograph Antelope Canyon that cannot be done with a camera easily.
Cons
- Limited Low Light Performance: Phones can struggle in the low-light conditions found in the darker parts of the canyon. The lack of a large sensor can result in grainy or blurry photos.
- Zoom Limitations: While phones offer digital zoom, it doesn’t compare to the optical zoom of a camera, making it harder to capture distant details without losing quality.
- Less Quality: Between the photos done with my camera and those done with my phone, the camera produced better quality images.
My Thoughts
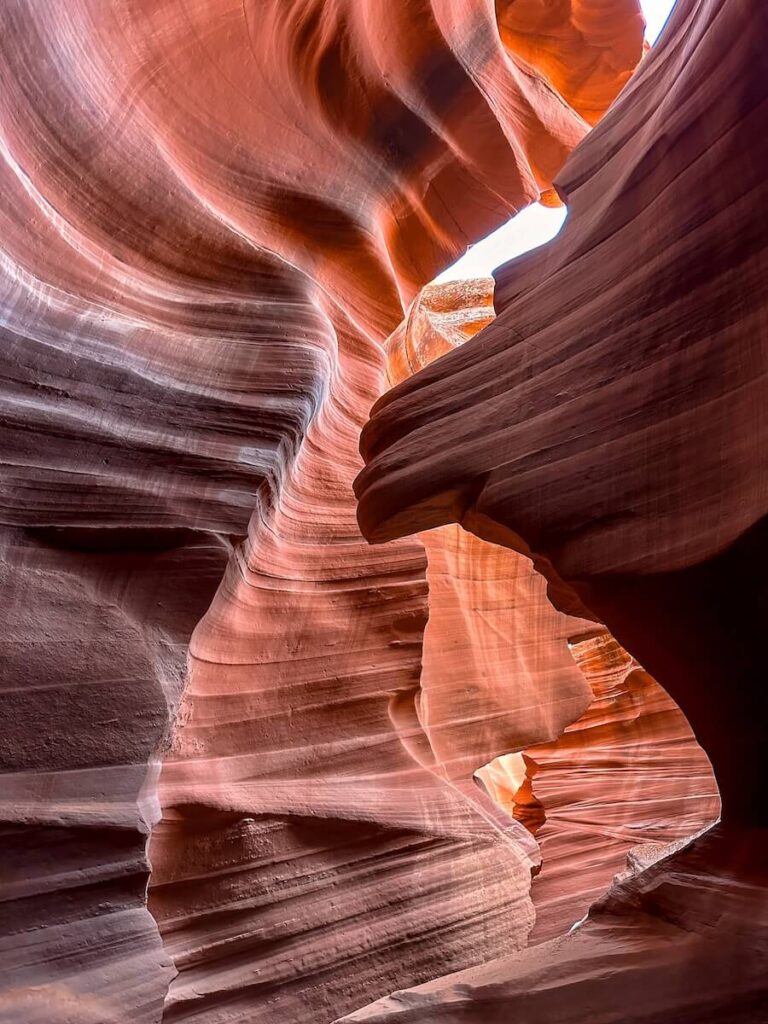
Overall, I found that the HDR was easier to use and looked more natural on a phone. The wide “0.5x” mode was very easy, quick, and great for wider shots.
It also excelled more with shooting upwards and getting the sky. In all of my camera photos, I primarily shot within the camera and avoided the sky all together.
Also, you don’t have to be fumbling around and changing lenses. It’s all right there.
Camera Photography:
Pros
- Better Low Light Performance: Cameras, especially DSLRs and mirrorless models, have larger sensors that perform better in low-light conditions, helping you capture crisp images even in the canyon’s darker areas.
- Higher Quality Images: With more control over settings like aperture, shutter speed, and ISO, you can capture images with better sharpness, detail, and color accuracy.
- Zoom & Wide-Angle Lenses: Cameras allow you to change lenses for different perspectives—perfect for both close-up shots of textures and sweeping wide-angle canyon shots.
- More Control: With a DSLR or mirrorless camera, you have full manual control of the image. With these tricky conditions, control is the key!
Cons
- Bulky & Heavy: Cameras and lenses can be cumbersome in the tight spaces of Antelope Canyon, making them less convenient to use.
- More Complicated to Use: DSLRs and mirrorless cameras require more technical knowledge and time to adjust settings, which can be challenging for those unfamiliar with manual controls.
My Thoughts
I always think that my phone slayed in Antelope Canyon…until I look at my camera photos…
However, I had to manually do Automatic Exposure Bracketing in order to get HDR images and some of them looked unnatural and weird. Overall, I struggled with photographing both the canyon and the sky.
The camera also was more stressful to take photos with and required more skill and confidence on manual mode.
What’s The Verdict?
I used both a phone and camera in both sections of Antelope Canyon.
I liked them both for different photos. My phone was better for wider shots that included the sky and I needed them fast.
My camera was better for…well…everything else.
However, I don’t think it is impossible to do with a phone, so don’t panic!
Photos are about the photographer, not the camera or phone.

Best Phone Settings For Antelope Canyon
With all of these settings, I would recommend learning how to use them or setting them before your tour.
These tours are fast paced and beautifully chaotic. You won’t have time to be fiddling around on your phone.
How to Adjust Exposure Manually for Contrast
Antelope Canyon’s lighting creates extreme contrast between bright highlights and deep shadows.
Your smartphone’s auto-exposure might struggle, making some parts of the image too bright or too dark. It will be tricky, but you could try…
- Tap to Focus & Adjust Exposure: Tap the brightest part of the canyon (usually a sunlit section) to prevent overexposure. Then, slide your finger up or down (on iPhones) or use the exposure slider (on Android) to fine-tune brightness.
- Lock Exposure for Consistent Results: On iPhones, tap and hold the focus point until “AE/AF Lock” appears, ensuring your settings don’t change between shots.
- Use Spot Metering Apps: Third-party apps like Halide or ProCamera let you manually control ISO, shutter speed, and exposure compensation, mimicking DSLR settings for better control.
Are you new to shutter speed, aperture, and ISO? Check out my beginner’s guide to the exposure triangle for adventurous photographers.
Using HDR Mode Effectively on Mobile
High Dynamic Range (HDR) mode blends multiple exposures into one image, balancing bright highlights and deep shadows.
Honestly, this is where the phone is the star of the show!
How to Use HDR Mode on a Smartphone
Most modern smartphones, including iPhones and Android devices, have built-in HDR functionality that automatically merges exposures. To enable it:
- iPhone: Go to Settings > Camera and turn on Smart HDR (for newer models) or enable HDR manually in the Camera app.
- Android: Open the Camera app and look for an HDR setting (sometimes called “Rich Tone” or “Auto HDR”).
- Once enabled, compose your shot as usual, ensuring you remain as steady as possible to avoid ghosting (blurry merging of exposures).
Keep in mind that I often tried to tap on the sky or brightest point so it wasn’t over exposed. However, when I tried to lighten up the dark parts later, it was very grainy.
This is the dilemma and why Antelope Canyon is so brutal (and beautiful) to photograph!
Read More – 500+ Ready-to-Use Travel Photography Hashtags
Vivid Warm Mode
I got this tip from the guide and he deserves all of my thanks! His advice was to put your phone’s camera to a “vivid warm” filter or setting (if available).
This setting will help bring out the canyon’s fiery tones, making the colors pop without making them look overly saturated.
Many phones offer a “Vivid” or “Vivid Warm” option in the photo settings or filters.
Focus and Tap-to-Focus
The narrow, intricate shapes of Antelope Canyon demand precision in focus.
On most phones, simply tap the screen on the subject you want in focus — whether it’s the textured walls, the light beams, or a small detail.
For tricky areas, try adjusting the focus a few times to find the sharpest, clearest shot.
Grid Lines
The grid lines on your phone’s camera help you apply the rule of thirds, an essential composition technique for balancing your shot and creating more visually appealing photos.
You can enable the grid lines in your phone’s camera settings (Settings > Camera > Grid)
Use the lines to align key elements of the scene, like the curves of the canyon walls or beams of light, ensuring that your image feels balanced and not too crowded.
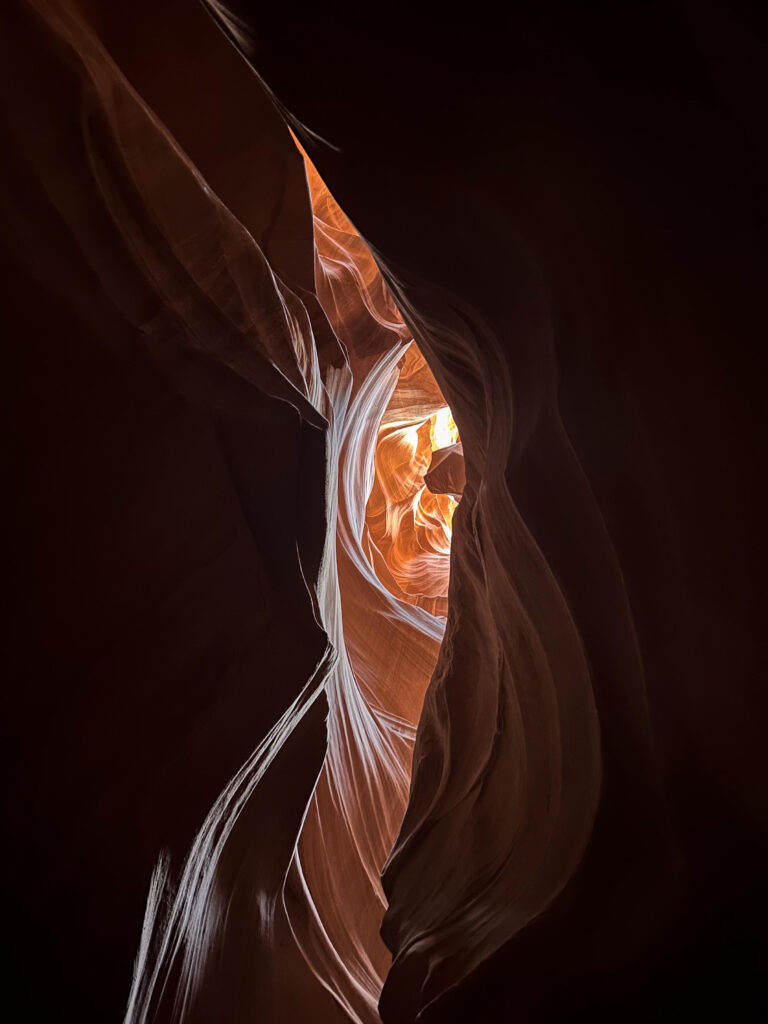
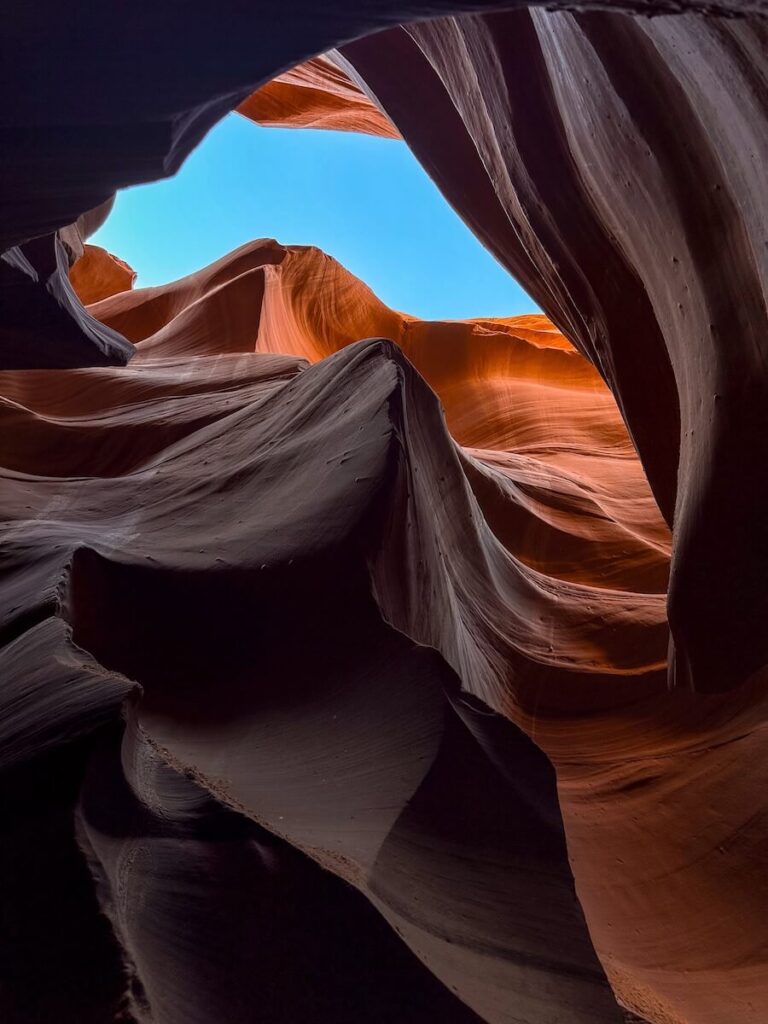
Compositional Tips for Antelope Canyon Photos with a Phone
When photographing Antelope Canyon, composition plays a key role in turning a good shot into a stunning one.
At the end of the day, you are the artist and it’s up to you!
Here are some tips to make sure you’re capturing the beauty of the canyon in the most visually impactful way:
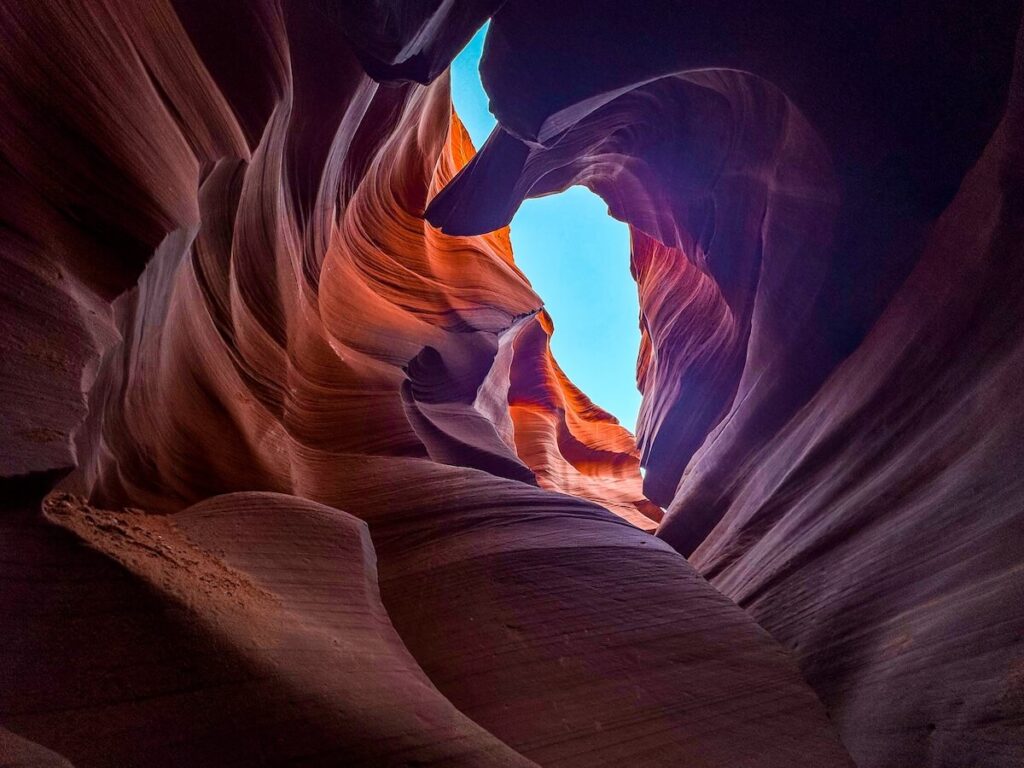
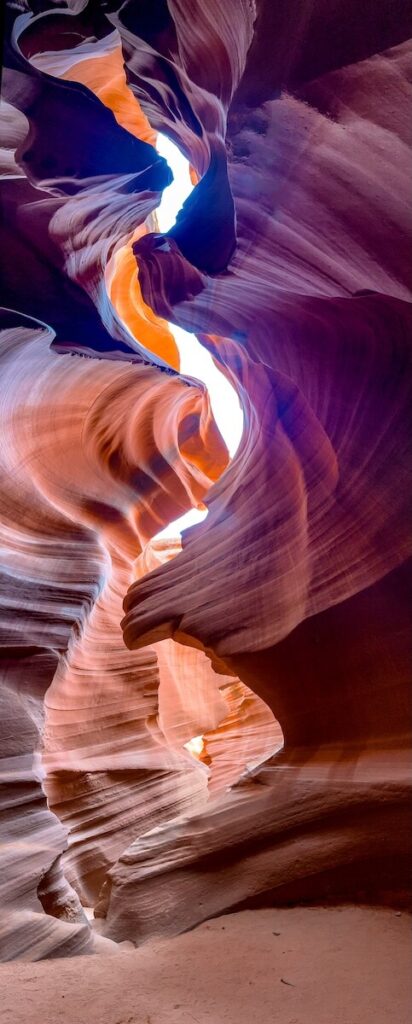
Pano Mode
This was another photo tip that I got from my guide!
If you have an iPhone, use pano mode….except up and down rather from side to side.
The result is an epic vertical image that showcases all the way from the sandy floor to the sky peeking through the top of the slot canyon.
Leading Lines
The natural curves and lines in Antelope Canyon—whether it’s the sweeping walls, winding paths, or even the sunbeams—can guide the viewer’s eye through the photo.
Position yourself so that these lines draw the viewer’s attention toward a specific focal point.
These lines can create a sense of depth and draw the viewer deeper into the scene.
Frame Within a Frame
Framing is a technique where you use natural elements within the scene to create a border or “frame” around your subject.
In Antelope Canyon, rock formations often create natural frames.
Look for archways or overhanging rocks that can act as a frame for another section of the canyon or a beam of light.
This technique adds depth to your image, making it feel more immersive.
Symmetry & Patterns:
The canyon’s walls feature mesmerizing, repeating curves, lines, and shapes that create natural symmetry and patterns.
Take advantage of these natural patterns by positioning your shot to emphasize the symmetry in the canyon’s structure.
Whether it’s the mirrored curves or the parallel lines of the walls, symmetry can create visually pleasing, balanced images that draw the viewer in.

Bonus Tips for Phone Photography in Antelope Canyon
While shooting in Antelope Canyon with your phone, there are a few extra tricks to elevate your photography experience
Bring a Lens Attachment
If you’re looking to get wider shots of the canyon’s grand curves, consider investing in a portable lens attachment for your phone.
A lens attachment is affordable and will help you capture more of the canyon’s breathtaking scenes in a single shot, especially in the narrow passageways.
They also have some other fun lenses that you can play with to get some unique perspectives that no one else has!
Don’t Bring a Tripod or Something Similar
Unfortunately, tripods, monopods, selfie sticks, or anything similar are prohibited.
I would check with your company before to check what you are allowed and not allowed to bring.
For example, I wasn’t even allowed a backpack and had to carry all of my gear into the canyon.
Clean Your Lens Between Every Shot
I know this sounds redundant…but you would be surprised how dusty it is in Antelope Canyon.
Because of this, I brought a simple microfiber cloth and quickly wiped off the lens every couple photos.
Be Mindful of Crowds
Antelope Canyon is a popular destination, so crowds can sometimes be a challenge.
To get the best shots, be patient, and wait for a quieter moment.
If you’re finding it tough to get a clean shot, don’t hesitate to ask the guide for help.
And the best Tip…Just Give Your PHone to the Guide
If you’re ever in doubt, give your phone to the guide!
They’re experts at navigating the canyon and can help you find those hidden gems and ideal photo opportunities.
With that being said, I would try your best to be the first in line and closest to the guide.
If anything else, he can at least point out some epic photo opportunities. Or, in my case, just grab your phone and take them for you!
Final Thoughts For Phone Tips for Antelope Canyon
Antelope Canyon is one of the most breathtaking natural wonders in the world, and the best part? You don’t need a fancy camera to capture its magic—just use your phone!
By understanding the canyon’s lighting, composition techniques, and phone settings, you can create stunning images that truly showcase its surreal beauty.
We’ve covered everything from the best time to visit and essential phone settings to composition tricks and handling tricky lighting conditions.
While phone photography has its limitations in low light and high contrast situations, knowing a few key tricks—like using HDR, adjusting exposure, and enabling vivid warm mode—can help you overcome them.
Plus, if you ever need a little extra help, just hand your phone to your guide—they know all the best angles!
Now, it’s time to put these tips into action! If you visit Antelope Canyon, share your photos with us on social media and inspire other adventurers to capture its beauty.
Tag us @TheBucketListMermaid so we can see your incredible shots! 📸✨
More Travel REsources
Adventure Bucket List Resources
I am here to help your travel adventures go as smoothly as possible! That way you can check off that bucket list with minimal complications and spending!
SHOP – Shop the best adventure gear and essentials on my Amazon Storefront – handpicked by a full-time adventuring mermaid!
AIRFARE – There are a few I use, but Aviasales is normally my go-to for flights without any extra fees or markups.
ACCOMMODATION – My two favorites are Booking.Com for hotels and VRBO for rentals.
GUIDED TOURS – If you are looking for quick and easy tours, check out GetYourGuide and Viator.
MULTI-DAY TOURS – For more in-depth tours that span several days, TourHub has many great options with reputable travel companies. Use my code (ALEXANDRA1GURU) for up to 5% off your next bucket list adventure.
TRANSPORTATION – You can either rent a car yourself with Discover Cars or do a guided bus tours like Big Bus Tours.
SIM CARDS – Avoid expensive roaming charges with an eSim card with Airalo. Personally, I prefer wifi boxes, and recommend WiFi Candy (get 10% of with the code THEBUCKETLISTMERMAID).
TRAVELER’S INSURANCE – Check out VisitorsCoverage for affordable insurance plans. If you are a nomad or remote worker, I would check out SafetyWing.
SEE MORE – Adventure Resources | Photography Resources
See Some Photos You Like?
Check out my full photography page for a full gallery and prices.