Photographing The Narrows: What I Did Wrong (and How You Can Do Better)
This website contains affiliate links from trusted partners. If you purchase through a link on this site, I may earn a commission at no extra cost to you. As an Amazon Associate, I earn from qualifying purchases. See my Privacy Policy and Disclosure for more information.
Last fall, I went on an epic quest through Zion National Park with one goal in mind: to photograph The Narrows.
I’d seen the jaw-dropping Instagram photos: glowing rivers, towering canyon walls, and light so magical it looked like the photography gods curated it themselves. I thought, “This is it. I’m going to nail it.”
Spoiler: I didn’t.
Don’t get me wrong…The Narrows is stunning. But it’s also one of the hardest places I’ve ever tried to photograph.
Between harsh slot canyon lighting, rushing water underfoot, and the very real risk of turning my gear into river bait, this hike humbled me fast.
As a full-time travel blogger and photographer, I’ve captured everything from pink sand beaches to jagged alpine peaks, but The Narrows fought back in the best way.
In this guide, I’ll share why photographing The Narrows is so challenging, the mistakes I made, and exactly what I’d do differently next time so you can capture shots you’ll actually love.
Key Takeaways
- 📸 Photographing The Narrows is harder than it looks, thanks to tricky lighting, rushing water, and risky gear situations.
- 🥾 Go in prepared, pack light, and focus on capturing a few intentional shots instead of hundreds of random ones.
- 🤘Sometimes, enjoying the experience matters more than getting the “perfect” photo.
Why Photographing The Narrows Is So Challenging
When I first planned my trip to Zion National Park, I thought photographing The Narrows would be a dream.
Reality check: this place is photography boot camp…and it does not hand out participation trophies.
After hiking it myself, I can confidently say this is one of the most difficult environments to capture, no matter what gear you bring or how skilled you are behind the lens. Here’s why:
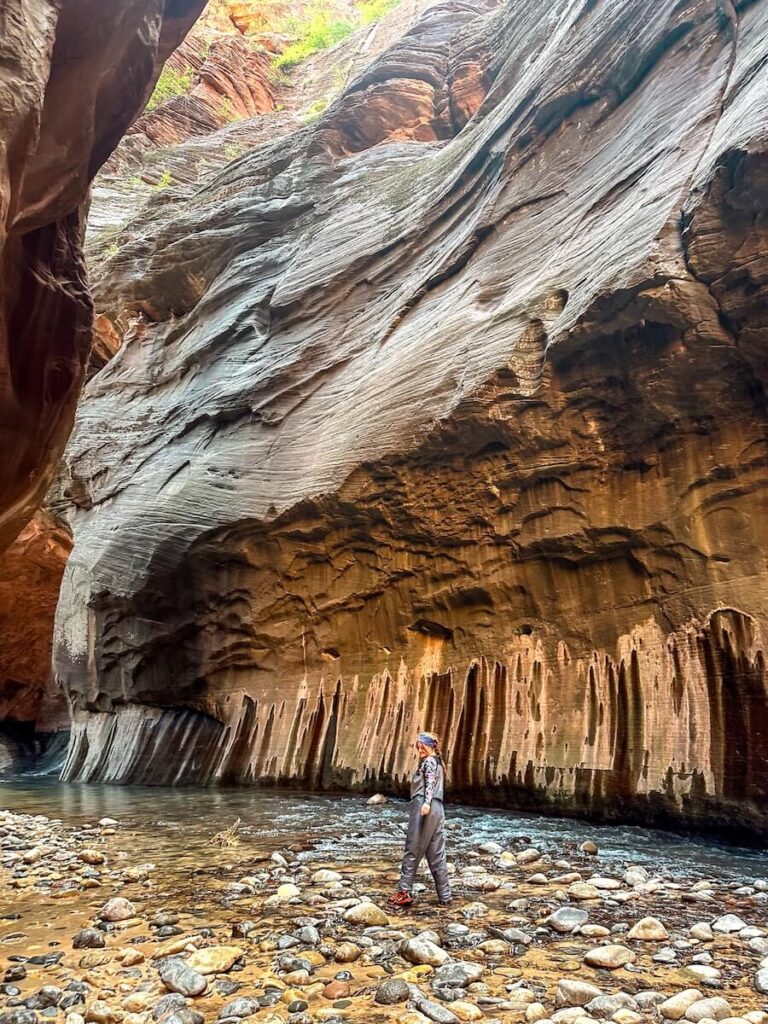
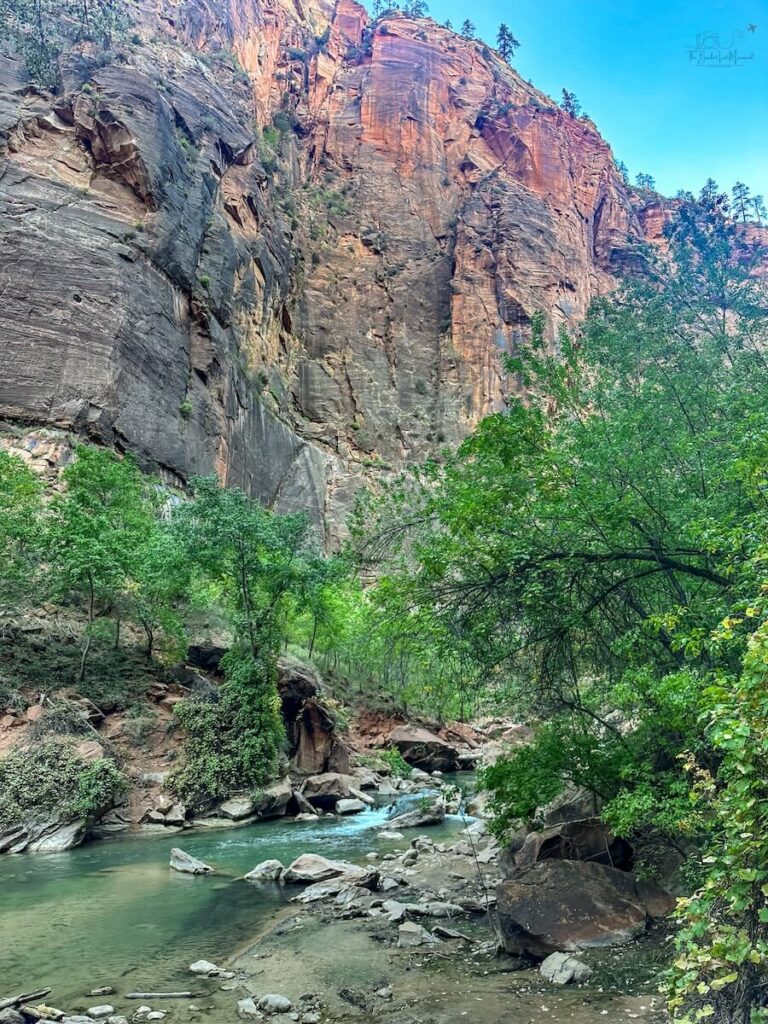
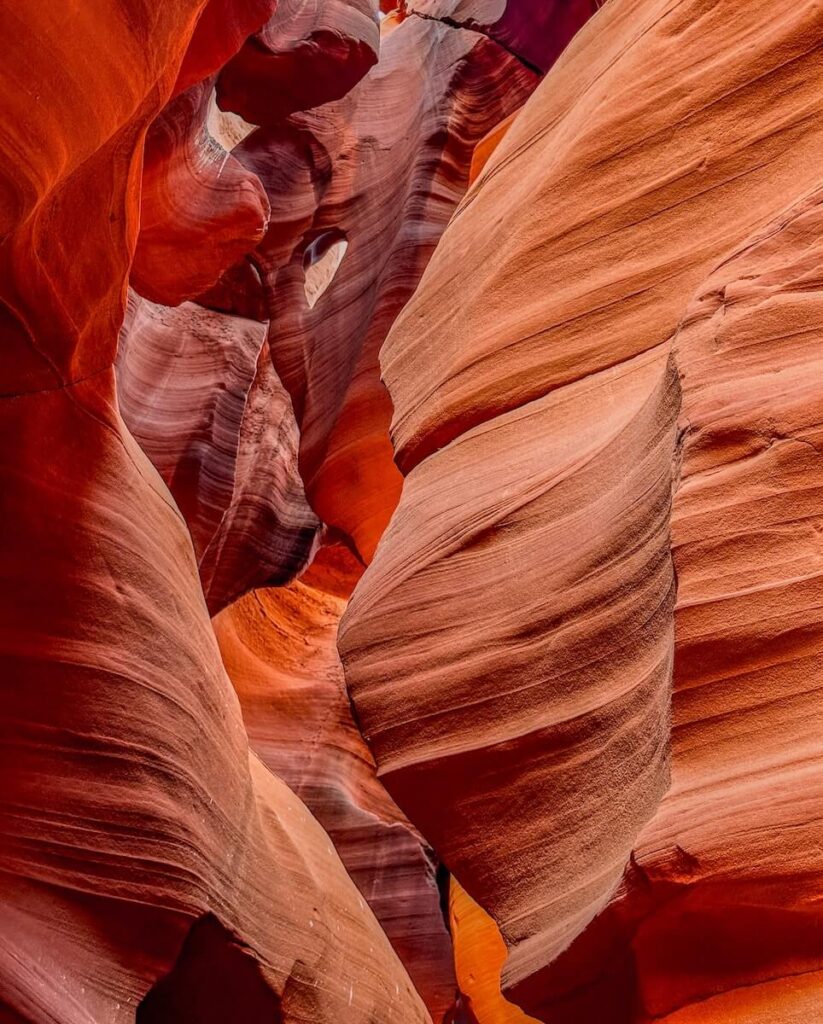
The Harsh Lighting Conditions
The Narrows is a slot canyon, which basically means you’re shooting inside a giant, winding tunnel of rock where sunlight behaves like an unpredictable toddler.
It’s the ultimate contrast nightmare:
- Deep, shadowy walls swallow detail.
- Bright sky slices through narrow openings and blows out highlights.
- The river reflects light unevenly, creating harsh, distracting hotspots.
The takeaway: in The Narrows, lighting isn’t your friend. It’s your unpredictable, slightly chaotic hiking buddy.
The Water Challenges
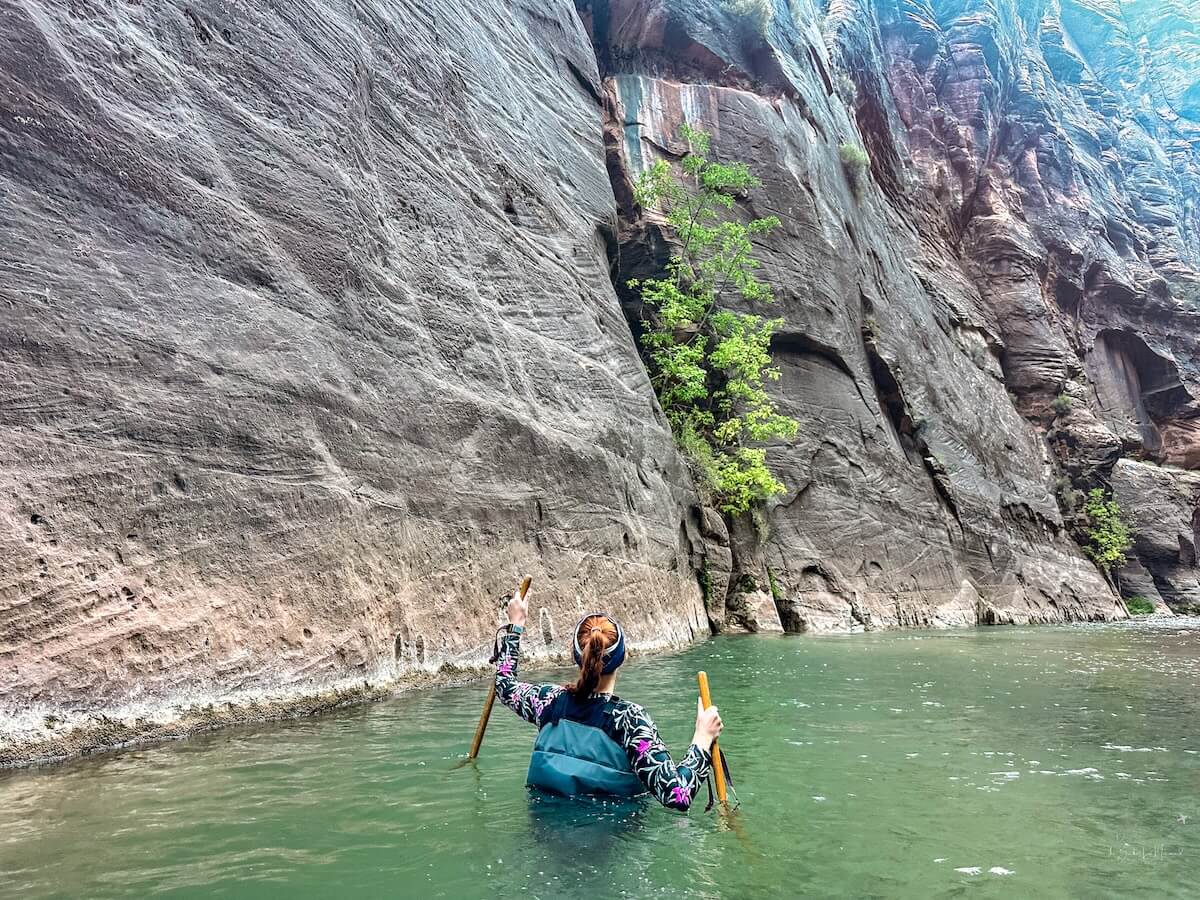
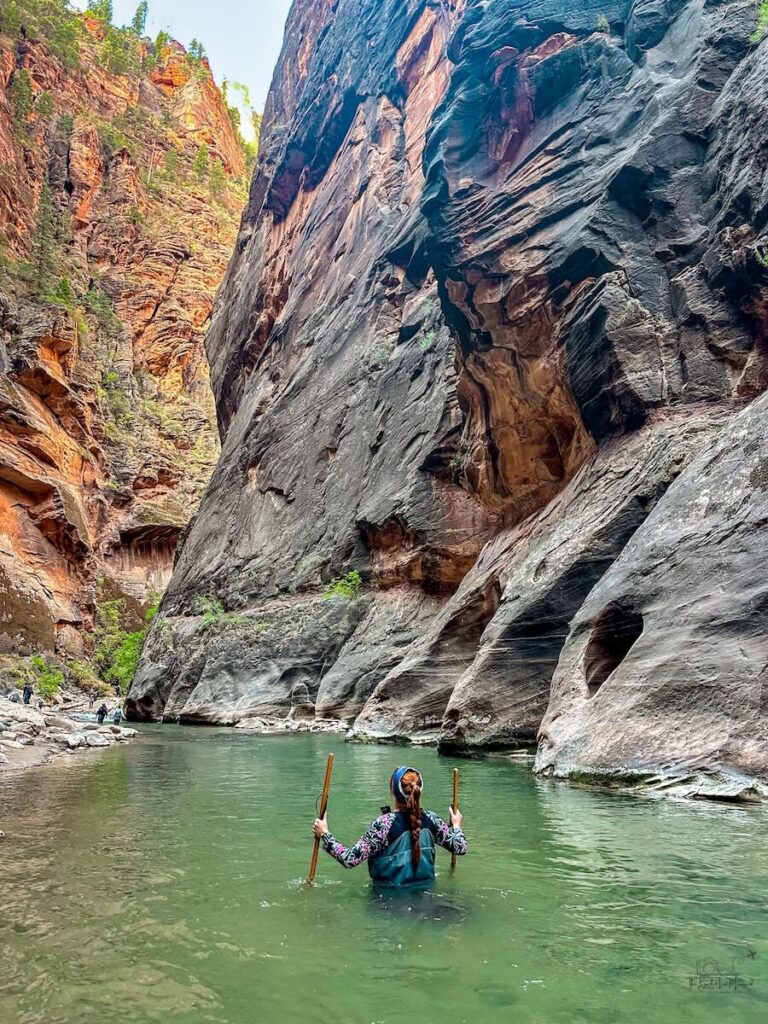
Here’s the thing nobody tells you before you start: You’re hiking in a river for 70 to 80% of this trail.
That means:
- You’re constantly fighting against rushing water.
- Slippery rocks make steady footing (and steady framing) nearly impossible.
- Every step feels like a game of “don’t dunk the camera.”
And then there are the deep sections and places where the water rises up past your waist.
In some stretches, you’re actually swimming, which means any gear that isn’t waterproof or carefully stored becomes one wrong move away from total destruction.
Trying to set up the perfect long-exposure water shot while bracing against a current? Yeah…good luck.
Gear Risk Is Real
On my hike, I brought my GoPro, Insta360, and phone, thinking I’d have a solid mix of versatility and safety.
Unfortunately, none of them delivered the magic I was hoping for.
Meanwhile, every step required constant calculations:
- Is my gear safe in this dry bag?
- Can I risk taking it out here?
- If I slip, am I about to lose $3,000 worth of camera equipment?
Honestly, I spent as much time worrying about keeping my gear dry as I did trying to compose good shots.
And that kind of mental load doesn’t exactly make for a relaxing creative flow.
The Mistakes I Made (So You Don’t Have To)
I went into The Narrows convinced I was about to capture National Geographic–level magic.
I left with…well, let’s call it “humbling character development.”
If you’re planning to photograph this trail, here are the biggest mistakes I made so you can avoid them:
Mistake #1: Overestimating the “Instagram-Perfect” Factor
I’d seen those dreamy photos: crystal-clear water, glowing canyon walls, hikers perfectly framed in golden light.
So, naturally, I thought I’d come back with the same. I did not.
Are the photos okay? Absolutely! Are they magical? No…
The Narrows is gorgeous, yes, but those photos you see online are usually the result of perfect timing, elite gear, and a whole lot of editing magic.
Expecting your images to look like that without planning ahead sets you up for disappointment.
Mistake #2: Underpreparing for Low-Light + High-Contrast Situations
I severely underestimated just how dark parts of the Narrows are and just how bright others can be.
Shooting in a slot canyon is a constant battle between deep shadows and blown-out highlights, and I wasn’t ready for it.
Without proper planning (or the right settings), I ended up with a lot of muddy shadows and skies that looked like someone cranked the exposure to “nuclear.”
Mistake #3: Relying Too Much on Action Cams
I figured my GoPro and Insta360 would save the day. Waterproof, lightweight, easy to carry – what could go wrong? Turns out, plenty:
- My GoPro handled the water but struggled badly in low light, giving me noisy, flat images.
- The Insta360 was fun for video, but the distortion made landscape shots less impactful.
Lesson learned: action cams are amazing for POV hiking footage, but they’re not your best bet for wall-worthy photos.
Read More – Common Travel Photography Mistakes
Mistake #4: Not Planning Dry Access for My Camera + Phone
I kept my phone and camera stashed in a dry bag most of the time.
This sounds smart until you realize how annoying it is to constantly stop, unzip, dry your hands, and hope you don’t drop anything into the Virgin River.
Because it was such a hassle, I missed some incredible moments simply because getting my gear out felt too risky.
Next time, I’d set up a system where my camera is protected but still quickly accessible for those fleeting shots.
Mistake #5: Focusing on Gear Instead of Strategy
I got so caught up in worrying about what to bring (DSLR? GoPro? Phone? All three?) that I didn’t spend enough time thinking about how I was going to shoot.
The result: I had all the tools, but no solid plan. My photos were a mix of “meh” snapshots and a few happy accidents instead of thoughtfully composed images.
Next time, my approach will be strategy-first, gear-second. Because in The Narrows, knowing when, where, and how to shoot matters way more than how fancy your camera is.
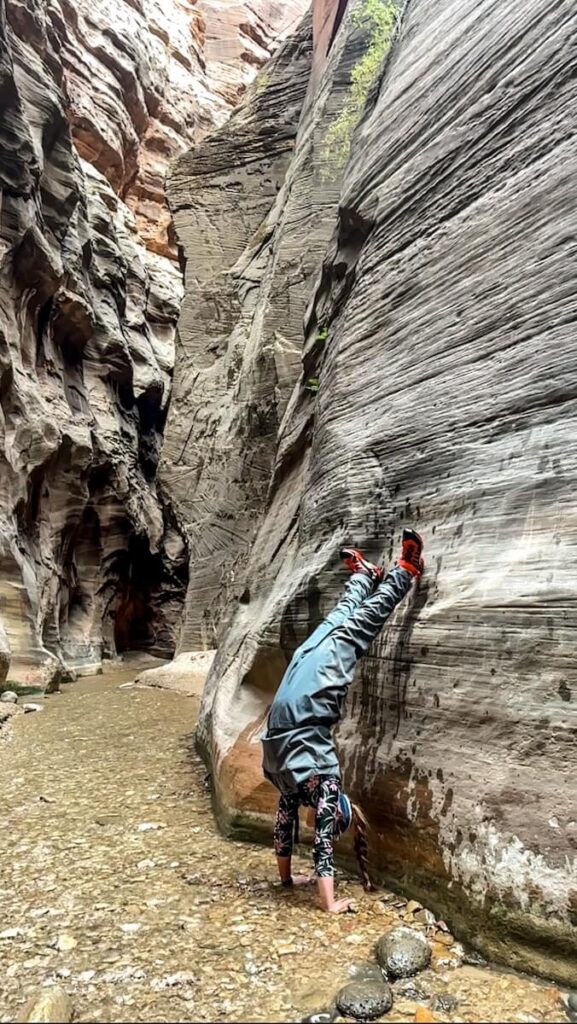
Mistake #6: Expecting a gorgeous shot of myself
Want those epic, “look-at-me-hiking-through-a-river” shots without hiring a photographer?
Pro tip: Keep safety first! Only set up your gear where you have solid footing, and make sure everything’s secured before you wade into deeper water.
Here’s the catch: unless you have a photography friend, it is going to be extremely hard to get a professional photo of yourself.
Setting up a tripod in the water? No thanks.
Giving my phone to a stranger while waist deep in water? No thanks.
Tips for Self-Portraits
- Use a Waterproof Tripod or GorillaPod → Set it up in shallow areas where the current isn’t strong, then use your camera’s timer or remote shutter.
- GoPro or Insta360 for POV Shots → Mount it on your chest or hiking pole to capture natural, candid angles as you move.
- Ask Fellow Hikers for Help → Most people are happy to snap a quick photo if you return the favor. Just frame your shot first so you don’t end up with half a canyon wall and no you.
- Turn On Burst Mode → Whether on your phone or camera, use burst shots while crossing the river so you have multiple frames to choose from.
- Include Movement → Walk through the water, look up at the canyon walls, or use your trekking pole! Natural action makes photos look way less posed.
Pro tip: Only set up your gear where you have solid footing, and make sure everything’s secured before you wade into deeper water.
What I’d Do Differently Next Time
The Narrows humbled me as an adventure photographer.
Between the unpredictable light, rushing water, and gear stress, I came out of this hike with a memory card full of “meh” shots and a list of things I’d change for round two.
If I had a redo, here’s exactly what I’d do differently:
1. Start Hiking Before Sunrise
Light is everything in a slot canyon, and I learned the hard way that midday sun is brutal.
If I went again, I’d hit the trail at first light to catch the soft, golden glow before the canyon fully wakes up.
Early mornings also mean fewer crowds, which makes it easier to compose clean, distraction-free shots.
Just get their early doing peak season so that you can park at the visitor’s center and take the first shuttle up.
2. Bring a Lightweight but Capable Mirrorless Camera
Hauling a full DSLR setup sounds good in theory, but in The Narrows, weight matters.
Next time, I’d bring a compact mirrorless body with solid low-light performance and one versatile wide-angle lens.
That setup strikes the right balance between quality and manageability in an environment where every ounce counts.
I really wish I would have brought my Canon EOS M50 MII and waterproofed the crap outta it!
3. Pack Better Waterproofing + Accessible Storage
One of my biggest frustrations was constantly digging through my dry bag to access my phone and camera. Next time, I’d rethink my setup:
- Use a waterproof crossbody bag for fast access.
- Keep my camera in a lightweight waterproof housing when not in use and it is safe when I’m navigating tricky currents.
- Store spare batteries and SD cards in small, double-sealed dry pouches.
This way, I wouldn’t waste precious shooting opportunities fumbling with gear.
4. Focus on Fewer, Better-Composed Shots
I made the mistake of trying to capture everything: every bend, every waterfall, every rock formation.
The result? Hundreds of mediocre shots instead of a handful of truly great ones.
Next time, I’d slow down, study the scene, and focus on:
- Framing hikers for scale.
- Using leading lines of the river for depth.
- Waiting for moments of interesting light.
5. Plan to Shoot Selectively Instead of Constantly Recording
I burned through GoPro batteries so fast because I recorded almost the entire hike, thinking I’d capture cinematic footage. Reality check: constant recording = dead batteries + wasted storage.
Now, my plan would be to:
- Record short, intentional clips in key locations.
- Prioritize still photography where lighting is optimal.
- Let myself enjoy the experience instead of trying to document every single second.
The Best Camera Gear for Photographing The Narrows
When it comes to how to take pictures in The Narrows, less really is more.
You want gear that’s light, fast, and easy to protect. Hauling your entire camera arsenal into a river canyon isn’t just exhausting – it’s risky.
Recommended Camera Setup
If you’re bringing a “real” camera, choose one that performs well in low-light conditions:
- Best choice: Lightweight mirrorless or DSLR with strong ISO handling.
- Lens picks:
- Wide-angle (16–35mm) → Perfect for capturing towering canyon walls.
- Fast prime (f/1.8 or f/2.8) → Great for controlling light in darker sections.
- Big vs small setups: Larger gear = better quality but heavier, riskier, and harder to manage in water. Compact = safer and quicker to grab.
Also, if you feel confident, I would consider bringing a sturdy tripod (and I mean STURDY), never leaving it’s side, and do some HDR bracketing to account for the contrasting light.
My Go-To Travel Cameras: Canon EOS M50 mark II | Canon EOS 5D mark IV | What’s in My Camera Bag?
Waterproofing & Protection
The Virgin River does not forgive. Protect your gear like your trip depends on it:
- Dry bags + waterproof pouches → For cameras, phones, and batteries.
- Water resistant camera pouch or professional housing→ Worth it if you plan to shoot mid-stream.
- Floating straps → Must-have for GoPros or action cams (trust me on this one).
What I’d Pack Next Time
After my first attempt, here’s the pared-down kit I’d bring:
- Lightweight mirrorless + one wide-angle lens
- ND filter to handle blown-out highlights
- Small tripod or GorillaPod for long exposures
- GoPro or Insta360 only for underwater shots or POV video – not my primary camera
Watch More – Here is a video of me doing a waterfall shot with no tripod, which might be useful for The Narrows.
The Phone & Action Camera
Let’s be real: most people hiking The Narrows aren’t carrying full camera rigs — they’re relying on their phones or action cams like GoPros and Insta360s.
And honestly? That’s smart. But to get the best shots possible, you need to tweak your approach:
For Phones
- Use HDR Mode → It helps balance the extreme highlights and shadows in this slot canyon.
- Lock Exposure on Darker Areas → Tap and hold to set exposure so your highlights don’t blow out.
- Go Vertical → A tall aspect ratio works better to capture the towering canyon walls.
- Keep a Waterproof Pouch Handy → Quick access = more photos without the panic.
For GoPro & Insta360
- Realize that it is great for POV, not great for photography.
- Both of my action cameras really struggled with the contrasting and dramatic light shifts.
- Bring Extra Batteries → Constant recording in wet, cold conditions drains power fast.
- Use Mounts for Stability →
- Chest mounts for a true POV experience.
- Pole mounts to shoot above the rushing water or to frame wider angles.
- I like this massive bundle that includes it all!
- Don’t Rely on It for Still Photos → Action cameras shine for video and underwater shots, but they struggle in low light and high-contrast scenes.
- Sometimes I’ve been able to swing a photo with these cameras, but not here 🥲
The Best Photo Spots in The Narrows
These are the most photogenic spots in The Narrows that are worth slowing down for.
I would suggest looking up pictures before as they can be hard to spot when you are hiking.
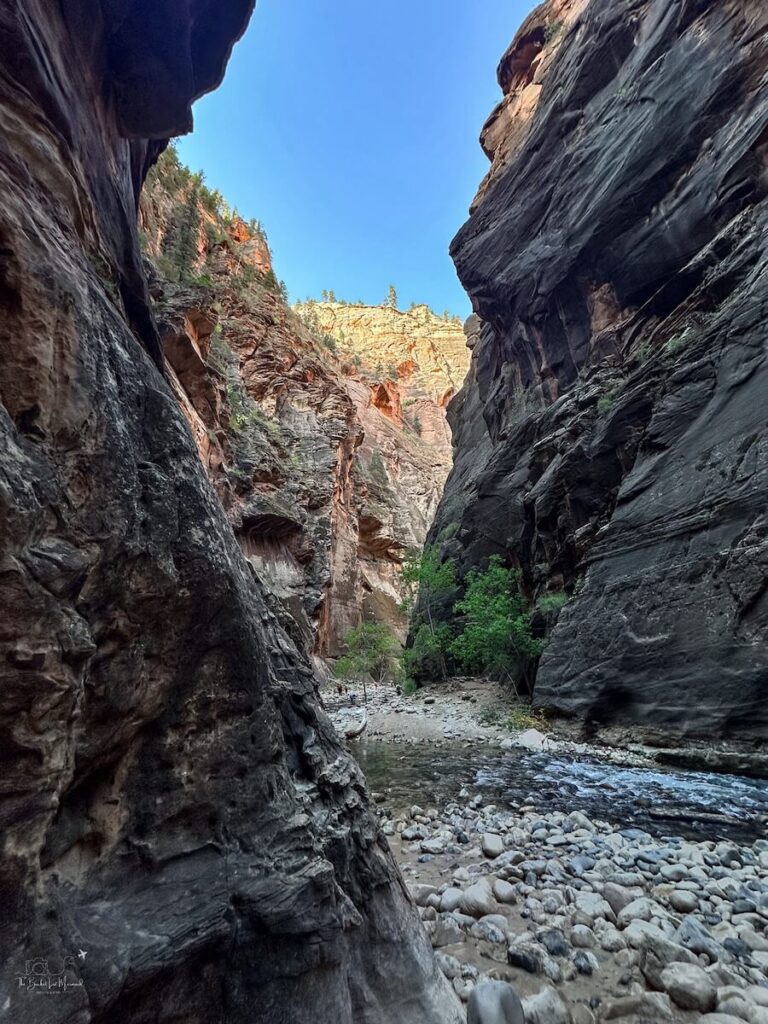
1. Wall Street
This is the iconic section of The Narrows and the one you’ve probably seen all over Instagram.
Towering canyon walls rise nearly 1,000 feet above you, squeezing the river into a narrow, dramatic corridor.
- Best shot: Stand downstream and shoot up-river to capture the leading lines of the water flowing between the cliffs.
- Pro tip: Visit early in the morning for softer light because midday sun here can blow out the highlights fast.
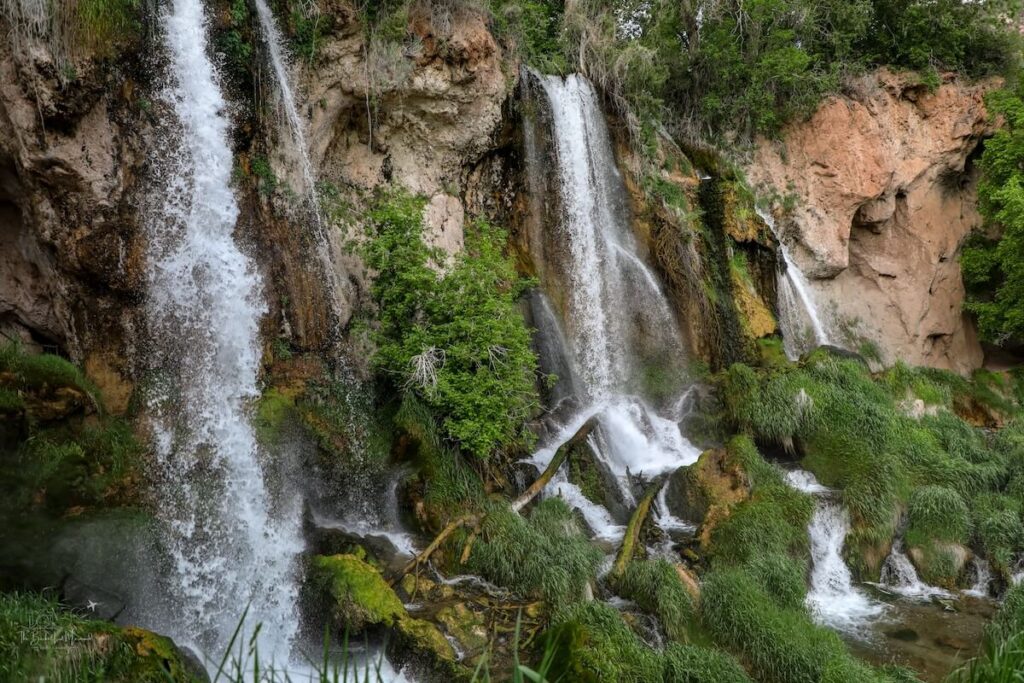
2. Mystery Falls
One of the first landmarks you’ll hit, Mystery Falls is a stunning little waterfall tucked into the canyon wall.
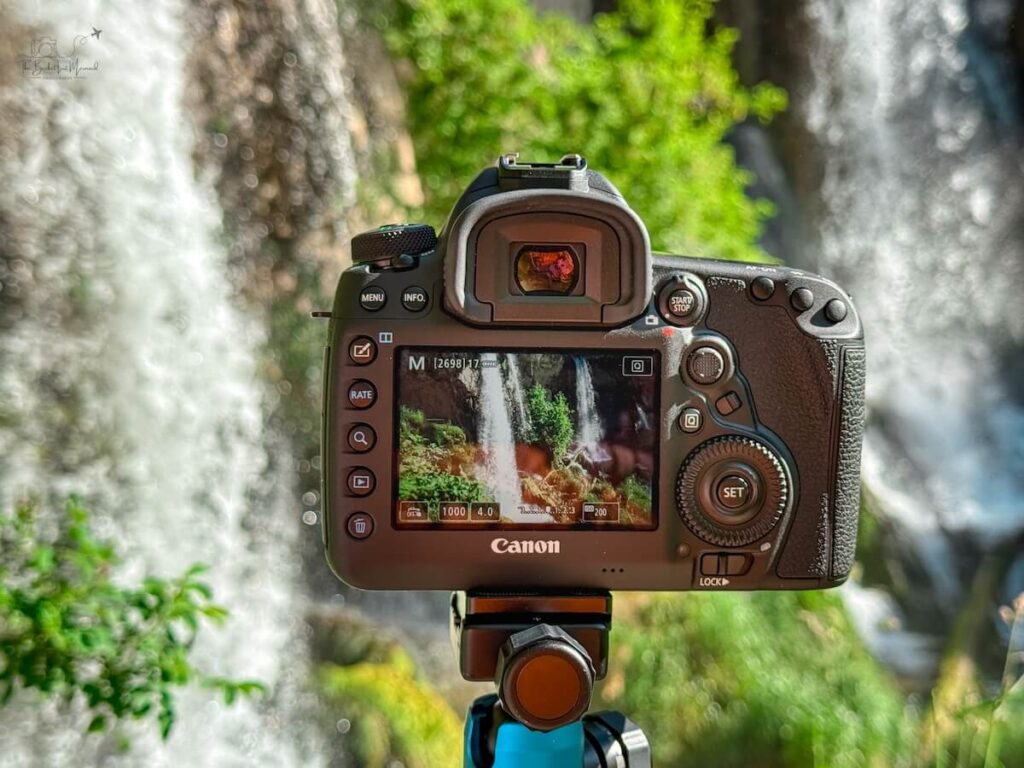
If you are wondering how I edit my waterfall photos, here is a real-time editing demo.
The water spills over mossy rock, making it an excellent spot for long-exposure photography if you have a tripod.
- Best shot: Bring a mini tripod or GorillaPod and slow your shutter speed to capture silky water movement.
- Pro tip: Since this is early on the trail, hit it on your way into the hike while you and your gear are still dry.
3. Big Springs
Big Springs is where the landscape changes from towering canyon walls to a more lush, green oasis.
- Best shot: Incorporate hikers or trekking poles for scale against the greenery and canyon backdrop.
- Pro tip: Big Springs is beyond the turnaround point for most day hikers. You might need a permit to reach it depending on your route, but if you can, it’s worth it for unique compositions.
4. Shorter Hikes vs. Top-Down Hikes
- Shorter Day Hike (Bottom-Up) → Most photographers stick to the bottom-up route from the Riverside Walk trailhead. This gets you access to Wall Street and Mystery Falls without needing a permit.
- Top-Down Route → A full 16-mile adventure that requires a permit and serious stamina, but you’ll pass through lesser-known sections that are pristine and far less crowded.
If you only have time (or energy) for one section, Wall Street + Mystery Falls will give you the most iconic images without overcommitting.
Realize that this is not a normal hike. It is slow, physically taxing, and requires more mental energy.
Safety & Photography Balance
Here’s the thing about photographing The Narrows: you can’t prioritize both safety and photography at the same time.
Between the rushing water, slippery rocks, and expensive gear, you have to choose your moments wisely.
1. Pick Your Shooting Spots Intentionally
Don’t try to take photos while constantly moving through the river.
Instead, pause in safe, stable areas where you can focus on your shots without worrying about getting swept downstream.
2. Keep One Trekking Pole Free
Trekking poles are lifesavers in The Narrows, especially when balancing with gear.
I always recommend keeping one hand free for stability and dedicating the other to handling your camera.
It makes navigating the rocks much safer and steadier.
3. Don’t Risk Swimming Sections With Unprotected Gear
Some parts of The Narrows get deep fast.
If you hit a swimming section, pack away your gear in a waterproof dry bag before entering. No photo is worth frying your camera, phone, or GoPro.
4. Safety First, Photos Second
If you’re photographing The Narrows, be extra cautious. Prioritize:
- Stability over shot angles.
- Short, intentional shooting breaks rather than juggling gear mid-stream.
- Letting someone know your route and turnaround time before you start.
The Narrows is challenging enough on its own. Staying safe has to come first, no matter how badly you want “the shot.”

Final Thoughts on Photographing The Narrows
If there’s one thing I learned from my time in Zion: photographing The Narrows is hard!
Like, really hard.
Between the unpredictable lighting, rushing water, and constant balancing act between safety and creativity, this is one of the most challenging places I’ve ever shot.
And here’s the truth: it’s okay if your shots aren’t Instagram-perfect. Mine definitely weren’t.
The Narrows is less about coming home with flawless, frame-worthy photos and more about experiencing one of the most unique hikes in the world.
Walking between towering sandstone walls with a river at your feet is something you’ll remember forever…whether or not your camera fully captures the magic.
So go into it prepared, give yourself some grace, and enjoy the adventure first and foremost.
The photos you do capture will feel all the more meaningful because of the effort it took to get them.
Have you tried photographing The Narrows? Did you nail the shot or walk away with “meh” images like I did?
I’d love to hear your tips, struggles, and lessons learned in the comments below.
Let’s swap stories and help future adventurers capture this bucket-list-worthy experience.
More Photography Resources
More Travel Resources
Adventure Bucket List Resources
I am here to help your travel adventures go as smoothly as possible! That way you can check off that bucket list with minimal complications and spending!
SHOP – Shop the best adventure gear and essentials on my Amazon Storefront – handpicked by a full-time adventuring mermaid!
AIRFARE – There are a few I use, but Aviasales is normally my go-to for flights without any extra fees or markups.
ACCOMMODATION – My two favorites are Booking.Com for hotels and VRBO for rentals.
GUIDED TOURS – If you are looking for quick and easy tours, check out GetYourGuide and Viator.
MULTI-DAY TOURS – For more in-depth tours that span several days, TourHub has many great options with reputable travel companies. Use my code (ALEXANDRA1GURU) for up to 5% off your next bucket list adventure.
TRANSPORTATION – You can either rent a car yourself with Discover Cars or do a guided bus tours like Big Bus Tours.
SIM CARDS – Avoid expensive roaming charges with an eSim card with Airalo. Personally, I prefer wifi boxes, and recommend WiFi Candy (get 10% of with the code THEBUCKETLISTMERMAID).
TRAVELER’S INSURANCE – Check out VisitorsCoverage for affordable insurance plans. If you are a nomad or remote worker, I would check out SafetyWing.
SEE MORE – Adventure Resources | Photography Resources
See Some Photos You Like?
Check out my full photography page for a full gallery and prices.