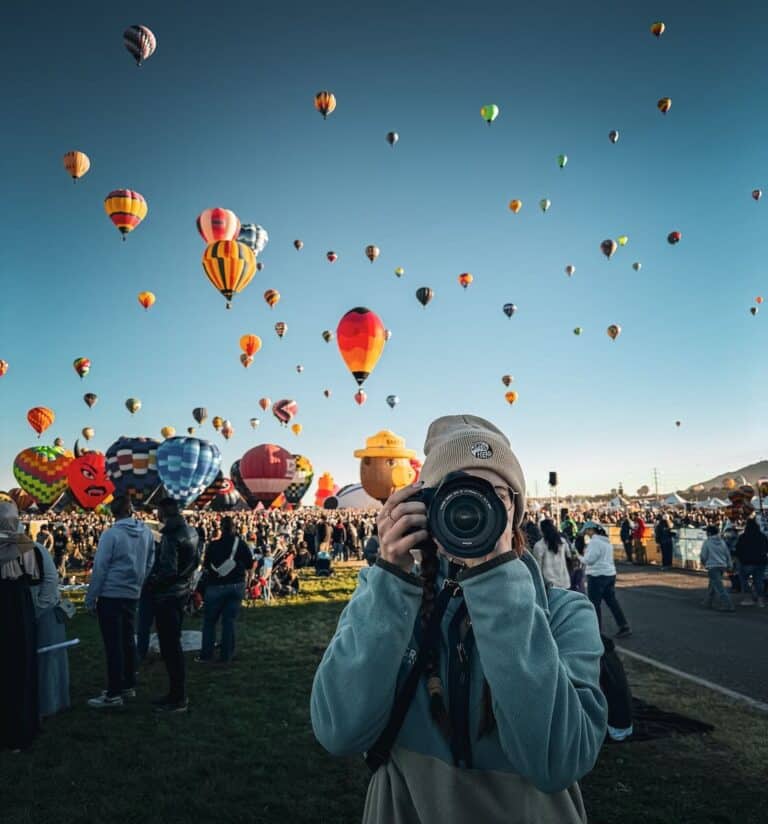
The Adventure Photographer’s 5-Second Rule – How To Capture Fast Travel Shots
This website contains affiliate links from trusted partners. If you purchase through a link on this site, I may earn a commission at no extra cost to you. As an Amazon Associate, I earn from qualifying purchases. See my Privacy Policy and Disclosure for more information.
If there’s one universal truth about adventure travel photography, it’s this: the world never waits for you to get your settings right.
The light changes. The hikers move. The wildlife sprints. The waterfall mist flares up like it’s throwing shade. Your travel partner suddenly does something adorable.
Adventure is chaotic, wild, and beautifully unpredictable, and that’s exactly why we love photographing it.
I would love to live in a world where I can plan out every little detail, and have three hours to set up my shot and tripod. But we are adventure photographers, and we don’t have that luxury.
The reality is that most people (including me) miss the moment because they spend too long fiddling with buttons.
Enter: The 5-Second Rule.
A simple, powerful, adventure-proof method to capture any moment fast without sacrificing your creativity or your sanity.
This mini-guide will walk you through what it is, why it matters, the settings you’ll use most often, and how to put it into practice on every trail, mountain summit, waterfall canyon, desert dune, or bucket-list adventure you find yourself on.
What Is the 5-Second Rule?
The 5-Second Rule is the fastest adventure-proof photography workflow I teach:
If you see something happening, you should be able to take your first shot within five seconds… or you risk losing it.
Five seconds. That’s it. From spotting the moment… to snapping your first frame.
Does the photo need to be perfect? No. Does it need to be captured? Oh, yes.
This rule is your insurance policy against regret and a guardrail that forces you to respond quickly, stay present, and get the shot before the adventure moves on without you.
Why the 5-Second Rule Matters for Adventure Photography
Adventure photography is a world where everything changes fast:
- Clouds shift and create the best light for only a few seconds.
- Wildlife appears and disappears like it’s auditioning for a magic show.
- Hikers peak a ridge and the silhouette lasts four seconds, tops.
- Waterfalls pulse and the texture changes constantly.
- Sun flares happen once and then vanish.
If you wait for the “perfect setting,” you’ll end up with the perfect feeling of regret.
The 5-Second Rule solves the four biggest pain points adventure photographers face:
1. You stop overthinking.
You don’t have time to second-guess yourself. You just shoot.
2. You document moments before they disappear.
The rule forces you to take the photo now, refine later.
3. You build reliable muscle memory.
When you practice quick-fire shooting, your camera settings become second nature.
4. You stay in the adventure instead of staring at your LCD.
No more missing the moment because you’re trapped in the menu maze.
Because a messy shot is always better than the regret of no-shot.
How to Use the 5-Second Rule Anywhere
Step 0: Prep Before You do the 5-Second Rule
Before you even lift your camera, set yourself up for success:
Shoot in RAW
Fast-action photography leaves zero room for “Oops, JPEG can’t save me now.” RAW gives you maximum flexibility to fix exposure, color, detail, and basically every worst-case scenario later. It’s non-negotiable.
Dial in your base settings early.
Take a moment to look at the environment you’re about to explore and set a reliable starting point so you’re never scrambling once the magic happens.
Here are a few examples:
Step 1: Spot the moment
If your brain whispers “Oh wow, that’d be a great shot,” your camera should already be in your hand.
Adventure photography rewards instant curiosity.
Step 2: Compose fast and don’t overthink it
Shift your feet.
Drop low.
Move one step left or right.
Find the fastest composition that makes sense: leading lines, rule of thirds, silhouette, framing, or symmetry.
Not perfect — useable.
Remember, this is your first shot, not your final masterpiece.

Step 3: Use your “Default Adventure Settings”
Look back at your prep and your base adventure settings. This is your secret weapon.
General Adventure Photography Camera Settings
These settings give you a reliable starting point in nearly every location:
- Shutter: 1/500
- Aperture: f/4
- ISO: Auto
- Drive mode: High-speed continuous
- Focus mode: AF-C or AI Servo (continuous focus)
- White balance: Auto
- Lens: Wide or midrange (16-35mm or 24-70mm equivalent)
These settings do 90% of the heavy lifting so you don’t have to think.
Ideal Camera Settings for Fast Adventure Moments
Here are some other examples of base adventure settings for different scenarios.
Bright Daylight Action
Perfect for hiking, summits, ridgelines, and wildlife.
- Shutter: 1/800–1/2000
- Aperture: f/4–f/5.6
- ISO: 100–400
- Focus: AF-C / AI Servo
Keeps everything crisp and sharp.
Golden Hour Magic
The most emotional, cinematic light, but trickier to shoot fast.
- Shutter: 1/400–1/800
- Aperture: f/2.8–f/4
- ISO: 200–800
Warm tones, clean shadows, emotional glow.
Waterfalls & Motion
Use this when you want silky water or motion streaks.
- Shutter: 1/4–1/20 (silky)
- OR 1/250–1/500 (freeze action)
- Aperture: f/8–f/11
- ISO: Auto
- Full Guide
Bonus: Brace your elbows or use a tree, rock, or knee as a tripod.
Dark Canyons / Forest Shade
For those moody, dramatic adventure shots.
- Shutter: 1/200
- Aperture: f/2.8–f/3.5
- ISO: 800–3200
Keeps your subject sharp without blowing out the shadows.
Starry Night Adventures
For astrophotography moments on the trail.
- Shutter: 15–20 seconds
- Aperture: f/2.8
- ISO: 1600–3200
- Lens: Wide as possible
And steady yourself like a ninja.
Step 4: Take the shot… quickly
Not good. Not perfect. Just taken.
This is your “safety shot,” and is the insurance that preserves the moment.
Step 5: THEN refine.
Now that the moment is captured (or partially), you can adjust:
- Slow the shutter for motion
- Change lenses
- Recompose thoughtfully
- Lower the ISO
- Switch angles
- Add foreground
- Do a vertical + horizontal version
- Try different creative effects
The 5-Second Rule isn’t about rushing. This is about preserving the magic before it vanishes.

Worst-Case Scenarios (and Why They’re Not Actually That Bad)
Shooting fast will always come with a few “oops” moments. This is the tradeoff for the 5-second rule.
But here’s the plot twist: almost every worst-case scenario is fixable with a little post-processing and some adventure-photographer common sense.
1. Overexposed Highlights
When you shoot in bright sun or fast-changing conditions, it’s easy to blow out a sky or lose detail in a waterfall splash. Because you shot in RAW, you would be amazed at how much detail you can recover here.
Fixes:
- Drop highlights and whites in Lightroom
- Pull down exposure and lift shadows
- Use the “Mask Sky” tool to rebuild contrast
- If it’s REALLY gone, convert to black and white for an intentional artistic look (instant drama)
2. Underexposed Shadows
Happens often in canyons, forests, or backlit scenes where you’re moving quickly. Again, since you shot in RAW, you will have more of a chance of brightening that up.
Fixes:
- Raise shadows + blacks
- Boost exposure slightly
- Use noise reduction in Lightroom or Topaz DeNoise
- Add warm tones to avoid muddy blues
Underexposed > overexposed because you can always recover more detail.
3. Slightly Blurry Subjects
Movement, low light, or adrenaline-fueled fast shooting can cause a little softness.
Fixes:
- Lightroom’s Texture + Clarity does mini-miracles
- Topaz Sharpen AI can resurrect a photo like Lazarus
- A bit of grain adds intentional “film” vibes
- Lean into the motion blur because it often adds energy to adventure shots
4. Missed Focus
It happens. Adventure doesn’t always hold still for your AF system.
Fixes:
- Mask the subject and add sharpness/clarity
- Reduce distraction by softening the background
- Crop in for a more intentional composition
- Convert to a silhouette if the focus is too far gone
5. Weird Compositions
When you’re rushing, horizons tilt, people get cut off, and random boulders photobomb your shot.
When shooting, it’s always better to pull out slightly and crop later.
Fixes:
- Straighten in Lightroom
- Crop using rule of thirds
- Use content-aware fill to rebuild sky or ground
- Add a subtle vignette to guide the eye
Bad composition is one of the easiest things to fix in post.
6. Noise From High ISO
Auto-ISO in dark scenes can climb higher than a mountain goat.
Fixes:
- Topaz or Lightroom DeNoise (absolute game-changer)
- Add minimal luminance noise reduction in Lightroom
- Add grain to make noise look intentional
- Keep it small on social media so noise barely shows
7. Lens Flare or Dust Spots
Shooting fast means you don’t always catch the sneaky little flare blobs or dusty sensor spots.
Fixes:
- Lightroom’s “Heal” tool using Generative AI.
- Clone tool for larger areas
- Add a radial gradient to mimic “intentional” sun flare if you want to hide flaws creatively
8. Cropped Limbs or Heads
Adventure subjects move fast. Sometimes a foot or hand doesn’t make it into the frame.
Fixes:
- Crop tighter and make it artistic
- Go horizontal or vertical to reframe
- Use generative fill (depending on your workflow/tool)
- Turn it into a detail shot instead of a portrait
Common Mistakes Adventure Photographers Make (and How to Avoid Them)
Mistake 1: Waiting for perfection
Perfection kills spontaneity. Take the shot, then refine.
I am a huge advocate for spontaneous photography because I think that is where the magic happens!
Mistake 2: Changing too many settings at once
Use your default setup. It’ll save you every time.
From there, change one setting at a time and take multiple pictures at each setting.
That way, you won’t miss a shot! Plus, there are several times where I thought I would like one thing and then tried a different setting and liked that one better only after looking at it on a computer.
Mistake 3: Watching the back of the camera more than the world
The moment is in front of you, not on your LCD.
Don’t forget to have fun while checking off your adventure bucket list.
Mistake 4: Not practicing speed shooting
Muscle memory is built on repetition.
I would practice the 5-Second Rule before you go on a massive and important adventure.
Mistake 5: Freezing under pressure
The 5-Second Rule gives you a decision-making framework.
Mistake 6: Carrying the wrong lens
Adventure = wide and fast.
Here is everything in my camera bag.
Here are the best lenses for adventure travel.
Mistake 7: Overpacking gear
If your pack is heavy, you move slower and miss more shots.
Mistake 8: Forgetting to shoot both vertical & horizontal
This is dependent on what you use your photography for.
For me, I work with brands, post my photos on socials, and write photography guides.
Photographers and your camera love options. So does future you.
Mistake 9: Turning off auto ISO
Auto ISO is your best friend in unpredictable light.
Sometimes it really bumps up the grain. But I would way rather have a grainy shot than a blurry one.
Mistake 10: Not shooting enough “safety shots”
The more you shoot, the better your chances of capturing magic.
Final Thoughts: Adventure Isn’t Waiting… and Neither Should You
Adventure photography is a dance with the unpredictable.
You’re out there climbing mountains, chasing light, wading rivers, hiking canyons, getting blasted by wind, and doing it all with a camera slung over your shoulder like the bold, adventurous mermaid you are.
The 5-Second Rule is your creative anchor. It’s a simple little reminder that the world is moving fast and magic doesn’t wait for perfect settings.
If you can train yourself to respond quickly, trust your instincts, and shoot first, refine second… you’ll capture more emotion, more storytelling, and more bucket-list moments than you ever thought possible.
So next time something catches your eye, a sunflare, a silhouette, a splash of light, give yourself five seconds.
And take the shot.
More Adventure Photography Resources


More Adventure Resources
Adventure Bucket List Resources
I am here to help your travel adventures go as smoothly as possible! That way you can check off that bucket list with minimal complications and spending!
SHOP – Shop the best adventure gear and essentials on my Amazon Storefront – handpicked by a full-time adventuring mermaid!
AIRFARE – There are a few I use, but Aviasales is normally my go-to for flights without any extra fees or markups.
ACCOMMODATION – My two favorites are Booking.Com for hotels and VRBO for rentals.
GUIDED TOURS – If you are looking for quick and easy tours, check out GetYourGuide and Viator.
MULTI-DAY TOURS – For more in-depth tours that span several days, TourHub has many great options with reputable travel companies. Use my code (ALEXANDRA1GURU) for up to 5% off your next bucket list adventure.
TRANSPORTATION – You can either rent a car yourself with Discover Cars or do a guided bus tours like Big Bus Tours.
SIM CARDS – Avoid expensive roaming charges with an eSim card with Airalo. Personally, I prefer wifi boxes, and recommend WiFi Candy (get 10% of with the code THEBUCKETLISTMERMAID).
TRAVELER’S INSURANCE – Check out VisitorsCoverage for affordable insurance plans. If you are a nomad or remote worker, I would check out SafetyWing.
SEE MORE – Adventure Resources | Photography Resources
See Some Photos You Like?
Check out my full photography page for a full gallery and prices.