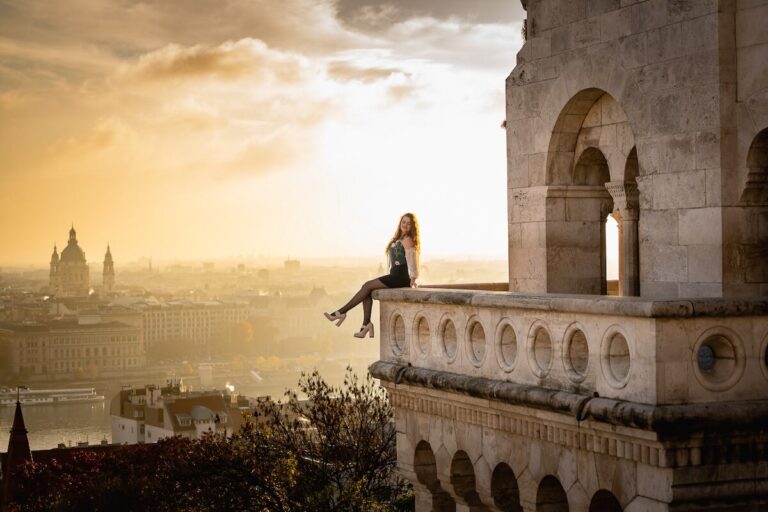
25 Travel Photography Mistakes That Are Wrecking Your Shots (And How to Fix Them)
This website contains affiliate links from trusted partners. If you purchase through a link on this site, I may earn a commission at no extra cost to you. As an Amazon Associate, I earn from qualifying purchases. See my Privacy Policy and Disclosure for more information.
Everyone thinks travel photography is easy. You show up, point the camera, and click the button. Boom! Instant masterpiece, right?
Yeah… no.
Then you get home, open your photos, and suddenly your epic mountain hike looks like a sad postcard from 2004. The colors are blown out. Your travel buddy’s head is cut off. The famous landmark is drowning in tourists.
Welcome to the wild world of travel photography mistakes — the kind everyone makes, but almost no one talks about.
And don’t worry, this isn’t a judgment zone. I’m an adventure photographer. I shoot in real places, with real weather, real crowds, real altitude, and real “oh no, that cloud looks spicy” moments.
If there’s a way to mess up a photo on the road, I’ve probably watched it happen, or learned the hard way myself.
Because here’s the truth: travel photography isn’t “just point and shoot.” It’s part planning, part patience, part storytelling, and part not being that person blocking the sidewalk for the perfect Instagram angle.
Beginners tend to repeat the same common mistakes in photography over and over, especially when traveling.
From bad lighting choices and awkward compositions to crowd chaos and rookie posing fails, these slip-ups quietly sabotage your shots.
This guide breaks down the mistakes in travel photography to avoid… the obvious ones and the sneaky ones most beginners don’t even realize they’re making.
I’ll show you what’s going wrong, why it happens, and exactly how to level up your photos without hauling a studio in your backpack.
Because your adventures deserve better than “meh” memories.
Let’s make your next trip look as epic as it felt. 🌍✨
Safety & Etiquette Commandments
I love a dramatic photo, live for golden light, and will absolutely hike at sunrise for “the shot.”
But I do not love lightning, flash floods, or being escorted off private property by an annoyed park ranger.
So before we talk about shutter speeds, composition, or how to pose like a travel influencer, we need to cover the unglamorous but essential part of avoiding travel photography mistakes:
Staying safe. Staying respectful. And not becoming a cautionary tale.
Let’s start with the three mistakes that can ruin your trip, your gear, and your dignity.
Mistake #1: Ignoring Weather, Terrain, or Local Conditions
Don’t Be an Idiot in Bad Weather.
If the sky is growling, the wind is throwing tantrums, and the trail looks like a Slip ‘N Slide… that’s not “cinematic.” That’s dangerous.
Every year, people chase dramatic travel photos in:
- Lightning storms
- High winds
- Flash-flood zones
- Icy cliffs
- Desert heat waves
- Coastal swell conditions
And shockingly, nature does not care about your Instagram goals.
Bad weather doesn’t just put you at risk, it also wrecks your image quality.
Harsh light, blown highlights, muddy colors, shaky hands, fogged lenses, and motion blur will absolutely sabotage your photos.
Actionable Fix:
- Check the forecast.
- Know the terrain.
- Respect the conditions.
- If it feels sketchy, it probably is.
No photo is worth risking your safety, or your gear.
Mistake #2: Trespassing or Ignoring Local Rules
Permits Exist for a Reason.
National parks. Private land. Sacred sites. Historic landmarks.
These places have rules, and they are not optional just because you brought a camera.
Common mistakes in travel photography to avoid include:
- Flying drones where they’re banned
- Setting up tripods in restricted zones
- Crossing barriers for a “better angle”
- Shooting in areas that require permits
- Wandering onto private property
And here’s the reality check:
Getting kicked out = no photos. Getting fined = no fun. Getting banned = no return trip.
Not to mention, disrespecting cultural or sacred sites is a fast track to being that tourist nobody likes.
Actionable Fix:
- Look up the rules before you go.
- Ask when you’re unsure.
- Follow posted signs.
Great photos come from respect, not rebellion.
Mistake #3: Blocking Paths & Ruining the Flow
Main Character Syndrome Is Not a Vibe.
You are the star of your adventure. You are not the star of everyone else’s day. This is why influencers and content creators get a bad wrap.
Yet somehow, people love to:
- Stand in the middle of walkways
- Block stairs, trails, and bridges
- Stop crowds for five-minute photo sessions
- Set up tripods in high-traffic areas
Nothing kills travel vibes faster than a human roadblock yelling, “WAIT! I NEED ONE MORE SHOT.”
You’re not just disrupting foot traffic, you’re ruining the experience for everyone around you.
And annoyed locals do not make great background characters.
Actionable Fix:
- Step aside.
- Shoot quickly.
- Be aware of your surroundings.
Your photos should tell a story, not start an argument.
Technical Mistakes of Travel Photography
These are the travel photography mistakes everyone knows about…and somehow keeps making anyway.
You’ve heard the advice, watched the tutorials, and nodded along like, “Yep, I got this.”
And then you get home and realize your photos look like a chaotic scrapbook from 2012.
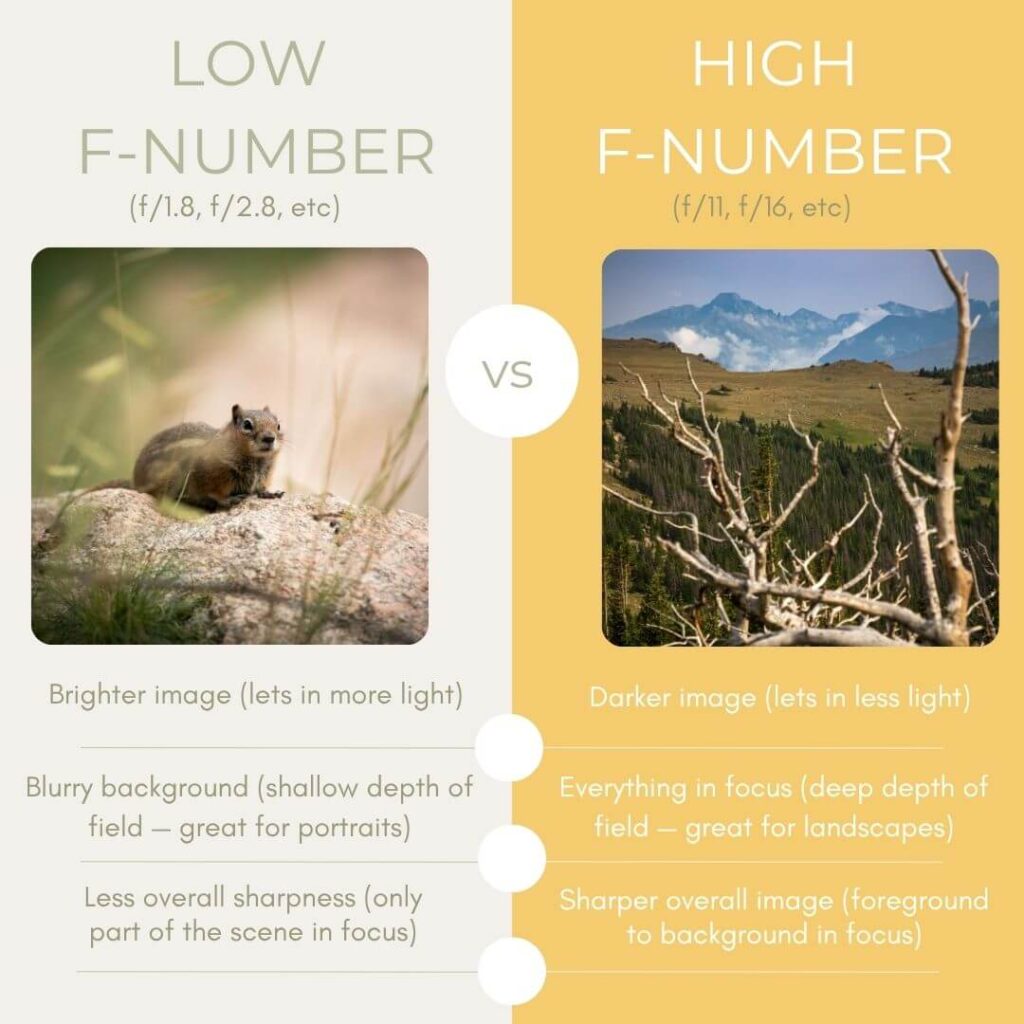
Mistake #4: Shooting Everything on Auto
Your Camera is Smart…Not Psychic.
You’re traveling. The light is changing. People are moving. Your brain is busy navigating, sightseeing, and trying not to get lost.
Auto mode feels safe, like letting your camera take the wheel while you enjoy the ride.
The problem? Your camera doesn’t know what you want. It doesn’t know you’re chasing dramatic skies, creamy backgrounds, or a moody vibe. It just aims for “technically acceptable.”
How to spot it:
Your photos look… fine. Not terrible. Not amazing. Just kind of flat and forgettable.
One simple fix:
Switch to Aperture Priority (A/Av) or Shutter Priority (S/Tv).
Control one creative setting and let the camera handle the rest.
When you feel ready, you can go full manual if you wish and the situation demands it.
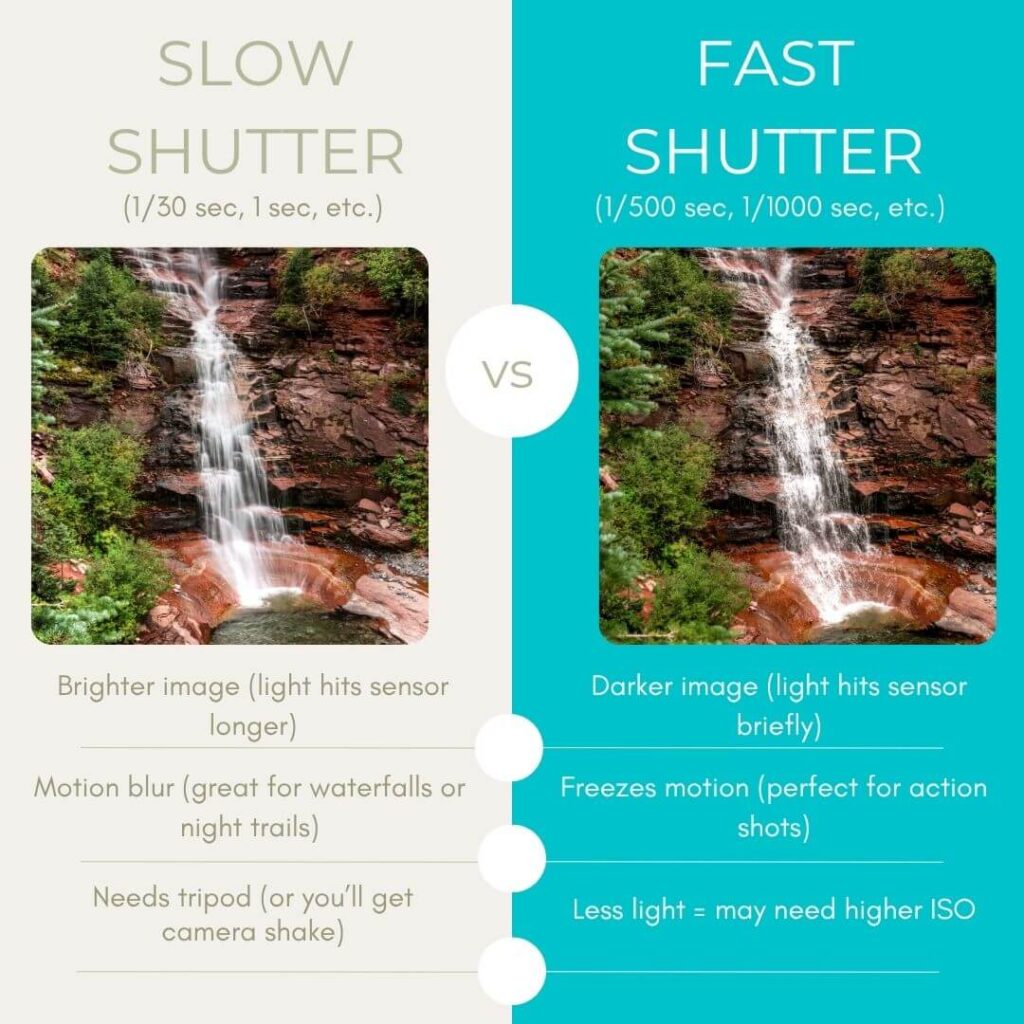
Mistake #5: Blurry Photos
If Blur is Unintentional, It’s Not Artistic. Sorry.
Blur in travel photos mostly happen due to low light, shaky hands, and slow shutter speeds.
And the fact that you’re probably standing on uneven ground while dodging tourists.
How to spot it:
Zoom in on the photo preview. If your subject looks like they were photographed during a mild earthquake, you’ve got blur.
I know it’s tedious, but it’s SO worth it not to miss the shot and regret it later.
simple fix:
- For people: keep your shutter speed 1/125 or faster.
- For movement: 1/250+.
- Brace your arms on a rock or a railing. Exhale slowly. Click with confidence.
Want an example? Here’s a video of me shooting a long exposure waterfall at a slow shutter with no tripod.
Mistake #6: Clipping Highlights & Shadows
If it’s Pure White or Pitch Black, it’s Gone Forever.
Travel lighting is ruthless. You are constantly dealing with bright skies, dark streets, harsh sun, dramatic shadows.
Your camera can’t capture everything at once. So something gets sacrificed
How to spot it:
- Your sky looks like a blank white sheet.
- Your shadows look like a black hole.
- No detail. No texture. No saving it.
One simple fix:
Expose for the highlights.
You can lift shadows later, but once the sky is blown out, it’s gone.
Mistake #7: Overediting Like a Neon Acid Trip
Your Photos Shouldn’t Glow in the Dark.
Why it happens:
- Sliders are fun.
- Saturation feels powerful.
- And you want your photos to “pop.”
So you push everything… too far.
How to spot it:
- Skin looks radioactive.
- The sky is turquoise.
- Grass is glowing.
- Your friends ask, “Is this a filter?”
One simple fix:
Edit for mood, not maximum chaos. If it looks fake, it probably is.
If you want to get more into editing for your photography style, check out my editing guide!
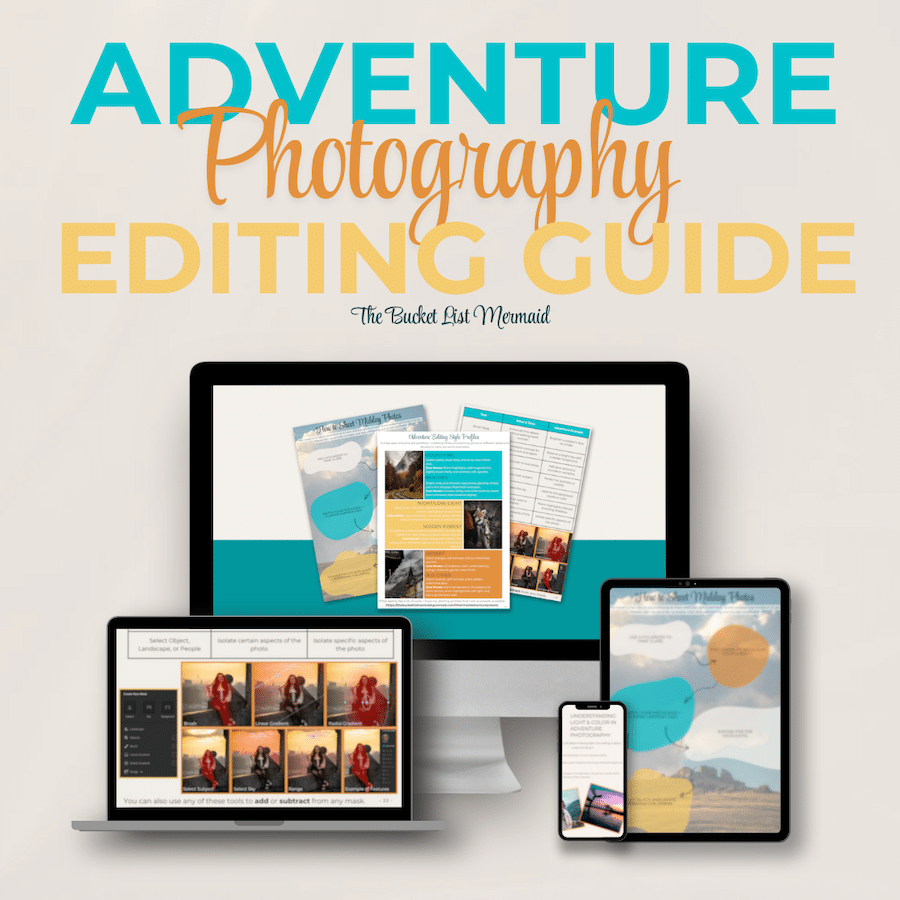
Not ready to commit? Here’s an editing guide with some great tips for travel!
Mistake #8: Cranking ISO for No Reason
Grain is Not a Personality Trait.
When low light hits? You panic. You crank ISO instead of adjusting shutter speed, aperture, or your position.
How to spot it:
- Your photo looks like it’s made of sand.
- Details are mushy.
- Everything feels crunchy.
One simple fix:
Use the lowest ISO you can. Stabilize yourself or find more light before turning your image into digital oatmeal.
If you did get some grain? Don’t cry, my cute little photographer! If you shot in RAW (more on that later), you can use Lightroom’s “Denoise” tool and it is pure magic!
You can see me use Denoise in my live editing demos. Here’s an example of me naturally editing a photo.
Mistake #9: Not Shooting in RAW
JPEG is fine… until you need to fix literally anything.
I used to think that RAW sounds intimidating. JPEG feels simple.
Plus, your camera probably defaulted to it anyway. No big deal.
So you stick with JPEG and assume editing will magically fix everything later.
Spoiler: it won’t.
How to spot it:
You try to adjust exposure, colors, or shadows, and suddenly your photo falls apart. Highlights get crunchy. Colors look weird. Details disappear.
That’s because JPEG files throw away a ton of information to stay small and shareable.
One simple fix:
Switch your camera (or phone app) to RAW or RAW + JPEG.
RAW files give you way more flexibility when editing, especially for tricky travel lighting like bright skies, dark streets, or dramatic sunsets.
More data = more control = better photos.
Just make sure to bring an extra SD card because RAW files are wayyy bigger than JPEG files.

Travel Photography Composition Mistakes Tourists Make
Now we’re getting into the sneaky stuff: the travel photography mistakes beginners don’t even realize they’re making.
Your camera works. Your destination is stunning. So why do your photos still feel… meh?
Because composition is doing the heavy lifting, and most people never train it.
Let’s fix that.
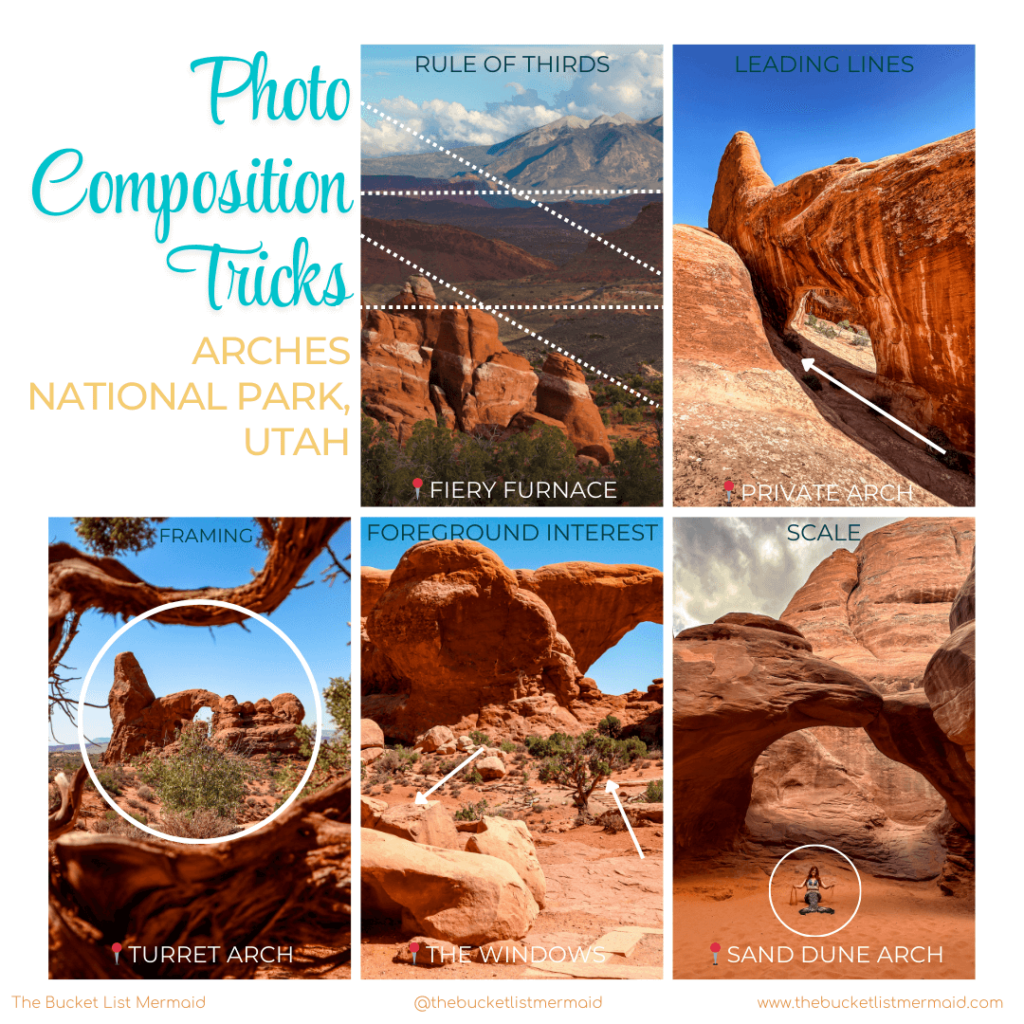
Mistake #10: Centering Everything
Your Subject isn’t the Only Thing in the Frame.
When you’re nervous, excited, or rushed, your brain goes: “Put the thing in the middle. Done.”
It feels safe and balanced…but it’s also boring.
How to spot it:
- Your subject is smack in the center every time.
- The background feels random.
- The photo doesn’t tell a story.
One simple fix:
Use the rule of thirds. Or break it intentionally.
Place your subject off-center and let the environment help tell the story.
Mistake #11: Ignoring Leading Lines
Your World is Full of Arrows. Use Them.
Most people see scenery, but photographers see direction.
Trails, roads, bridges, fences, rivers, boardwalks, and staircases? They all guide the viewer’s eye.
How to spot it:
Your photo feels flat, there’s no sense of depth or movement, and the eye doesn’t know where to look.
One simple fix:
Position yourself so lines lead toward your subject.
Let the path, river, or skyline pull people into the photo.
Direction = drama.
Mistake #12: Shooting Eye-Level Every Time
Crouch. Climb. Commit.
Eye-level feels natural. It’s easy!
Well, it’s also predictable.
How to spot it:
Every photo feels the same, no matter how epic the location.
Simple Fixes:
- Get low for power.
- Get high for context.
- Move your body, not just your zoom ring.
Different angles = different stories.
Mistake #13: Cropping Off Feet, Heads, or Landmarks
Amputation is Not a Composition Style.
Why it happens:
- You’re rushing.
- You’re zoomed in.
- You didn’t check the edges.
How to spot it:
- Feet vanish.
- Heads disappear.
- Landmarks get sliced in half.
One simple fix:
Scan the edges of your frame before clicking.
If anything, go too wide because you can always crop later.
Your subject deserves their full body. And so does that mountain.
Mistake #14: Flat Photos With No Depth
Your Scene Needs Layers, Not Just Vibes.
When you’re staring at a massive mountain, waterfall, canyon, or skyline, it’s easy to forget what’s happening inside the frame.
You focus on the big view… and ignore everything else.
So you end up with a photo that feels wide, but weirdly empty.
How to spot it:
- Your subject looks distant.
- The scene feels flat.
- There’s no sense of scale or immersion.
simple fix:
Build your shot in three layers:
• Foreground – rocks, plants, railings, people, trails
• Middleground – your main subject
• Background – mountains, skyline, sky, horizon
Those layers pull the viewer into the scene instead of leaving them staring at it from the outside.
Depth = drama.
Drama = better travel photos.
Mistake #15: “There Is No Subject”
If Your Eye Doesn’t Know Where to Look, Neither Will Anyone Else.
Big views are overwhelming. Mountains. Skylines. Waterfalls. City streets. Everything looks cool, so you try to capture all of it.
This is often the biggest mistake I see when critiquing photos, even with more advanced photographers. It’s a sneaky one.
The problem?
When everything is the focus, nothing is.
This is especially an issue with landscape photography. You see a mountain and you photograph it. Cool. But what is your subject? Where do I look?
I did this a TON as a beginner and didn’t even know I was doing anything wrong.
You end up with a photo that’s technically fine… but emotionally forgettable.
How to spot it:
Show your photo to a friend and ask: “What’s the subject?”
If they hesitate, squint, or say, “Uh… the vibe?”
Yeah. That’s not great.
Simple fix:
Give the viewer a visual anchor:
• A person
• A building
• A trail
• A rock
• A boat
• A streetlight
• A waterfall
• A leading line
Your scene needs a hero. The background can be epic, but the subject tells the story.
Crowd & Timing Mistakes
You picked an epic destination. The light is decent. Your camera is ready.
So why do your photos still look like a Where’s Waldo page?
Because crowds and timing can absolutely sabotage your shots if you don’t play them smart.
This is a massive issue with travel and adventure photography!
Mistake #16: Shooting at Peak Tourist Hours
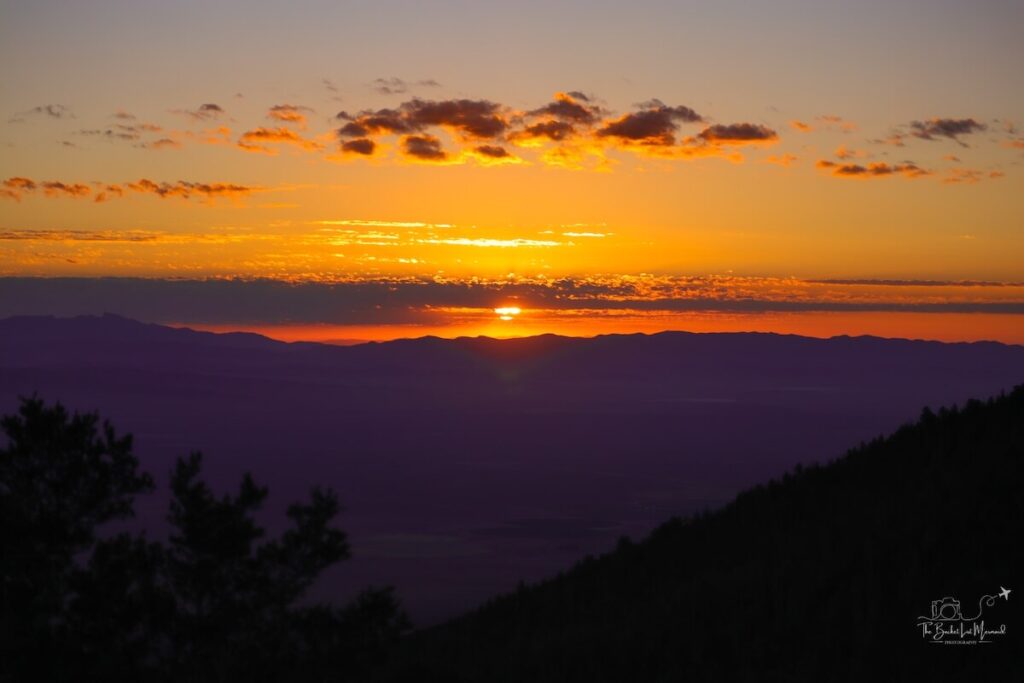
Sunrise Is Your Secret Weapon.
I get it. I HATE getting up early. Plus, you are on vacation!
It’s tempting to sleep in. So, you roll up mid-morning. Guess what? So does everyone else.
Tourist hotspots fill up fast, especially in cities, national parks, and famous viewpoints. By noon, it’s less “cinematic travel moment” and more “crowded theme park.”
How to spot it:
- Your background is packed.
- People are everywhere.
- The vibe feels chaotic, not magical.
One simple fix:
Shoot early (recommended) or late.
Sunrise gives you:
- Softer light
- Fewer people
- More breathing room
In cities, early mornings mean empty streets. In nature, it means calm trails and golden light.
Your alarm clock is annoying, but your photos will thank you.
Still can’t get up or stay up late? At the very least go during popular meal times. It won’t thin the crowds dramatically, but it helps.
Mistake #17: Trying to “Remove” Crowds in Editing
Photoshop Isn’t a Magic Wand.
You didn’t beat the crowds and now your dream shot has 47 strangers in it. So you think, “I’ll just edit them out.”
That’s bold and optimistic…and usually disastrous.
Trust me, I’ve tried to edit people out and usually get really weird results, especially if I was using generative AI.
How to spot it:
- Weird ghost shapes.
- Blurry patches.
- Suspicious empty spaces where humans used to be.
- Or it creates other humans from nothing and gives me nightmares.
Generative AI can be good for small distractions, but not changing the entire scene.
One simple fix:
Solve it in-camera:
- Change your angle
- Use people as foreground
- Shoot tighter
- Wait for gaps
- Embrace silhouettes
Crowds don’t have to ruin your photo, but bad editing definitely will.

Mistake #18: Waiting for the Perfect Moment That Never Comes
Chaos Is Part of Travel.
I’ve seen a lot of photographers say, “You need to be patient!”
I agree with that, but only to a certain extent, especially in travel photography.
I get it. You want the flawless shot. Perfect light. Perfect pose. Zero people. Zero movement.
So you wait….and wait…and miss everything.
How to spot it:
You have lots of “almost” shots… and no real memories.
One simple fix:
Shoot the moment you’re in.
Travel isn’t a studio. It’s messy, it’s loud, and it’s alive! That’s what makes it fun!
Movement, energy, and real-life chaos often tell a better story than perfection ever could.
A good photographer knows when to wait and when to embrace the chaos of travel.
Posing & People Mistakes (For You or Your Travel Buddy)
You traveled all this way and the location is taking your breath away! Of course you need a picture! It’s for the bucket list!
So why do your photos still feel… awkward?
Because posing in real-world travel settings is a whole different game than posing in a studio.
And let’s be honest, most of us (including me) aren’t models. I’m about as photogenic as a goat, and I’m proud. But here’s how I fixed it:
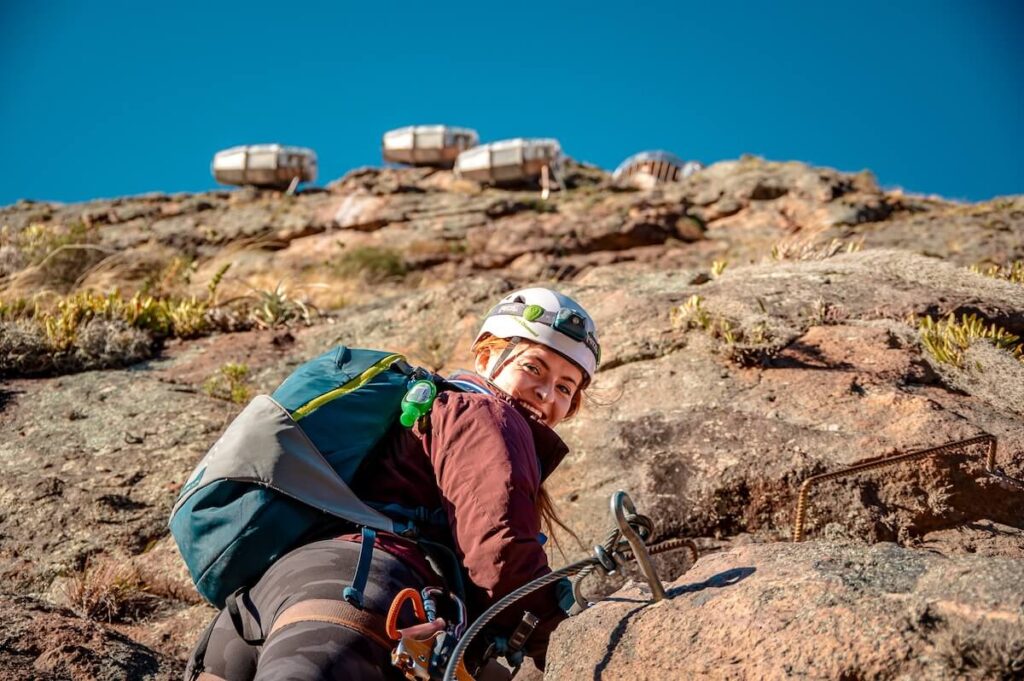
Mistake #19: Stiff, Awkward Poses
If it feels weird, it probably looks weird.
The camera comes out and suddenly everyone forgets how to exist like a normal human. Arms freeze. Smiles get forced. Bodies go full mannequin mode.
If I see another picture with a group and their hands on their waist, I may puke.
How to spot it:
- Your subject looks uncomfortable.
- The pose feels unnatural.
- The vibe is more “school picture day” than “epic adventure.”
Simple fix:
Add movement and have FUN!
- Walk toward the camera
- Spin
- Lean on a railing
- Look around
- Interact with the environment
Motion creates energy. Energy creates better photos. If you are having fun and being authentic to yourself, those are always the best pictures.
Read More – I go over posing and tricks in my travel photoshoot guide.

Mistake #20: Blocking the Scenery With Your Body
You’re Not the Only Star Here.
You step right in front of the view and strike a big pose.
There is big presence but zero context.
Now the epic location feels… irrelevant.
How to spot it:
- Your body covers the best part of the scene.
- The background feels wasted.
- The location loses its magic.
Simple fix:
Pose with the landscape, not against it.
- Stand off-center
- Use negative space
- Show scale
- Let the scenery breathe
You’re part of the story, not the whole story. This is where the Rule of Thirds can work very well!
Mistake #21: Wearing Outfits That Clash With the Environment
Neon Pink vs Ancient Stone.
You dress for comfort or trends, not the location.
So now your outfit is screaming while the scenery is whispering.
What you wear matters. Sorry…
How to spot it:
- Your clothes distract from the photo.
- Colors clash.
- Nothing feels visually cohesive.
simple fix:
Think color harmony:
- Earth tones for nature
- Neutrals for cities
- One bold pop, not five
Your outfit should complement the scene, not fight it.
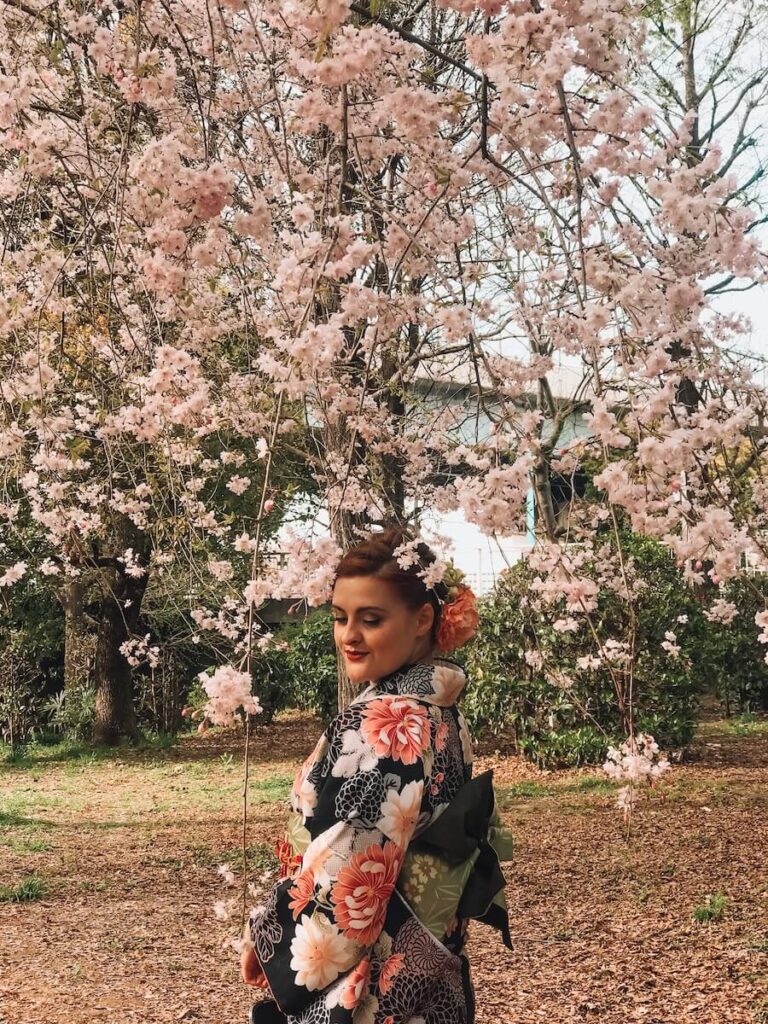
This is slightly controversial, but I try to dress in local or historical clothes (with the utmost respect) if possible and appropriate.
Me in normal clothes in Tokyo? Meh. Me in a kimono in Tokyo? Pure magic!
Mistake #22: Letting a Stranger Take Your Photo Without Any Direction
Hope Is Not a Photography Strategy.
This happens with travel all the time.
You’re solo or your travel buddy is busy. You want one nice photo of yourself in front of something epic.
So you hand your camera to a random human and pray.
I’ve done this more times than I can count and rarely is it successful.
Issues I’ve Run Into
- Your head is cut off.
- The horizon is crooked.
- You’re tiny in the frame.
- The background is a chaotic mess.
One simple fix:
Set them up for success:
- Frame the shot first (show them exactly what you want)
- Lock your focus so it doesn’t hunt
- Use burst mode so they can’t mess up every shot
- Point to where you’ll stand
- Ask for one wide, one medium, one close
- Then take a photo of them. People are more likely to get a great shot for you if you get a great shot for them.
Most people want to help, they just don’t know how to shoot.
Give them a game plan, and suddenly your odds of a usable photo skyrocket.
Don’t feel comfy giving your camera to a stranger? Set up a tripod and LOCK it down so no one runs away with it.
Travel-Specific Photography Mistakes
These aren’t beginner camera mistakes. These are travel mistakes.
They are the kind that happen when you’re tired, excited, navigating new places, and trying to capture everything at once.
Let’s fix them before your trip turns into a logistical circus.
Mistake #23: Not Scouting Locations First
Google Maps is your friend.
You assume the spot will be obvious. Maybe you just trust the vibe. Then, you show up and hope for the best.
THEN:
- Then the sun is in the wrong place.
- The entrance is blocked.
- And the “viewpoint” is actually behind a fence.
I am very guilty of this because I am a type-B spontaneous photographer. It’s kicked me in the 🍑 more times than I can count.
How to spot it:
- You’re wandering in circles.
- The light feels off.
- You can’t find the angle you imagined.
Simple fix:
Scout before you go:
- Check sun direction
- Look for entrance points
- Study view angles
- Save pins in Google Maps
Five minutes of planning saves you an hour of confusion. This is especially important if you are hiking to your photo spot.
It’s lowkey embarrassing how many times I’ve involuntarily four-wheeled and hiked for three hours only to have the sun or a fence be right in my photo. Don’t be me.
Mistake #24: Carrying Too Much Gear
Your Backpack Shouldn’t Weigh as Much as Your Soul.
This is a sneaky mistake, especially in travel and nature. You pack for every possible scenario.
- Wide lens.
- Zoom lens.
- Prime lens.
- Tripod.
- Drone.
- Snacks for a small army.
Now you’re exhausted before the hike even starts.
Read More – Here are the best of the best travel photography backpacks!
How to spot it:
- Your shoulders hurt.
- You move slower.
- You’re too tired to actually enjoy shooting.
One simple fix:
Bring what you’ll actually use. Be ruthless when packing, especially if you are exploring or trekking all day.
Here’s what I’ve learn is the essentials:
- One camera
- One versatile lens
- A lightweight tripod (if needed)
Mobility beats gear hoarding. Always.
My Go-To Travel Cameras: Canon EOS M50 mark II | Canon EOS 5D mark IV | What’s in My Camera Bag?
Mistake #25: Forgetting to Enjoy the Moment
Put the Camera Down Sometimes.
I don’t care what you say, everyone has felt this. You feel pressure to document everything.
Every view…Every step….Every angle.
So you experience your trip through a screen.
I am guilty of this one! It is a struggle for me to turn my photography brain off and just enjoy my bucket list!
How to spot it:
- You’re stressed.
- You’re rushing.
- You remember the photos… but not the feeling.
Simple fix:
Take the shot. Then take a breath.
Then once you get the shot, just put the camera away!
Let yourself experience the place, not just record it.
Your memories and bucket list deserve attention too.
Read More – Dealing With Burnout in Photography

Pro Tips That Will Save Your Time, Your Photos, and Your Sanity
Because great travel photography isn’t just about creativity, but also about knowing the rules, using the right tools, and protecting your gear.
When Tripods Are Banned
Museums, historic sites, busy city areas, and some national parks don’t allow tripods.
Read More – Photographing Museums | Photographing Zoos
Your move:
Use walls, railings, backpacks, or the ground for stability, and bump your ISO slightly instead of risking blur.
Drone Laws by Region
Many countries, national parks, and cities ban drones entirely.
Your move:
Check local regulations before you travel.
No permit = no flight = no fine.
Best Lenses for Cities vs Landscapes
Cities = tight spaces + tall buildings
Nature = wide views + distant subjects
Your move:
• Cities: 24–70mm
• Landscapes: 16–35mm or 24mm
• Wildlife/adventure: 70–200mm+
One versatile lens beats five unused ones.
Read More – Best Lenses For Travel Photography
Phone Photography Hacks
Your phone is more powerful than you think.
Your move:
- Clean the lens
- Tap to set focus
- Use gridlines
- Lower exposure for skies
- Shoot in RAW (if available)
Protecting Your Gear on the Road
Travel is rough on cameras.
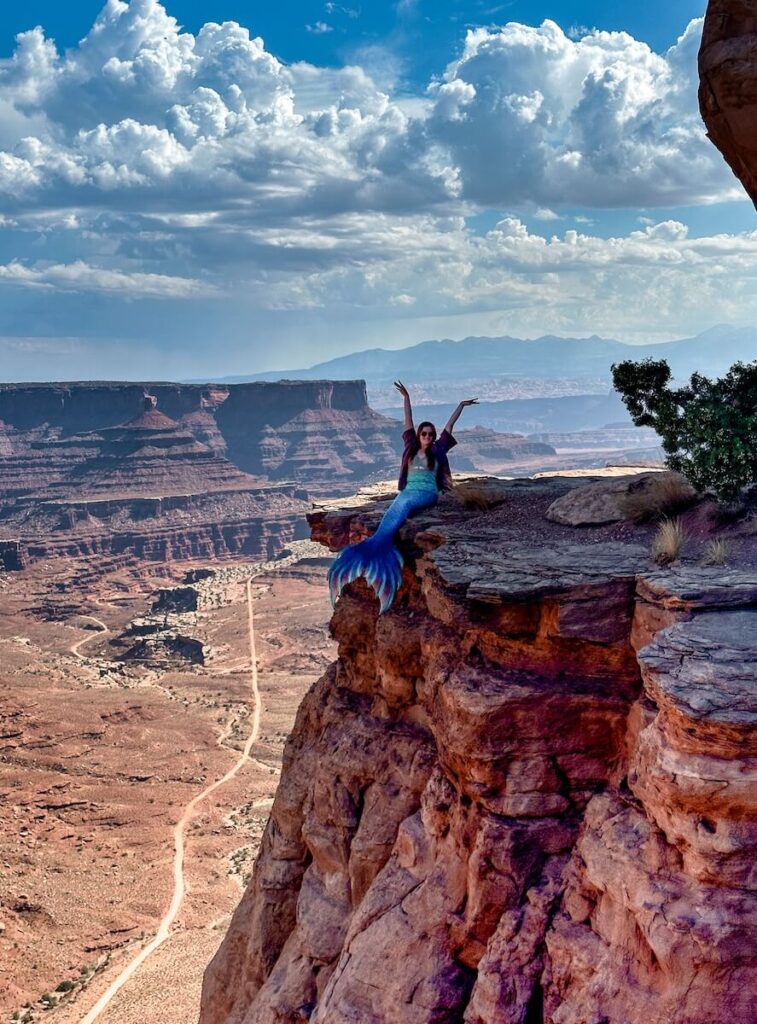
As a full-time RVing mermaid photographer, I have really put my camera gear through the ringer.
Your move:
- Use padded bags
- Pack silica packets for humidity
- Avoid extreme heat
- Lock or strap your camera/tripod in crowds
- Grab a rain cover
- Never leave gear unattended and be careful when you’re camera is on a tripod

Quick Wins to Level Up Your Travel Photos
📸 Chase better light
Early mornings and golden hour will save your shots (and your editing time).
🌄 Use the environment
Foreground, leading lines, and real subjects turn “pretty” into “powerful.”
🧍♀️ Move naturally
If it feels stiff, it looks stiff. Walk, lean, spin, interact.
🕰 Time it right
Beat the crowds. Shoot early. Adapt when chaos shows up.
🧠 Think before you click
Ask yourself: What’s the subject? Where should the eye go? How can I guide the eye and tell a story?
🎒 Pack smart
One great lens beats five heavy regrets.
🌦 Respect conditions
No photo is worth getting hurt, fined, or hated.
Final Thoughts: Shoot With Intention, Not Perfection
Here’s the thing about travel photography:
It’s not about flawless lighting. It’s not about perfect poses. And it definitely isn’t about having the most expensive gear in your backpack.
It’s about intention.
More importantly, it’s about slowing down long enough to notice the light. It’s about stepping to the side instead of blocking the trail.
And it’s about choosing shots that mean something instead of just filling your camera roll.
The best travel photographers aren’t reckless. They’re aware.
They don’t rush every shot and they don’t fight the environment. They work with it.
You don’t need more equipment. You need more patience, more curiosity, and the guts to move your feet, change your angle, and try again.
Because the world is already epic. Your job is just to tell its story better.
So go explore, go create, and go chase the light!
More travel Photography Tips
How to Become a Travel Photographer (and Actually Make Money With Your Travel Photos)
Travel Photography Hashtags: 500+ Ideas & Ready-to-Use Sets
Hiking Gear Checklist: What to Bring for Comfort, Safety & Great Trail Photos

Waterfall Photography 101: How to Nail Every Shot (Even If You’re a Beginner)
More Travel Resources
Adventure Bucket List Resources
I am here to help your travel adventures go as smoothly as possible! That way you can check off that bucket list with minimal complications and spending!
SHOP – Shop the best adventure gear and essentials on my Amazon Storefront – handpicked by a full-time adventuring mermaid!
AIRFARE – There are a few I use, but Aviasales is normally my go-to for flights without any extra fees or markups.
ACCOMMODATION – My two favorites are Booking.Com for hotels and VRBO for rentals.
GUIDED TOURS – If you are looking for quick and easy tours, check out GetYourGuide and Viator.
MULTI-DAY TOURS – For more in-depth tours that span several days, TourHub has many great options with reputable travel companies. Use my code (ALEXANDRA1GURU) for up to 5% off your next bucket list adventure.
TRANSPORTATION – You can either rent a car yourself with Discover Cars or do a guided bus tours like Big Bus Tours.
SIM CARDS – Avoid expensive roaming charges with an eSim card with Airalo. Personally, I prefer wifi boxes, and recommend WiFi Candy (get 10% of with the code THEBUCKETLISTMERMAID).
TRAVELER’S INSURANCE – Check out VisitorsCoverage for affordable insurance plans. If you are a nomad or remote worker, I would check out SafetyWing.
SEE MORE – Adventure Resources | Photography Resources
See Some Photos You Like?
Check out my full photography page for a full gallery and prices.