How to Play With Light in Travel Photography and Create Magical Shots
This website contains affiliate links from trusted partners. If you purchase through a link on this site, I may earn a commission at no extra cost to you. As an Amazon Associate, I earn from qualifying purchases. See my Privacy Policy and Disclosure for more information.
Written by Naomi Phillips
Most new photographers quickly learn that light can either be your best friend or a photo-ruining enemy.
I’ll let you in on a little secret…
You can make friends with light when you know how to work with it, and this often means getting creative and having fun!
Whether you’re taking photos of nature, landmarks, objects, or people, playing with lighting and exposure can result in spectacular photos – so spectacular that you’ll look at them and think, “I’m not just a photographer. I’m an artist.”
And good news – you can do these techniques even when you are traveling!
If you’re here to find out how to transform ordinary travel shots into eye-popping masterpieces using just your camera and a little illumination, keep reading.
We’re about to get lit!
Key Takeaways
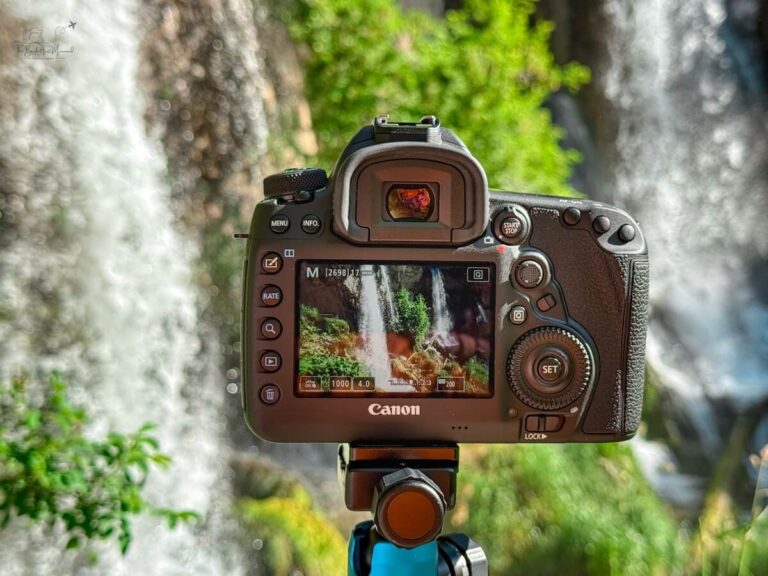
- 🏆Triumph with a tripod: You’ll need a tripod if you want to play with light and exposure, as this often requires longer exposure times.
- 📸Familiarize yourself with your camera’s manual settings: You’re going to need to adjust your ISO, shutter speed, and metering mode, so find out where these are in your camera’s manual settings.
- 🧪Be prepared to experiment: Getting your settings right for the conditions you’re shooting in might be tricky at first, so make small adjustments to your settings until you get the results you want.
Lighting Photography Tricks with a Lamp
Let’s start with one of the easiest ways to get creative and have fun with lighting: using lamp light.
Big or small, lamps create a pocket of light that adds drama, and you don’t have to splash out on expensive studio equipment to get this effect.
You can use any household lamp, whether it’s an Anglepoise for focused beams, a vintage lamp with a bare bulb for moody shadows, or a bold floor lamp with a big fabric shade for soft, diffused light.
It’s up to you whether to move the lamp or to keep it where it is and work with what you’ve got.
The good news is that lamp light photos don’t need to be crisp and sharp unless you want them to be.
When it comes to this type of lighting, a little noise (the graininess that happens when you shoot with a high ISO) can add to the effect.
How to Use a Lamp for Unique Lighting
To use lamp light in your photos, turn off other lights in the room, place your subject in the light pocket created by the lamp, and start shooting.
Remember to experiment with different angles and settings to get the best photos!
How to Use Lamps While Traveling
When you’re on the road, hotel rooms and Airbnbs can double as makeshift studios.
That quirky bedside lamp? It can add moody shadows.
A reading light in a hostel bunk? Perfect for focused beams.
Always ask before moving lamps, but don’t be afraid to get creative with whatever lighting your accommodation offers. It’s travel-proof lighting at its finest.
My Go-To Travel Cameras: Canon EOS M50 mark II | Canon EOS 5D mark IV | What’s in My Camera Bag?
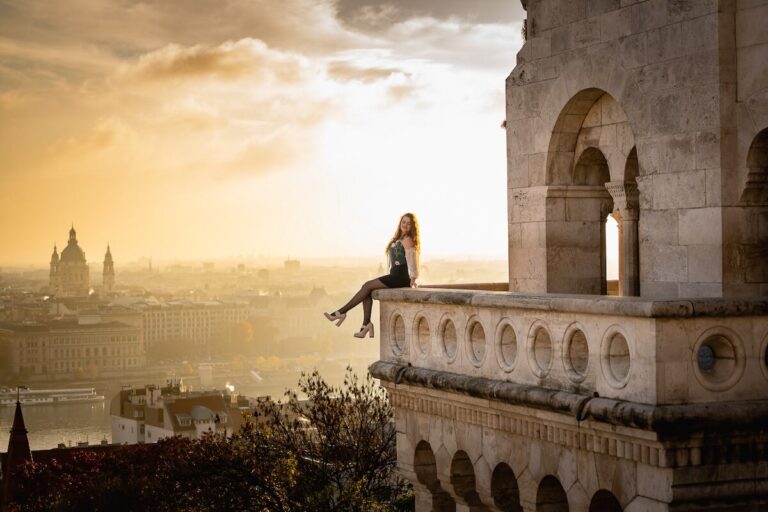
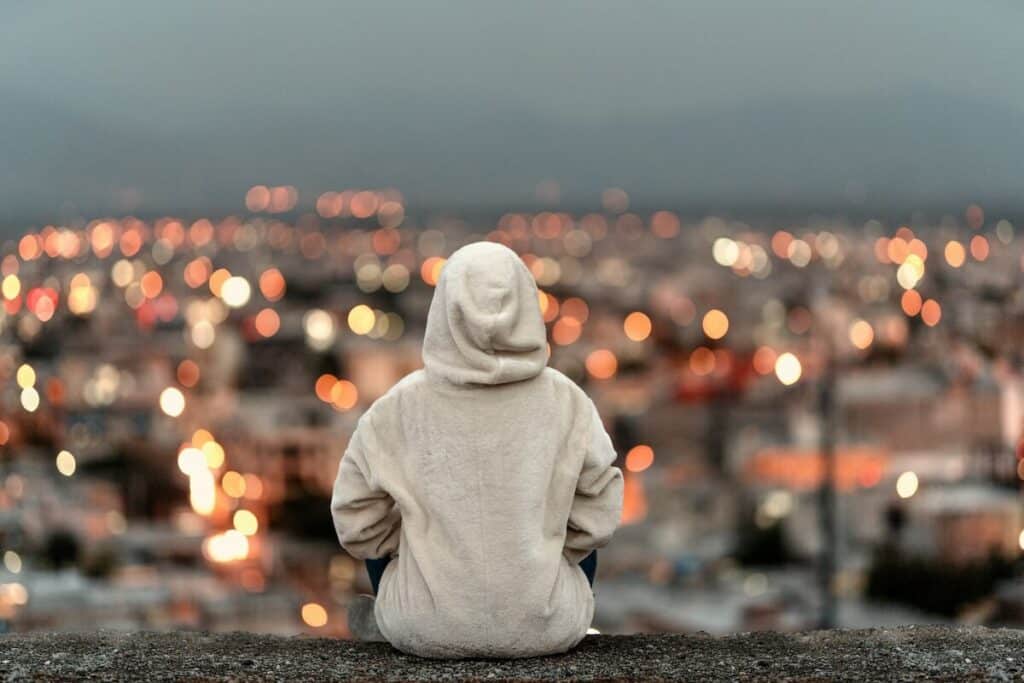
Playing with Partial Silhouettes
Unlike full silhouettes, where the subject is a dark shape against a light background, partial silhouettes allow some light on the subject.
This allows you to capture some, but not all, the details, creating more mood than mystery.
How to get Silhouette shots
Initially, you’ll want to practice indoors, as it can be easier than shooting outdoors. Once you’ve got the hang of it, feel free to experiment outside.
Follow these easy steps to start taking amazing partial silhouette photos:
- Open your camera settings and change the metering mode to spot metering to expose for the light source in the background.
- Choose an aperture between f/5.6 and f/11.
- Start around f/5.6, but if you’re indoors you may need to go wider (like f/2.8) to get enough light.
- Place your subject in front of a window, ensuring that some light highlights certain details and that they’re isolated to create a proper outline.
- Take a photo.
Check your photo before taking more, as you may want to adjust the ISO setting to better suit the light conditions.
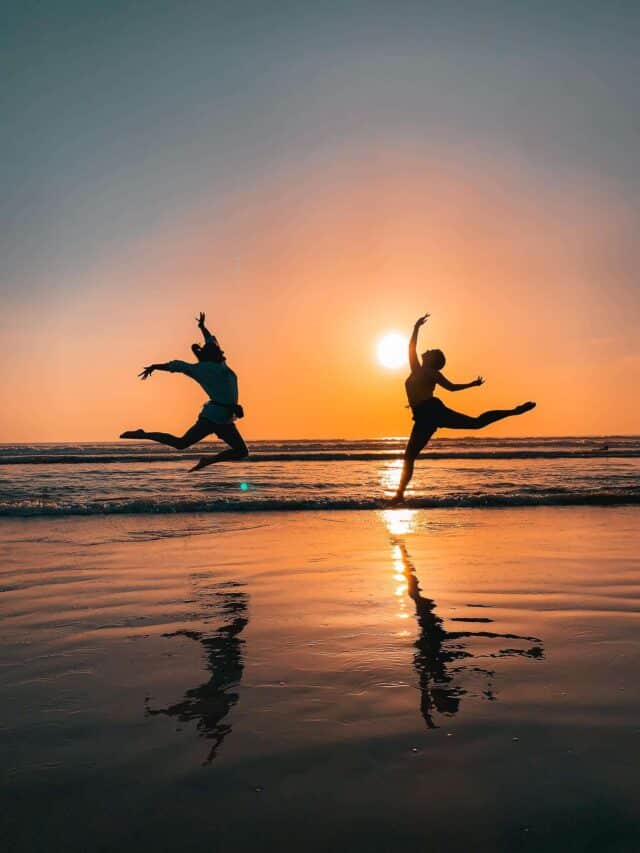
Travel-Worthy Silhouettes
This technique can make for some killer travel shots! In fact, one of my favorite sunrise shots was taken of my best friend and I jumping on a beach in Florida.
Sunrises and sunsets on beaches, mountains, or city rooftops are some of the best backdrops for silhouettes.
Pose your travel buddy jumping, doing yoga, or just standing against the horizon.
These shots are simple to capture but pack major wanderlust vibes and they scream adventure!
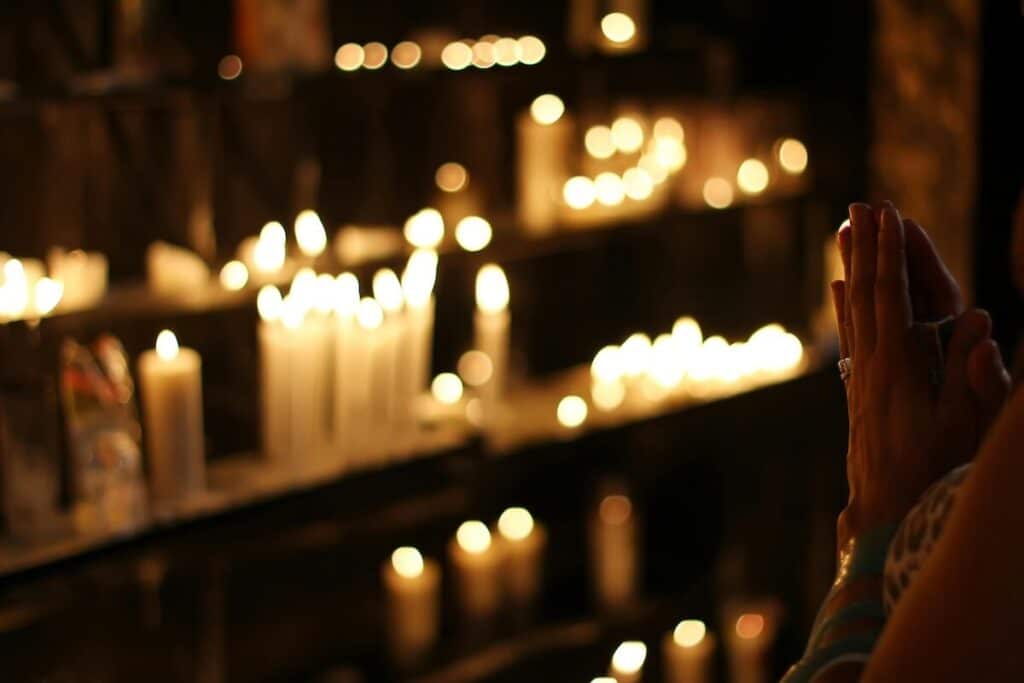
Capturing the Magic of Candlelight
The warm, soft glow of candlelight makes you feel like you’re in a romantic novel, and it brings ambience, old-world charm, and emotion to photographs.
Sadly, too many photographers either ignore candles as a light source or use them as props in rooms lit with electric lights.
How To Photograph with Candles
While you shouldn’t be afraid to be creative and have fun with candles, remember to use a tripod, or you’ll end up with blurry, out-of-focus images.
Start using candlelight in your photos with these tips:
- Use a wide aperture lens, such as 50mm f/1.8, if possible.
- Mount your camera on your tripod.
- Open the camera settings, choose an ISO between 400 and 500, and set the shutter speed to 1/100.
- If your photo still looks too dark, slow down your shutter speed or bump your ISO higher.
- Position the subject carefully – if you’re photographing a person, consider positioning the candle or candles near their eye level to illuminate their face evenly.
- Set your camera to meter off your subject so their face isn’t lost in the shadows
- Check the whole frame and reposition the subject if you think you could get the shadows to be more flattering.
- Start shooting!
Read More – Best Lenses for Travel Photography
If you want a little more light in your photos, consider using a few more candles in the background or near your subject.
Another option is to use reflectors positioned to reflect more light onto your subject.
Using Candlelight Abroad
Travel dinners lit only by candles (hello Santorini tavernas or Paris cafés) make for dreamy, intimate shots.
Or think temples, churches, lantern festivals, or campfire nights.
Anywhere you find candles on your adventures, you’ll have a chance to capture that warm, moody glow that instantly transports viewers.
Read More – Best Travel Photography Hashtags to Use
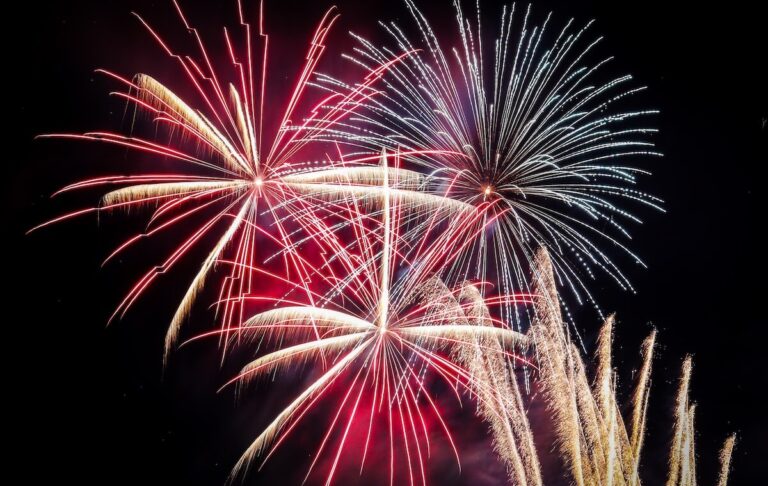
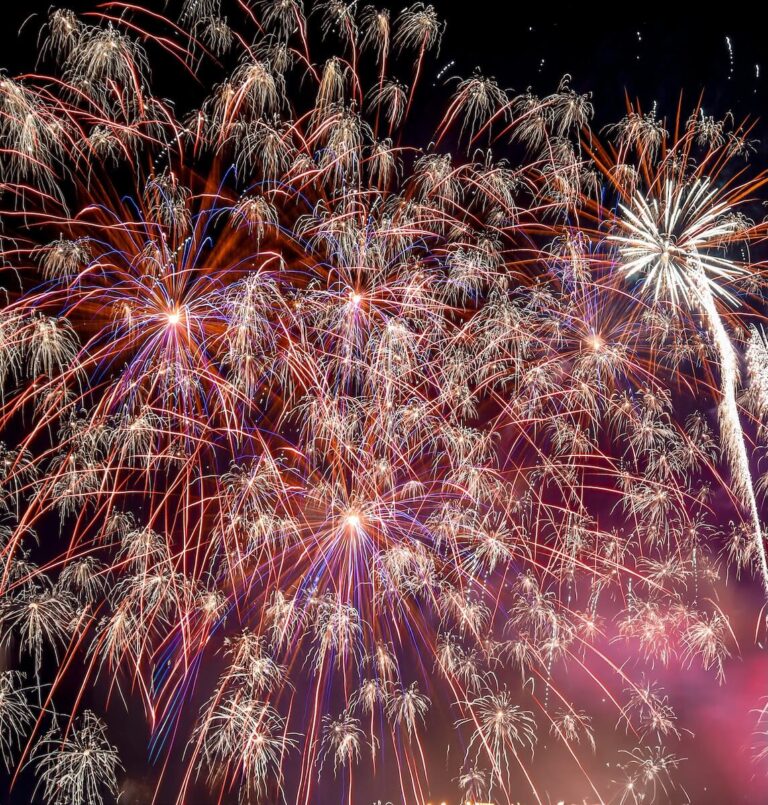
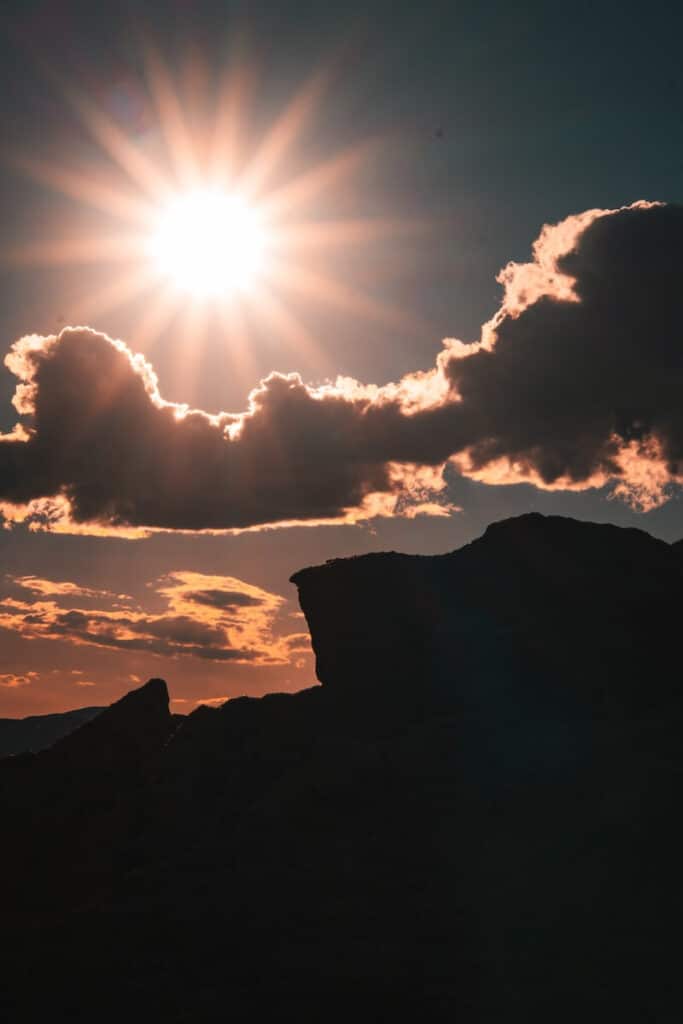
Creating Stunning Starbursts
Everyone needs a guiding star, and with this little trick, you can create one or more starbursts in your photos.
Basically, the idea is to turn the points of light in the image into starbursts. These points of light can be pretty much anything – from the sun to streetlights, and from a porch light to car headlights.
The important things to remember are that diffused or soft light won’t create starbursts (no matter how many times you adjust your camera settings), and that you’ll get the best results if you use a tripod.
How to Create Starbursts in Your Photos
Once you’ve found the light source you want to use, follow these steps to create stunning starbursts in your photos:
- Crank your aperture up to f/16–22. The higher the number, the sharper those star rays get.
- If you’re shooting in low light, choose an ISO around 400 and a shutter speed of 1/5, or if you’re shooting outdoors, choose a shutter speed of 1/100.
- At night, don’t be afraid to slow your shutter and use a tripod.
- Shooting outdoors during the day and using the sun as a point of light?
- DO NOT look at the sun through your viewfinder! Use the screen on the back of the camera or simply point it in the general direction and hope for the best – this might take some experimenting.
- If you’re shooting outdoors and using the sun as a light point, position the subject so that the sun peeks out from behind your subject, as this makes the sunlight less harsh and offers a better starburst.
Whether you make them the focal point or not, starbursts add sparkles to your photos.
Starbursts on the Road
Travel is full of point lights: street lamps in Rome, neon signs in Tokyo, headlights in New York, or even the setting sun peeking through mountain peaks.
Use a high aperture to turn those into magical starbursts that add cinematic flair to your adventure shots.
Using Fairy Lights for Spellbinding Bokeh
Bokeh is like starbursts on steroids, and it can turn an ordinary photo into something magical.
By placing fairy lights behind or around your subject, you can blur them into soft, glowing orbs that add depth, warmth, and a dreamy, almost storybook-like quality to your images.
How to Create Bokeh
To create a bokeh effect using fairy lights, follow these steps:
- Choose your fairy lights. Warm white or soft yellow tones work best for a dreamy glow, but you can also experiment with colored lights for a variety of fun effects.
- Set up your scene by draping or hanging up the lights in the background, or wrapping them around nearby objects.
- Use a wide aperture (f.1.8 or f/2.8) to get a shallow depth of field.
- Make sure your subject is sharp while the lights blur into the background.
- Shoot in low light or dusk, as dim lighting helps the fairy lights stand out beautifully.
- Experiment with different distances, angles, and arrangements to create unique effects.
If you want to make your bokeh more pronounced, increase the distance between your subject and the fairy lights.
The further away the lights are from your subject and closer to the background, the larger and softer the orbs will appear.
Travel Bokeh Magic
From Christmas markets in Europe to night bazaars in Asia, fairy lights are everywhere when you travel.
Hang them around your camper van, frame your tent under the stars, or capture them behind your subject for an instant travel-magazine feel.
It’s one of the easiest ways to add an adventurous sparkle.
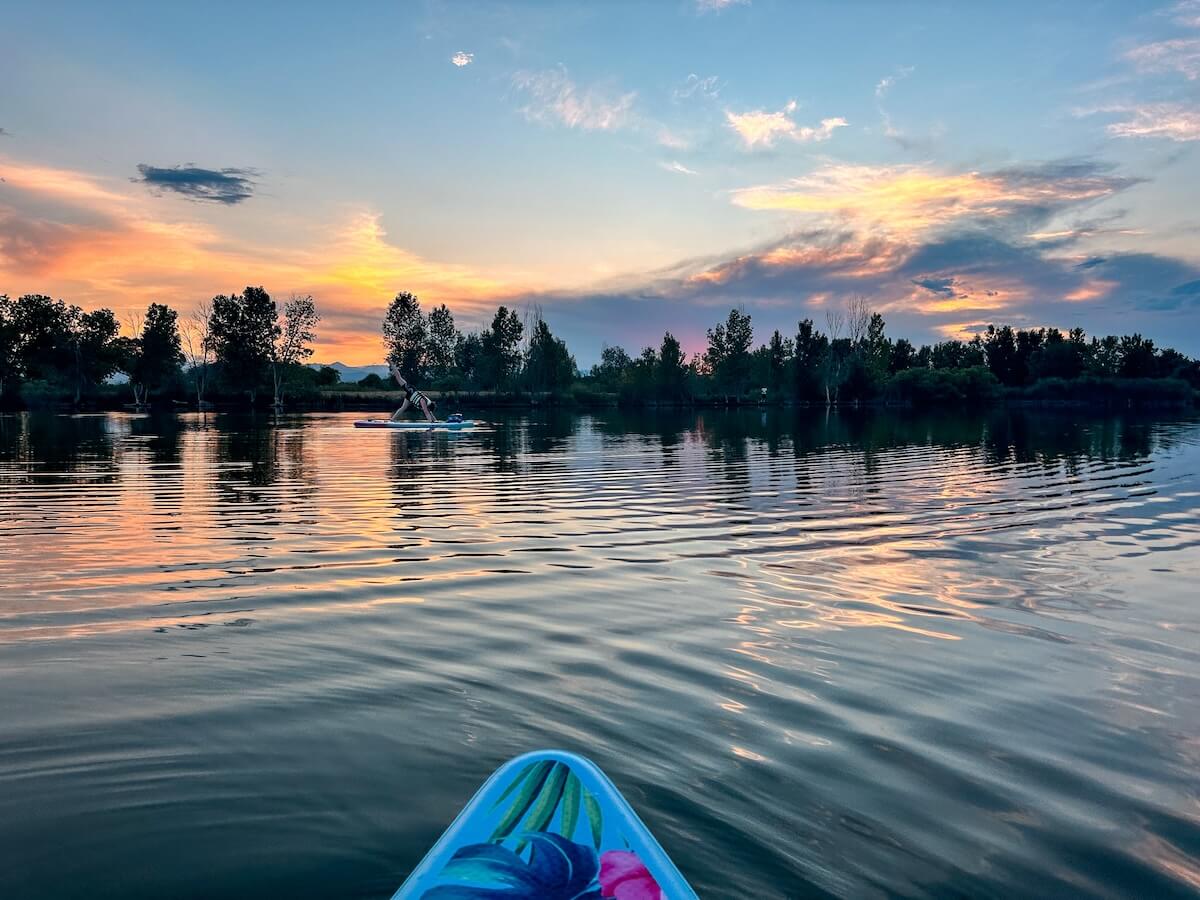
Chasing the Golden & Blue Hour Glow
The golden hour is pure photo gold, and it’s 100% free too!
This is a gold mine for anything travel related! In fact, most travel photographers exclusively shoot during this time.
During this gorgeous window just after sunrise or before sunset, the light is soft, warm, and oh-so-flattering.
Whether you’re shooting landscapes or portraits, you’ll get rich colors and stunning shadows that are hard to recreate with artificial light.
How to Shoot During Golden Hour
Try these tips to make the most of it:
- The golden hour is perfect for dreamy depth of field (f/1.8 to f/4) as a wide aperture lets in more of that golden light and gives you a beautifully blurred background.
- Use Manual or Aperture Priority mode to keep creative control. Start with Aperture Priority (A/Av) if you’re a beginner, or go full Manual (M) and lock your exposure so the light doesn’t shift mid-shot.
- You have natural light, so keep your images crisp and noise-free by using ISO 100–400, only bumping it up slightly as the sun gets lower if necessary.
- Try backlighting your subject to create a soft halo or beautiful lens flare.
- Keep shooting as the light changes, as this creates a whole range of moods.
Just remember that morning or evening, the golden hour doesn’t last long.
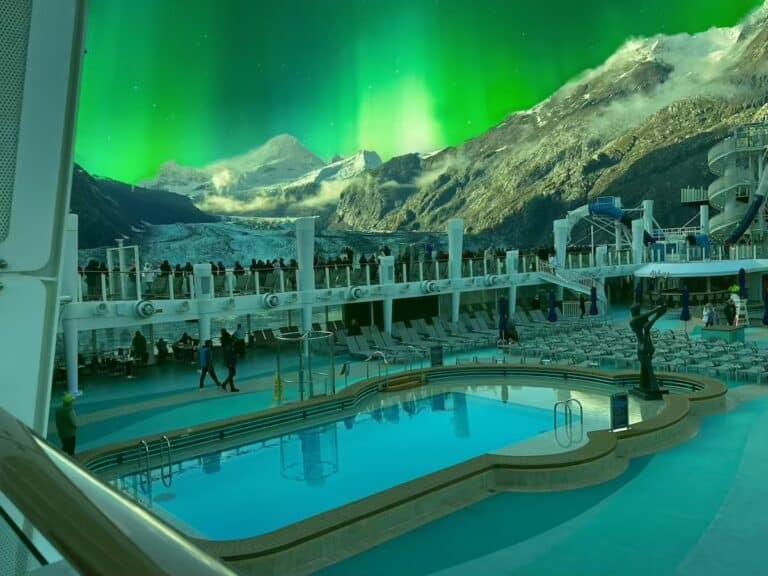
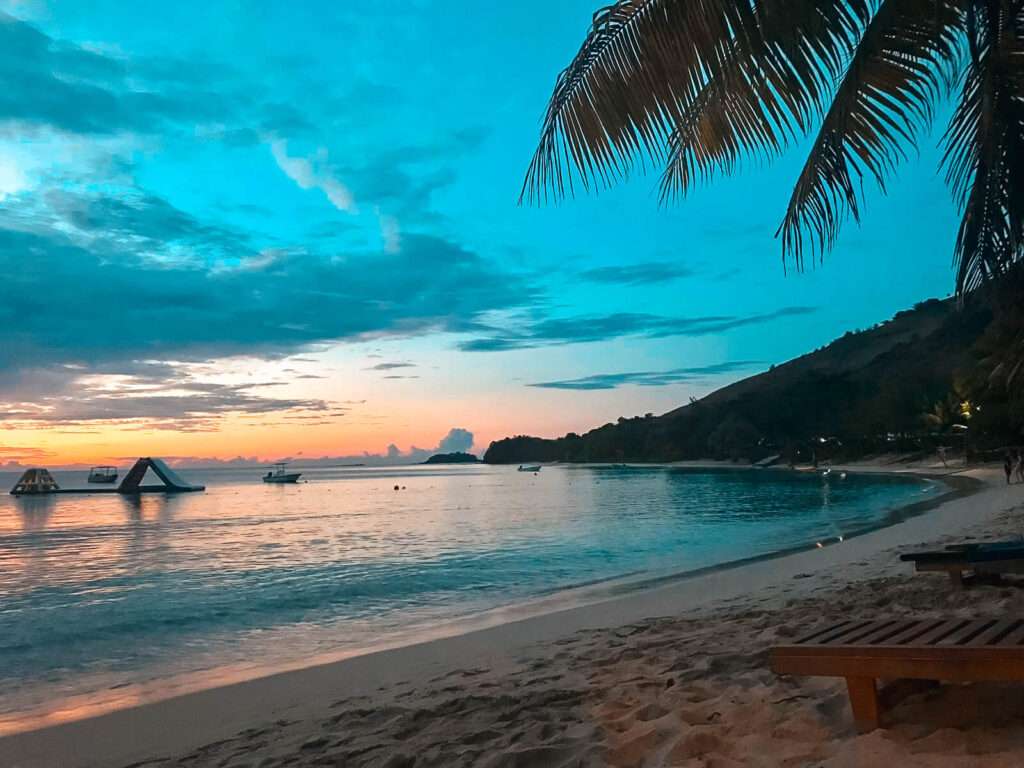
Don’t forget blue hour
However, if you arrive a bit earlier or stay a bit later, you can also take advantage of the blue hour.
Not as well-known as the golden hour, the blue hour may be less forgiving, but it’s no less spectacular.
During this brief period just before sunrise and directly after sunset, the light is diffused and low in contrast.
This creates cool, dusky tones and a moody, cinematic feel that’s perfect for long exposures, silhouettes, and capturing twilight magic.
So, scout your location ahead of time, have your settings ready, and shoot fast.
From blue to gold or gold to blue, the light changes quickly, but the results make it totally worthwhile.
Why Travelers Love Golden & Blue Hour
The golden hour is every travel photographer’s best friend.
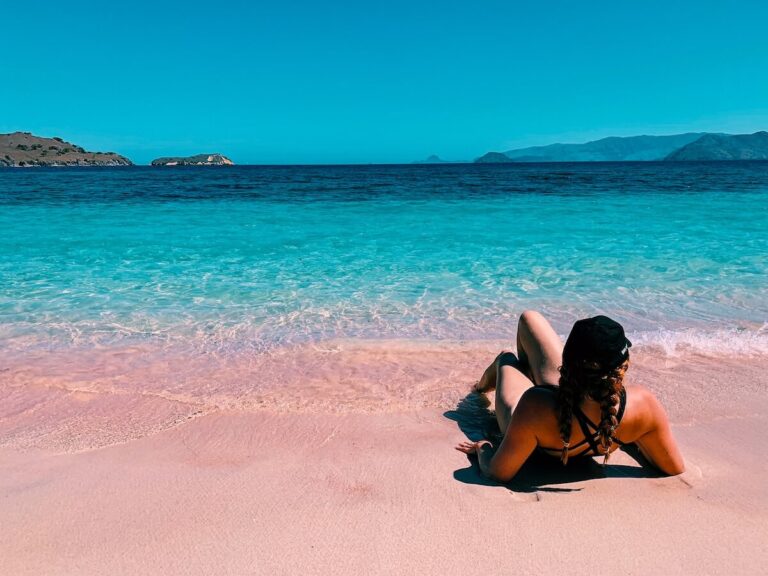
Mountain peaks glow pink, tropical beaches turn golden, and cities shimmer.
The blue hour, on the other hand, is perfect for capturing quiet twilight moments in places like Venice canals or desert landscapes.
Always plan your sightseeing with light in mind.
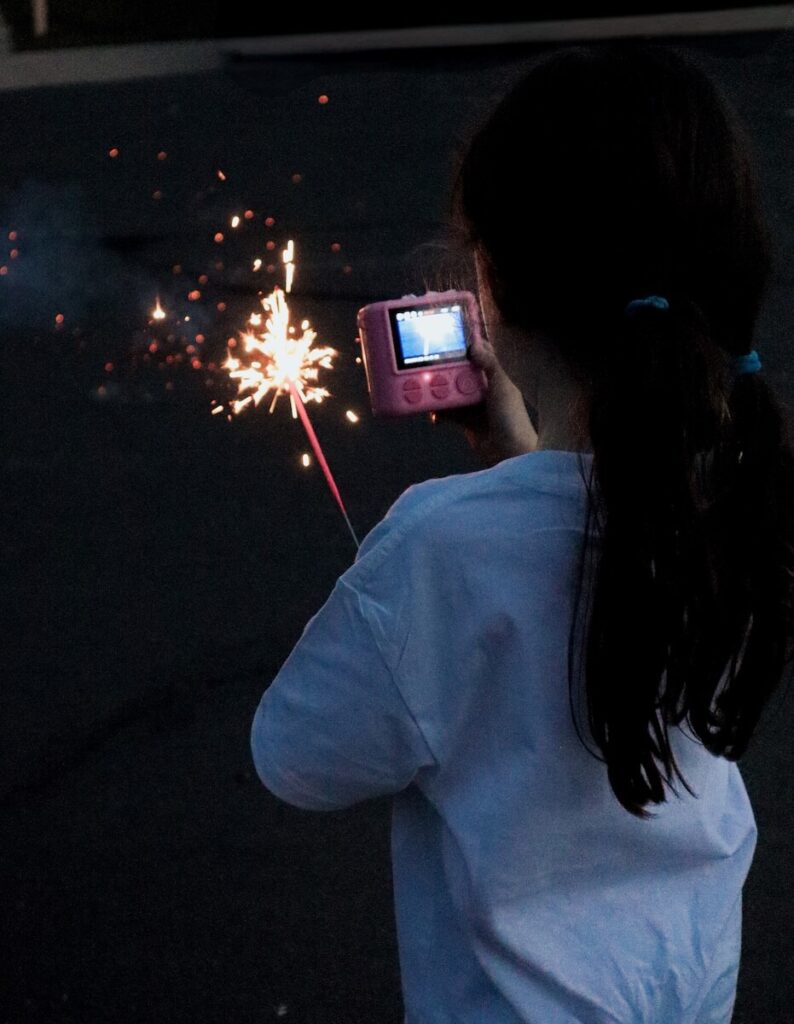
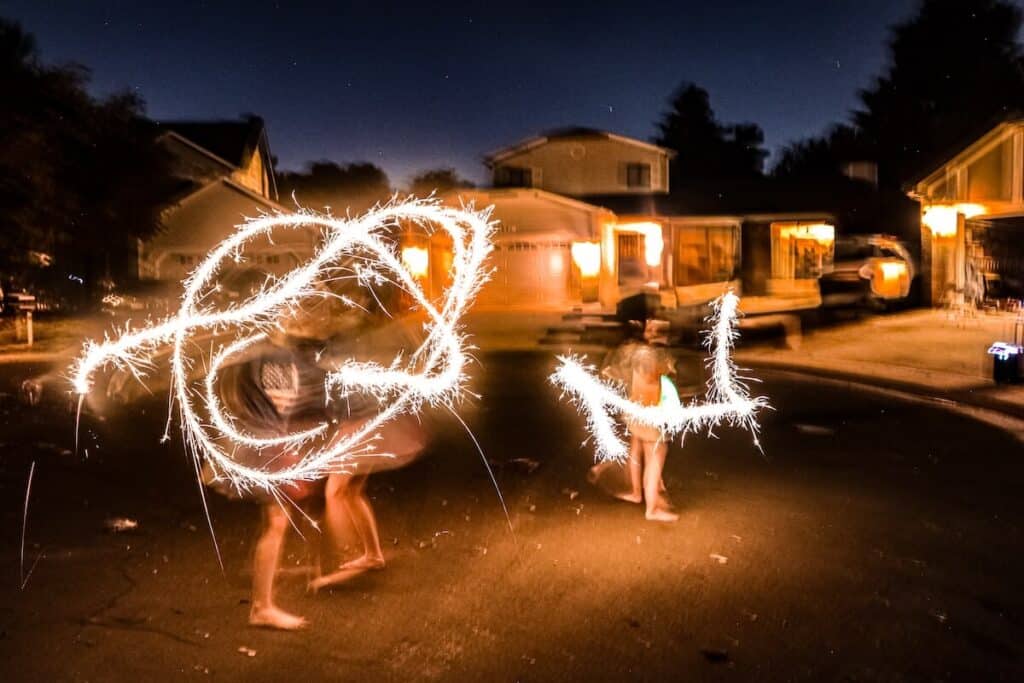
Painting with Light
For something different, tap into your inner Aurora Crowley or JanLeonardo and paint with light.
This is exactly what it sounds like, as you use a flashlight, sparkler, LED stick, or your phone’s torch to create glowing shapes, patterns, or words in mid-air, and the dark is your canvas.
It does take a bit of trial and error, but once you get the hang of it, the results are almost otherworldly.
How to Paint With Light
Here’s how to use light as your paintbrush:
- Find a dark location, either indoors or outdoors, at night.
- Set up your camera on your tripod to prevent any shaking during long exposures.
- Choose an aperture of between f/8 and f/11 and use an ISO between 100 and 200 to avoid graininess.
- Set a slow shutter speed of between 10 and 30 seconds.
- Pre-focus on your subject.
- Start to “paint” by pressing the shutter while you move your light source in front of the camera.
If you want your light paintings to be even more intriguing, highlight parts of a scene or illuminate objects creatively for striking cinematic effects.
Are you new to shutter speed, aperture, and ISO? Check out my beginner’s guide to the exposure triangle for adventurous photographers.
Painting With Light on Adventures
Camping in the desert? Use your headlamp to trace shapes in the sand dunes.
At a festival? Sparklers make whimsical patterns.
Hiking at night? A line of headlamps across a mountain ridge can create unforgettable light trails. It’s travel photography turned into art.
Light Up Your Life (and your photographs!)
Whether you’re taking photos for fun or to build your portfolio and go pro, playing around with lighting and exposure is one of the easiest ways to add atmosphere, emotion, and mystery to every shot.
While a tripod is necessary in most of the suggestions I’ve given above, you don’t need expensive equipment or fancy lighting rigs.
With the right settings on your camera, you can use almost any light source to take photos that will make people stop and say, “Wow!”
About The Author
Naomi Phillips is a sparkly, whimsical wordsmith who spends her days stringing together sentences about photography and event marketing. When she’s not crafting prose, she’s probably trying on a new pair of earrings or daydreaming with her trusty furry sidekicks, Sherlock and Maple.
More travel Photography Guides
Cheap vs Expensive Camera: The Truth Nobody Tells You
Is the Canon EOS M50 Mark II camera still worth it in 2025 or is it DEAD?

I Paid For a Pro Travel Photoshoot and Here’s What I Learned

How to Photograph Pink Beaches Like a Pro (And Look Amazing Doing It!)
More Travel Resources
Adventure Bucket List Resources
I am here to help your travel adventures go as smoothly as possible! That way you can check off that bucket list with minimal complications and spending!
SHOP – Shop the best adventure gear and essentials on my Amazon Storefront – handpicked by a full-time adventuring mermaid!
AIRFARE – There are a few I use, but Aviasales is normally my go-to for flights without any extra fees or markups.
ACCOMMODATION – My two favorites are Booking.Com for hotels and VRBO for rentals.
GUIDED TOURS – If you are looking for quick and easy tours, check out GetYourGuide and Viator.
MULTI-DAY TOURS – For more in-depth tours that span several days, TourHub has many great options with reputable travel companies. Use my code (ALEXANDRA1GURU) for up to 5% off your next bucket list adventure.
TRANSPORTATION – You can either rent a car yourself with Discover Cars or do a guided bus tours like Big Bus Tours.
SIM CARDS – Avoid expensive roaming charges with an eSim card with Airalo. Personally, I prefer wifi boxes, and recommend WiFi Candy (get 10% of with the code THEBUCKETLISTMERMAID).
TRAVELER’S INSURANCE – Check out VisitorsCoverage for affordable insurance plans. If you are a nomad or remote worker, I would check out SafetyWing.
SEE MORE – Adventure Resources | Photography Resources
See Some Photos You Like?
Check out my full photography page for a full gallery and prices.