
Adventure Photography Guide
A real-world guide to planning, shooting, and editing adventure photos built on real travel situations, imperfect conditions, and honest experience from real photographers.
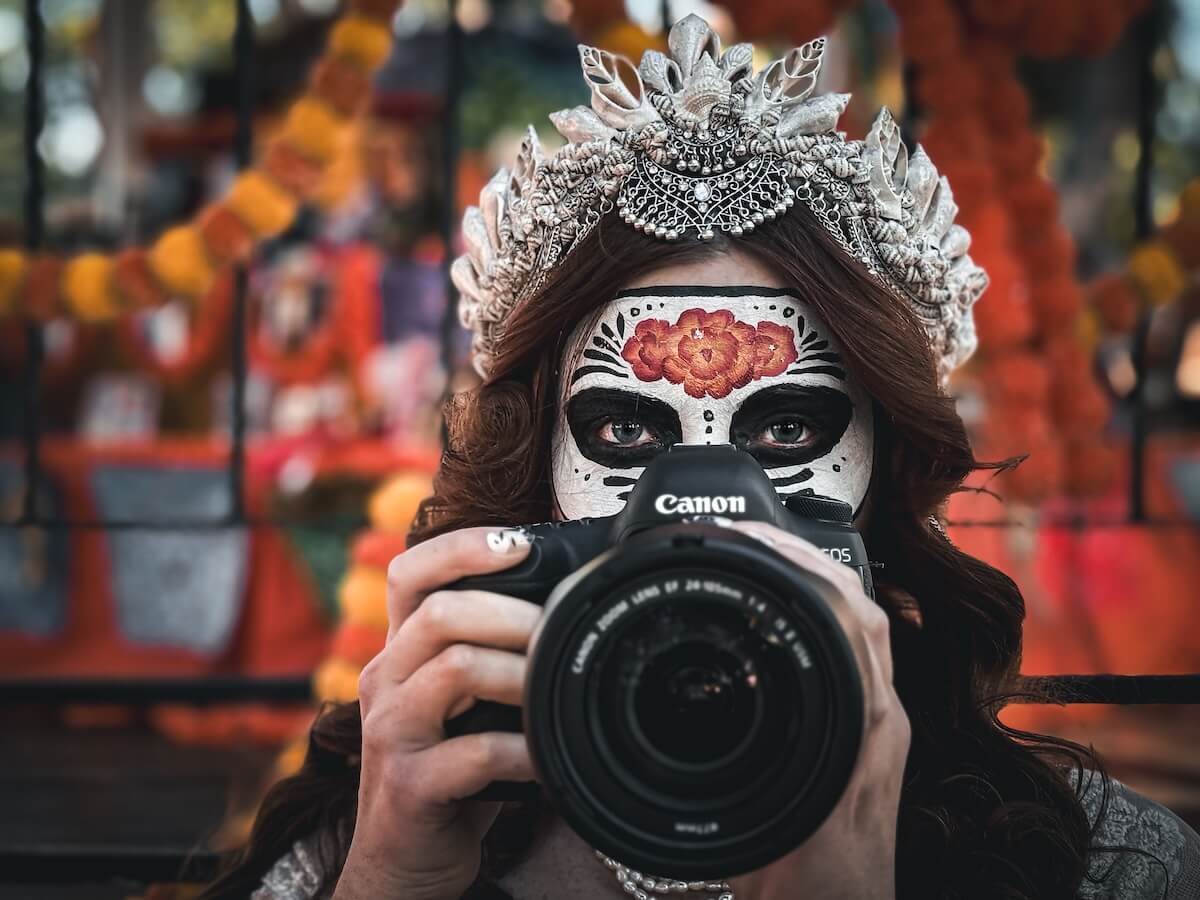
Let’s get adventuring!
Ready to start? Here are some valuable resources for your camera and bucket list!
This website contains affiliate links from trusted partners. If you purchase through a link on this site, I may earn a commission at no extra cost to you. As an Amazon Associate, I earn from qualifying purchases. See my Privacy Policy and Disclosure for more information.
This is going to be an epic and intense deep dive into adventure photography! If you are short on time, you can skip to any section using the table of contents above. Just make sure to bookmark this page if you want to return for any more information 💙
What Is Adventure Photography (Really)?
Adventure photography isn’t just about extreme sports, remote expeditions, or hanging off the edge of a cliff with thousands of dollars of gear.
At its core, adventure photography is about documenting experiences. Think: the places you go, the moments you move through, and the story that unfolds along the way.
That can look like:
- Hiking in national parks and local trails
- Road trips, van life, and RV travel
- Waterfalls, mountain viewpoints, and scenic pull-offs
- Cities, overlooks, and unexpected pockets of beauty
- Solo adventures and everyday exploration close to home
Adventure photography isn’t defined by how dangerous or dramatic the destination is.
It’s defined by presence, intention, and storytelling.
The goal isn’t to prove how extreme the adventure was, but to translate what it felt like to be there.
Story Over Adrenaline
Some of the most compelling adventure photos aren’t taken during high-adrenaline moments at all.
They’re captured:
- While waiting for light to shift
- When plans fall apart and you adapt
- In between the “big moments”
- During quiet pauses that reveal scale, mood, and emotion
Adventure photography is about showing the experience as a whole, not just the highlight reel.
What Adventure Photography Is Not
Adventure photography is not:
- Gear flexing or proving you own the most expensive setup
- Chasing Instagram trends or copying viral shots
- Risking safety for the sake of a photo
- Forcing every trip to become “content”
If getting the shot means putting yourself or others in danger, missing the experience entirely, or burning out creatively, then something’s off.
The strongest adventure photographers know when to shoot, when to adapt, and when to simply be there.
Why This Definition of Adventure Photography Matters
Once you stop defining adventure photography by extremes, everything shifts:
- You can practice anywhere
- You can grow without constant pressure
- You can shoot consistently without burning out
- You can build a sustainable creative rhythm
Adventure photography becomes less about proving something, and more about seeing clearly and telling honest stories wherever you are.
The Adventure Photography Mindset
Shooting Adventures vs. Chasing Content
Adventure photography changes the moment you stop trying to collect shots and start learning how to work with whatever the day gives you.
When you’re photographing real adventures (not staged shoots) you don’t control everything.
Plans shift. Light changes. Trails get crowded. Weather does its own thing. Energy runs out.
And that’s not a failure! It’s the reality of shooting on the move.
A strong adventure photography mindset is built around:
- Flexibility instead of rigid shot lists
- Problem-solving instead of frustration
- Awareness instead of constant pressure to produce
Some days you get the image you envisioned. Other days, you get something different and often more honest.
The goal isn’t perfection. It’s responsiveness, spontaneity, and creativity.
Missing Shots Is Part of the Process
Every adventure photographer misses shots. Light fades faster than expected. Clouds roll in. A trail closes. A moment passes before the camera is ready.
One time I missed golden hour because my batteries died and I was stuck on the side of the road. Adventure happens.
That doesn’t mean you failed. It means you were present in a real environment.
Over time, you learn:
- Which shots are worth waiting for
- Which ones require fast decisions
- When it’s better to put the camera down entirely
Adapting to Real-World Conditions
Adventure photography rarely happens under ideal circumstances.
You’re often working with:
- Midday light instead of golden hour
- Crowds instead of solitude
- Wind, rain, heat, or cold
- Physical fatigue after long days outdoors
Instead of fighting these conditions, experienced photographers learn how to adjust expectations and techniques.
That might mean:
- Changing composition instead of location
- Embracing contrast or harsh light creatively
- Simplifying a shot when energy is low
- Capturing atmosphere instead of detail
Adaptability is a skill and it’s one of the most valuable ones you can develop in this niche of photography.
Why “Perfect Conditions” Are Rare (and That’s Okay)
If you wait for perfect light, empty locations, and endless energy, you’ll spend most of your time waiting instead of shooting.
I don’t know about you, but patience isn’t my strong suit and I’d rather go with the flow than chase an unrealistic standard.
Adventure photography is built on imperfect moments:
- The light that’s “almost” right
- The viewpoint you didn’t plan on
- The shot you took handheld because a tripod wasn’t practical
Some of the strongest images come from learning how to work within limitations, not around them.
This is also where many photographers burn out! They are chasing an unrealistic standard that real travel simply doesn’t support.
Planning Adventure Photos Before You Go
Planning for adventure photography doesn’t mean turning every trip into a rigid production.
Trust me… I HATE planning and try to do as little as possible However, there does have to be some level of planning to set yourself up for success.
It means giving yourself just enough structure to recognize opportunities when they show up without letting preparation override the experience itself.
A solid plan helps you:
- Anticipate light and conditions
- Avoid common timing mistakes
- Stay flexible when things change
- Not miss anything massive in an epic location
Read More – Common Travel Photography Mistakes
You don’t need a detailed shot list for every adventure, but you do need context, awareness, and a loose game plan.
Unless planning is your jam…then by all means! Plan away!
The goal of planning is always to arrive informed, not pre-frustrated.
Location Scouting (Without Ruining the Adventure)
Location scouting is about familiarity, not obsession.
You’re not trying to memorize every angle before you arrive. However, it is smart to give yourself visual references so you can adapt once you’re there.
Here are the tools I use most:
- Satellite view for terrain and access points
- Street View for cities and roadside stops
- Saved pins for viewpoints, pull-offs, and trailheads
- Trail length, elevation, and difficulty
- Real user photos for realistic expectations
- Notes about closures, crowds, and seasonal conditions
Note: I have used this on some seriously remote trails. Sometimes it works. Sometimes it doesn’t. If you are going out to the boonies, I would also recommend a satellite trail GPS for safety!
Instagram and Pinterest (Used Sparingly)
- To understand general perspectives and scale
- To identify overdone angles you might want to avoid
Instagram and Pinterest is useful for awareness, but relying on it too heavily can flatten creativity and set unrealistic expectations.
I would also warn you to gain inspiration, but don’t try to copy other’s work. Part of the fun of adventure and travel photography is adding a sprinkle of YOU into it! If you are trying to find your style, I would suggest completing my “Why?” workbook for photographers.
Timing, Light, and Crowds
Golden Hour vs. Real Life
Golden hour is great… when it works. But travel, weather, access, and energy don’t always cooperate.
Honestly, every travel photography course will say “DO GOLDEN HOUR OR YOU WILL DIE AND YOUR PHOTO WILL SUCK”.
This pisses me off. Yes…golden hour is epic. But it’s also very frustrating and not always realistic.
Midday light, overcast skies, or shifting conditions are often unavoidable, especially on multi-stop trips or longer adventures.
Learning how to work with the light you have (instead of waiting endlessly for ideal conditions) is a core adventure photography skill.
I’m gonna hold your hand when I say this: With this type of photography, taking pictures isn’t the main goal. The main goal is to live and experience first, document second.
Shoulder Seasons
Some of the best adventure photos happen just before peak season and just after it ends.
You get:
- Softer light
- Fewer crowds
- More flexibility
Shoulder seasons often offer the best balance between access, atmosphere, and sanity.
As a full-time RVer, peak season is my nightmare.
Midday Problem-Solving
When you’re shooting in harsh or flat light:
- Look for shade and contrast
- Use natural framing
- Focus on composition and story over dramatic skies
Midday doesn’t ruin photos. It just asks you to shoot differently.
Adventure Photography Gear (Keep This Lean)
Everybody out there is gonna try to sell you a bunch of crap so they can make money.
I’m not that person. And that’s because I’ve only hiked 10 miles into the wilderness with 20 lbs of photography gear once. Never again.
Let’s cut the BS and talk about what you actually need.
Essential Gear for Adventure Photography
Adventure photography doesn’t require the newest camera or the biggest bag.
It requires gear that’s reliable, versatile, and realistic for the way you actually travel.
The best setup is the one you can:
- Carry comfortably
- Use confidently
- Adapt with quickly in changing conditions
My Go-To Travel Cameras: Canon EOS M50 mark II | Canon EOS 5D mark IV | What’s in My Camera Bag?
You don’t need a different camera for every situation. Instead, focus on a small kit that works across many situations that you are comfortable operating.
You need to know your gear as well as you know your lover! Because sometimes adventure photography happens fast, and the last thing you need is to be fumbling around with your gear.
Camera Bodies & Lenses
The most important truth about adventure photography gear is this:
Sensor ≠ skill.
A higher-end camera won’t automatically make stronger images, especially if it’s heavy, intimidating, or rarely leaves your bag.
In fact, I put this to the test and did an epic showdown between a $4000 camera set up vs a $1000 one. I’ll let you be the judge if the price tag and empty wallet actually made a difference…
Here was my conclusion from that experiment…
What matters more than brand or specs is:
- How well you understand your camera
- How quickly you can adjust settings
- Whether the gear fits your travel style
Versatility beats perfection and price every time.
A single, flexible lens (or a small two-lens setup) will often outperform a heavy, specialized kit that slows you down or limits spontaneity.
👉 If you want to see what I actually carry on adventures, I break it down in detail here:
What’s in My Camera Bag for Adventure Photography
👉 Also, I did a deep dive on the best travel lenses. I give you the lowdown here: Best Lenses for Adventure and Travel Photography
Accessories That Actually Help
You don’t need many accessories, just the right ones.
If you haven’t gotten this vibe yet… I am a minimalist and sometimes chaotic photographer. I like to be challenged to work with what I have.
With that being said, here are the accessories I can actually justify carrying through mountain ranges.
ND Filters
Neutral density filters are one of the most useful tools for adventure photography, especially for:
- Waterfalls
- Motion blur
- Bright midday conditions
They expand what you can shoot without adding complexity.
I’ve gotten caught without this before and cried. I’ve also done polarizers when working with water, but if I had to choose one, I would go with the ND filter.
Tripods (or No Tripod at All) – My Controversial Opinion
Tripods are helpful, but not always practical.
Some photographers swear by them, but have you ever tried to carry a heavy tripod for 10 hours through a crowded European city? Cause I have. And it’s not pleasant, or always allowed.
On crowded trails, tight viewpoints, or fast-moving adventures, shooting handheld is often more realistic.
For me, tripods are a case by case basis. If it is not absolutely necessary or I am not doing heavy long exposure work, I will opt out.
Or, I will carry a very lightweight and small travel tripod.
Here is a video of me doing a waterfall long exposure shot with no tripod ↓
Learning when to use a tripod (and when to skip it) is more valuable than carrying one everywhere.
Quick tip: For heavier tripods, I would always get one with a quick release plate. It is extremely inconvenient to screw it in and out when moving from tripod to handheld.
Rain Covers & Protection
Weather doesn’t care about your camera.
A simple rain cover or weather protection can:
- Save your gear
- Reduce stress in unpredictable conditions
- Let you keep shooting when others stop
Preparedness doesn’t mean overpacking. It just means smart packing.
Bonus Idea for Hikers: I hate having a neck strap when I am trekking out or adventuring. I often mount my camera for comfort on my hiking backpack with a peak design quick release clip.
Read More – Best Travel Photography Backpacks
How to Shoot in Real Adventure Conditions
Adventure photography rarely happens under perfect circumstances and waiting for them is often what stops people from shooting consistently.
Most of the time, you’re working with:
- No tripod
- Harsh or flat midday light
- Wind, rain, snow, or heat
- Crowded viewpoints or tight spaces
These aren’t obstacles to overcome later. They’re the conditions adventure photography is built around.
The key isn’t forcing every situation to match an ideal setup, but to learn how to adapt your approach on the spot.
Sometimes that means simplifying a composition. Sometimes it means changing your angle instead of your location. And sometimes it means shooting handheld because that’s what the environment allows.
Ask yourself: It might not be perfect, but did I capture what I was feeling when I was checking this off my bucket list? If yes, you were successful!
Handheld Techniques for Adventure Photography
Handheld shooting is one of the most useful skills you can develop as an adventure photographer.
When a tripod isn’t practical, allowed, or simply slows you down, stability comes from technique, not equipment.
A few fundamentals make a big difference:
- Control your breathing before pressing the shutter
- Brace your body against stable surfaces when possible
- Use faster shutter speeds when conditions demand it
- Take multiple frames to increase your chances
- Try focus stacking
These techniques are especially useful for:
- Waterfalls in busy or restricted areas
- Trail shots where stopping isn’t ideal
- Fast-changing light and weather
- Locations where tripods aren’t allowed
👉 I walk through this in real time in my video on how I photographed a waterfall without a tripod, breaking down what worked, what didn’t, and how I adapted in the moment.
👉 You’ll also find more real-world examples in my “How I Got the Shot” series, where I share the conditions, compromises, and decisions behind specific images, not just the final result.
Adventure Photography Camera Settings
In adventure photography, the goal isn’t memorizing numbers.
It’s actually more beneficial to understand how settings respond to movement, light, and environment, so you can make quick adjustments on the go.
And here’s the kicker: there are no magic numbers. There are only starting numbers with experimentation depending on the situation.
In other words, these are practical starting points for common adventure scenarios. Think of them as flexible frameworks, not rigid rules.
If you need a refresher on basic camera settings, I would suggest reading about the exposure triangle or downloading my free adventure photography cheat sheet.
Waterfalls & Motion
Waterfalls are a classic adventure photography subject, and one of the most misunderstood.
The key variable here is shutter speed:
- Slower shutter speeds create smooth, flowing water
- Faster shutter speeds freeze motion and texture
A few general guidelines:
- Use a slower shutter when you want motion and softness
- Increase ISO or open your aperture if light is limited
- Handheld shots may require faster shutter speeds than tripod setups
Mountains & Landscapes
I’m a Colorado local so I was literally birthed with hiking gear on and plopped on a mountain. Plus, I now live in an RV.
For wide landscapes, clarity and depth matter more than extreme settings.
General priorities:
- Moderate aperture for sharpness across the frame
- You may have to do HDR bracketing or focus stacking
- Shutter speed adjusted for wind or movement (be careful of wind and blowing leaves)
- ISO kept as low as conditions allow
Mountains don’t require dramatic settings. Instead, they reward patience, framing, and awareness of light direction.
👉 Check out my extreme bucket list hiking guides or my national park guides for more photo and adventure tips.
Cities & Travel Scenes
Travel and city scenes often involve movement, crowds, contrast, and unpredictable lighting.
I moved to Europe when I was 18, so I have a ton of experience navigating incredible cities with a camera!
Helpful approaches:
- Slightly faster shutter speeds to handle people and motion
- Flexible aperture to adapt to changing light
- Awareness of highlights and shadows in reflective environments
City adventure photography is about balance and capturing energy without losing control of the frame.
Low Light & Blue Hour
Low light situations demand a different mindset. They are also the most tricky for photographers.
Instead of fighting darkness, focus on:
- Stabilizing your camera (even handheld)
- Accepting higher ISO when needed
- Prioritizing mood over technical perfection
Blue hour, in particular, offers:
- Soft contrast
- Rich color tones
- A slower, more intentional shooting pace
Don’t be afraid to bump up your ISO. With modern cameras, post-processing techniques, and AI, you would not believe the technology available to get rid of that pesky grain!
👉 I share practical techniques and examples in my low light and blue hour editing guide!
Editing Adventure Photos
I am an editing nerd. Seriously. I LOVE IT! Editing is where adventure photos come together.It’s not about changing reality, but more about clarifying the story you experienced.
Three things matter most when editing adventure photography:
Color Storytelling
Color guides emotion. Warmth, cool tones, contrast, and saturation all influence how a scene feels.
Strong editing supports the experience instead of overpowering it.
What I love about color grading is that it is so personal! I love a certain hue of blues, yellows, and greens. You might like another. And both are equally as beautiful.
Mood vs. Realism
There’s no single “correct” edit. Some images call for accuracy. Others benefit from interpretation.
The key is being intentional and not pushing sliders without direction.
Consistency
Consistency is what turns individual photos into a recognizable body of work. It’s also what helps your images feel cohesive across trips, seasons, and locations.
Much like the act of photographing itself, editing isn’t about perfection… it’s about intentional choices that reinforce the story.
My Adventure Editing Workflow
Over time, I’ve developed a simple, repeatable editing process that works across a wide range of adventure conditions.
At a high level, my workflow focuses on:
- Establishing a clean base edit
- Correcting light and color before adding style
- Enhancing contrast and depth without over processing
- Finishing with consistency in mind
This approach keeps editing efficient and flexible, even when shooting in unpredictable environments.
👉 If you want a deeper, step-by-step walkthrough of this process, I break it down in my Adventure Editing Guide, including before-and-after examples and practical decision-making.
👉 For photographers who want a faster starting point, my presets are designed to support this workflow. I’ve designed this to help from beginner-friendly starters to full brand-level consistency.
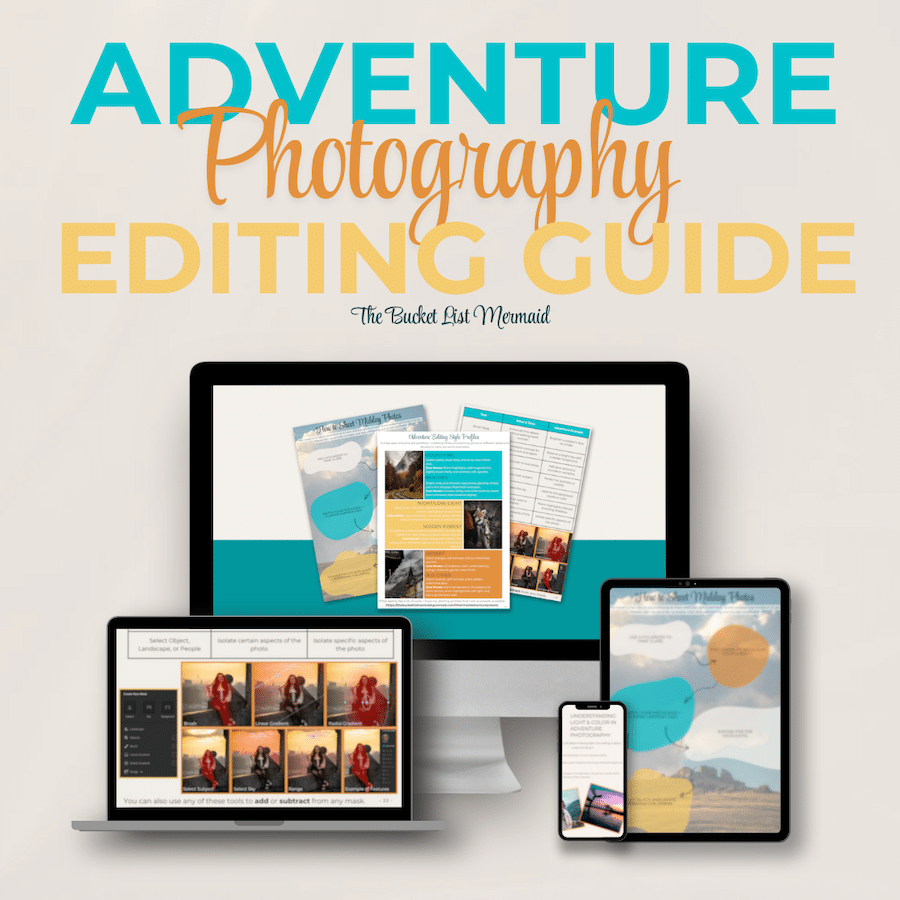
As a thank you for reading my guide, here is a discount code 👉 MERMAIDPHOTOGRAPHER 👈 for 10% off everything! That will bring the price down to a nice cup of coffee.
Not ready to buy? Get the free editing checklist! 👇
Why Presets Are a Starting Point (Not Magic)
Presets don’t replace skill, and they’re not meant to.
They’re tools and time-savers. A good preset helps you:
- Speed up your workflow
- Establish a consistent starting point
- Learn how different adjustments affect an image
But every photo still needs context, judgment, and refinement with your eye.
That’s why I design presets to be:
- Flexible across lighting conditions
- Easy to tweak instead of locked in
- Supportive of learning, not shortcuts
The strongest edits come from understanding why adjustments work, not just applying them blindly. Presets should empower your creativity, not replace it.
Real Examples — How I Got the Shot
Adventure photography isn’t theoretical.
It happens in unpredictable conditions, with imperfect light, limited time, and real constraints. Do I sound like a broken record?
Some of this stuff can’t be taught, it has to be experienced. That’s why I’m going to give you real life examples and challenges from my career and how I tackled them!
That’s why I share how shots actually come together, not just the final image, but the decisions, compromises, and adjustments behind it.
These examples break down real-world scenarios across different environments, showing how planning, technique, and mindset intersect in practice.
I tried to pick photos that challenged me the most.
Turning a “Meh” Fall Scene into an Autumn Story
Not every fall location delivers peak color, dramatic light, or postcard-worthy conditions.
In this case, the scene itself was… fine. Not bad, just underwhelming. And the camera was struggling.
Instead of forcing vibrance that wasn’t there, I focused on:
- Simplifying the frame
- Using color selectively rather than globally
- Letting texture and contrast carry the image
This is great because sometimes you travel for fall leaves and the weather/conditions laugh at you. Don’t panic! Here’s how I did it 👇
Want to level up your fall adventure photography? Here is the full fall photography guide that explains everything and here’s some bucket list ideas with a free printable!
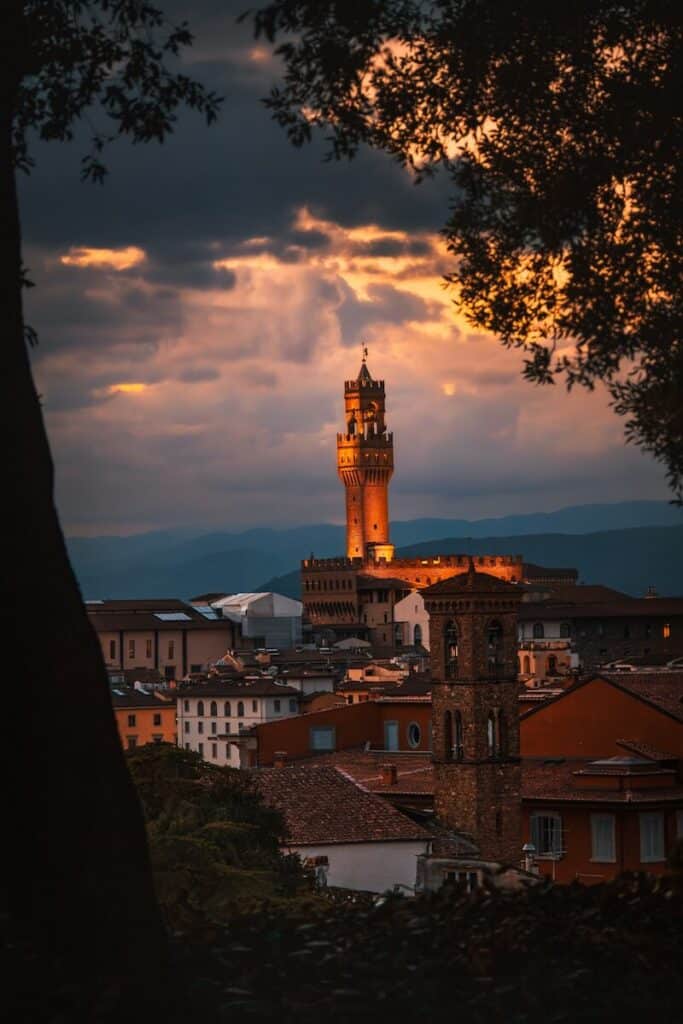
Capturing Florence at Blue Hour (With a Tree as a Tripod)
Florence during blue hour is beautiful, and incredibly crowded.
On this evening, tripods weren’t practical, space was limited, and the light window was short. Instead of fighting the environment, I improvised. I was there for a wedding, not a photo assignment. Yet, I still got THIS!
I stabilized myself against a tree, controlled my breathing, and shot handheld, prioritizing timing and composition over technical perfection.
The result captured:
- The glow of the city
- The transition between day and night
- The energy of the moment
Read More – Full Florence Photography Guide
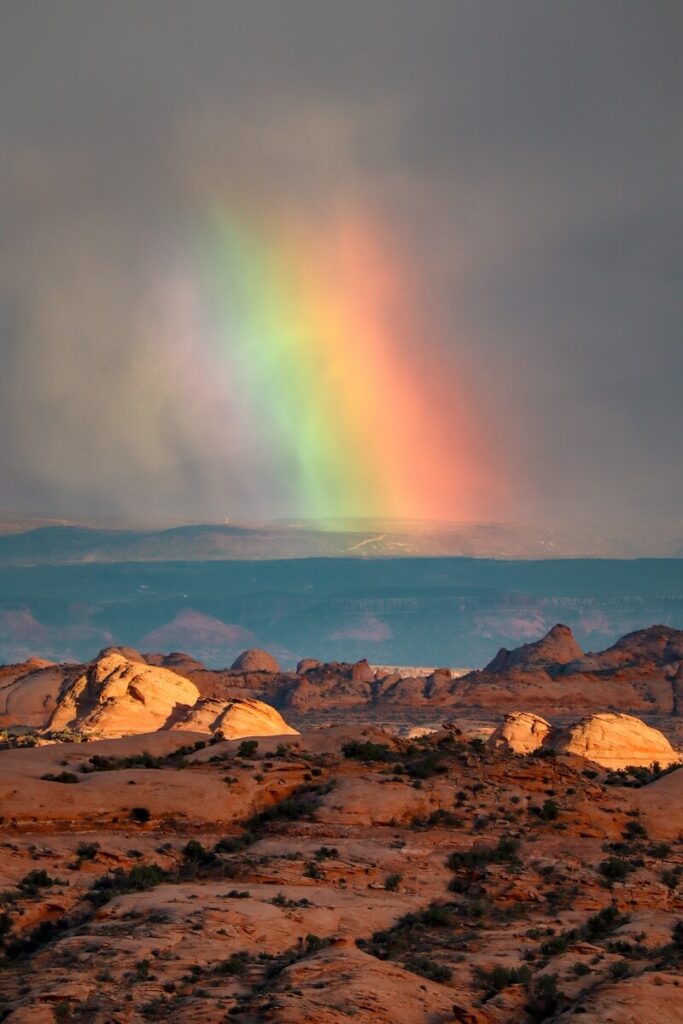
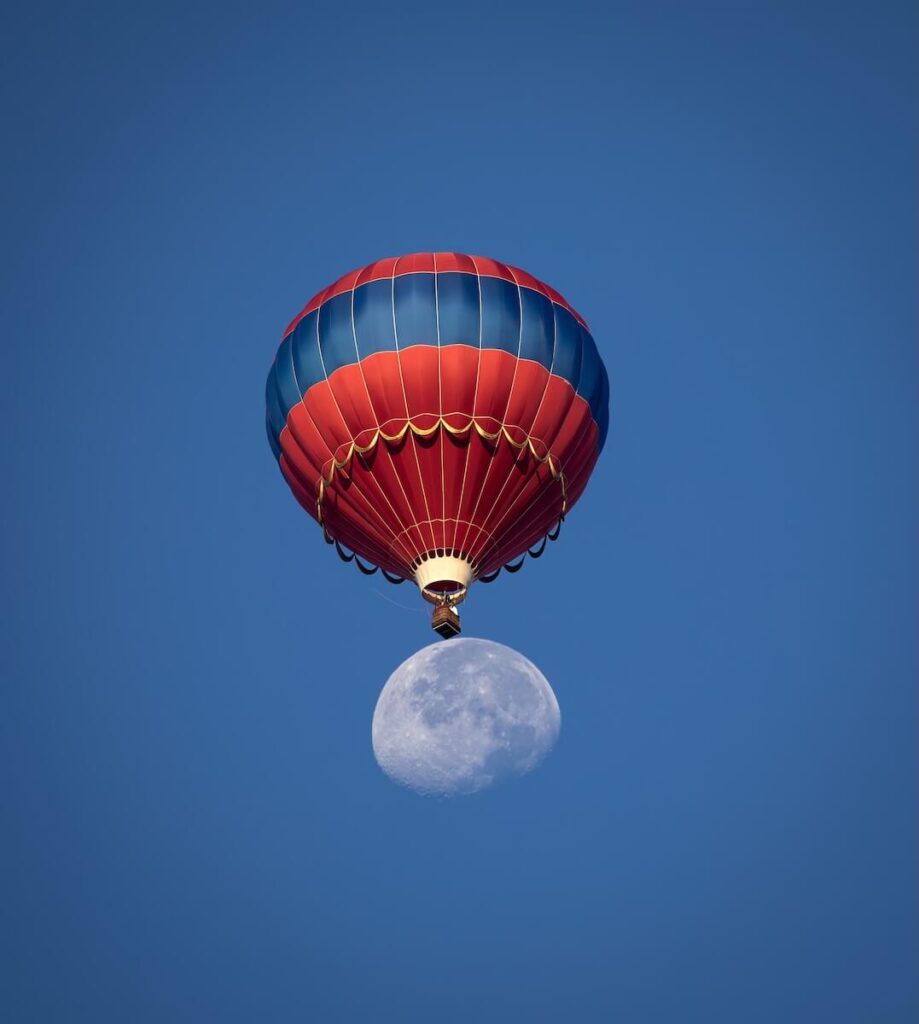
A Balloon, a Supermoon, and One Perfect Moment
At the Albuquerque Balloon Fiesta, the timing had to be exact.
Balloons move unpredictably. The supermoon doesn’t wait. And alignment moments last seconds, not minutes.
This shot came down to:
- Anticipation instead of reaction
- Positioning early
- Patience while letting the scene unfold
The image wasn’t heavily edited. The strength came from being ready when the moment arrived.
👉 This is one of the most photographed events in the world! Here are some unique shots you can take to stand out at the International Albuquerque Balloon Fiesta!
👉 Here the full photography vlog and shot list.
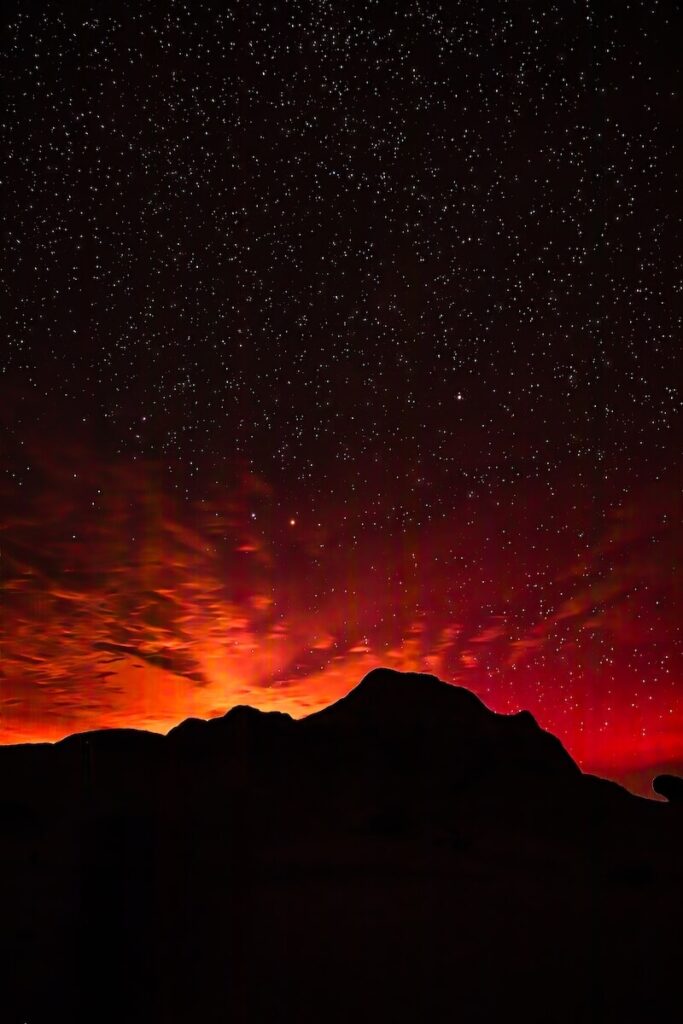
The Aurora Shot That Almost Wasn’t (New Mexico)
This is one of those shoots that tests your resolve.
I drove three hours, then hiked for hours into the middle of nowhere on an Indian reservation. I was chasing stars and aurora with high expectations and very little margin for error.
The conditions weren’t what I hoped for. The lights were faint. The results felt underwhelming. And after that much effort, the disappointment hit hard.
It wasn’t until I started editing, slowly and intentionally, that the image revealed itself.
The final shot wasn’t about spectacle.
It was about restraint, subtlety, and seeing potential where I initially saw failure.
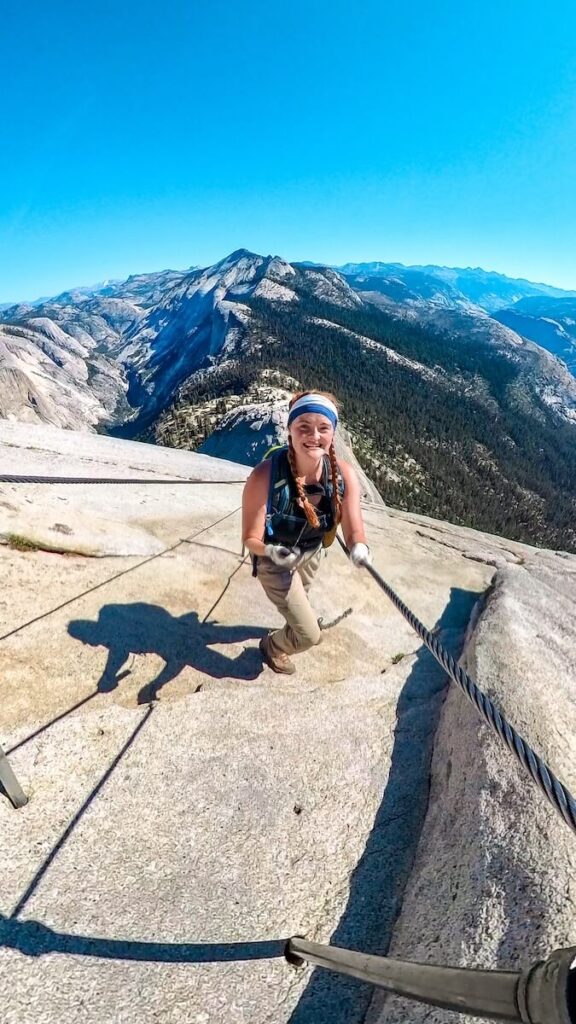
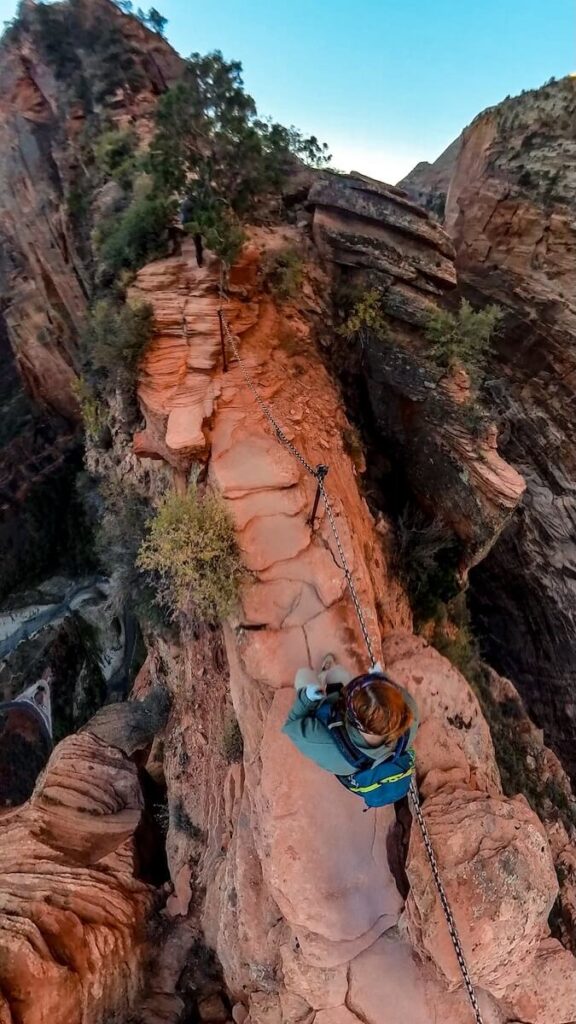
Half Dome & Angels Landing — Choosing Safety Over the Shot
Some locations demand humility.
At Half Dome and Angels Landing, the safest option wasn’t my primary camera. It was an Insta360.
Rather than risk balance, space, or attention for a “better” image, I chose a setup that allowed me to:
- Stay present
- Keep my hands free
- Prioritize safety over sharpness
The images weren’t technically perfect, and I’m okay with that.
Because no photo is worth compromising safety.
Did this make your butt cheeks clench in the best way? Here are the full videos 👇
When Weather Ruined the Plan (Rocky Mountain National Park)
Sometimes you do everything “right” and nature still doesn’t cooperate.
For this shoot, I drove for hours to Rocky Mountain National Park with a clear plan and specific images in mind.
And then it rained. Hard. The light disappeared, conditions deteriorated, and the plan unraveled quickly.
Instead of leaving immediately, I slowed down.
I waited. I adjusted. And at one point, I accepted that getting the shot meant laying in the mud.
What I learned from this experience wasn’t about settings or gear — it was about patience and surrender. Some of the strongest adventure images come after the moment you want to quit.
When a Place Looks Better in Person (Rim-to-Rim Solo Adventure)
Not every place translates well through a lens, no matter how skilled you are.
During my rim-to-rim solo adventure, I got the shots. I documented the experience. Technically, everything worked.
But the images didn’t do the place justice.
And that’s when the best decision was to put the camera down.
Some experiences are meant to be felt, not framed. When that happens, forcing photos only creates frustration. Accepting it creates presence.
This was a reminder that adventure photography isn’t about capturing everything, it’s about knowing when not to.
- Blog post: Ultimate Rim to Rim Survival Guide
- Vlog: R2R Solo in One Day Vlog
Avoiding Burnout as an Adventure Photographer
I know what you are thinking. There is no way I can burn out on photography. Sorry… you can.
Even as a hobby, the pressure to constantly capture everything and experience photography FOMO is very real.
Adventure photography can quietly turn from joy into pressure if you let it. Emphasis on quietly because you don’t realize it’s happening.
The expectation to document everything adds up over time. And when every experience becomes potential content, creativity often suffers.
Where do you draw the line from capturing everything to actually enjoying the moment?
Some adventures are meant to be explored without a camera in your hands. Others are worth shooting lightly. And a few become the projects you invest in fully.
Sustainability comes from choosing intentionally, not from constantly producing.
Burnout doesn’t happen because you don’t love photography anymore. It happens when the balance between experience and output disappears.
Ready to Get Photographing and Adventuring? Start Here!
If you’re feeling inspired but not sure where to go next, you don’t need to do everything at once.
Choose the path that matches how you learn best right now.
🎒 Just Getting Started: Start with my Adventure Photography Cheat Sheet. This is a simple framework for planning, shooting, and editing without overwhelm.
🎥 Visual Learner: Head over to my YouTube channel, where I break down real-world adventure shoots, techniques, and behind-the-scenes decisions.
🎨 Focused on Editing: If editing is where you want to grow, my Adventure Editing Guide walks through my full workflow with practical examples and clear decision-making.
📸 Serious Creator: If you’re ready to speed up your workflow and build consistency, explore my custom presets or custom editing services designed for adventure photographers who want reliable results.
Adventure Photography FAQs
Adventure photography is my life’s greatest passion. I’m here to help you in whatever way possible. If I didn’t answer your question, feel free to reach out!
Final Thoughts on Adventure Photography
Adventure photography isn’t about going farther, it’s about seeing deeper wherever you are.
You don’t need extreme destinations, perfect conditions, or constant output to create meaningful work.
What matters is awareness, intention, and the willingness to adapt when reality doesn’t match the plan.
✨ Start where you are. Build steadily. And let the adventure shape the story… not the other way around.
I’m Here to Help!
It is The Bucket List Mermaid’s goal to help travelers and adventurers take epic pictures!
This mermaid is here to help you, no matter what point of your journey you are at!
More Travel Resources to Help
Adventure Bucket List Resources
I am here to help your travel adventures go as smoothly as possible! That way you can check off that bucket list with minimal complications and spending!
SHOP – Shop the best adventure gear and essentials on my Amazon Storefront – handpicked by a full-time adventuring mermaid!
AIRFARE – There are a few I use, but Aviasales is normally my go-to for flights without any extra fees or markups.
ACCOMMODATION – My two favorites are Booking.Com for hotels and VRBO for rentals.
GUIDED TOURS – If you are looking for quick and easy tours, check out GetYourGuide and Viator.
MULTI-DAY TOURS – For more in-depth tours that span several days, TourHub has many great options with reputable travel companies. Use my code (ALEXANDRA1GURU) for up to 5% off your next bucket list adventure.
TRANSPORTATION – You can either rent a car yourself with Discover Cars or do a guided bus tours like Big Bus Tours.
SIM CARDS – Avoid expensive roaming charges with an eSim card with Airalo. Personally, I prefer wifi boxes, and recommend WiFi Candy (get 10% of with the code THEBUCKETLISTMERMAID).
TRAVELER’S INSURANCE – Check out VisitorsCoverage for affordable insurance plans. If you are a nomad or remote worker, I would check out SafetyWing.
SEE MORE – Adventure Resources | Photography Resources
See Some Photos You Like?
Check out my full photography page for a full gallery and prices.