How to Get Epic Angels Landing Pictures (Without Risking Your Life)
This website contains affiliate links from trusted partners. If you purchase through a link on this site, I may earn a commission at no extra cost to you. As an Amazon Associate, I earn from qualifying purchases. See my Privacy Policy and Disclosure for more information.
You’re hiking Angels Landing balanced on a razor-thin spine, 1,500-foot voids on both sides, fingers gripping cold chain, lungs full of red-rock dust.
And your brain whispers “focus on footing,” while your heart yells “this needs to be a photo.”
If you’ve felt that cocktail of fear, adrenaline, and FOMO, you’re my people.
I’m Alexandra, an adventure photographer who lives for Type-2 fun. I’ve hauled cameras up Half Dome, waded The Narrows with a tripod, and muscled my way through long treks in Peru.
Along the way I’ve learned exactly when to shoot…and when to stash the camera and move.
This Angels Landing photography guide is your step-by-step plan to get jaw-dropping Angels Landing pictures without doing anything reckless.
We’ll map the safest photo spots, dial in lightweight gear, master quick compositions in crowded pinch points, and fix that harsh canyon light in post.
The mission is simple: come home with photos that look fearless – without being reckless.
Clip in (metaphorically), and let’s capture the moment without becoming the headline.

Key Takeaways
- 📸 Plan ahead and stay safe: The best Angels Landing pictures come from knowing where to stop, what to shoot, and avoiding risky mid-chain setups.
- 🌄 Timing is everything: Late spring and early fall mornings give you soft light, cooler temps, and fewer crowds. Always try to hike in the morning.
- 🎒 Pack light, shoot smart: Use hands-free gear, one versatile lens, and keep safety first so you can enjoy the hike and capture unforgettable memories.
What Makes Photographing Angels Landing So Tricky
Let’s get one thing straight: Angels Landing photography isn’t for the faint of heart…or the shaky of hand.
This hike is stunning, yes, but it’s also like trying to do a photoshoot while balancing on a balance beam, 1,500 feet above the ground, with sweaty palms and fifty of your new closest friends breathing down your neck.
Narrow Trails and Drop-offs
First, there are the narrow trails and sheer drop-offs.
There’s no “oops, let me just step back for a better angle” here unless you’re auditioning for Final Destination 6.
Crowds
Then there are the crowds. Even with the permit system, there’s a constant parade of hikers on the chain section.
Everyone’s either gripping for dear life or staging their “I’m totally fine” selfies.
You can get permits for Angels Landing → here.
Harsh Canyon Lighting
Oh, and don’t forget the harsh canyon lighting. Between glowing red walls and deep shadows, your camera will throw a tantrum.
We’ll talk exposure hacks later, but trust me, bracketing is your best friend here.
Packing Limitations
Finally, you need to pack light. There’s barely room for your water bottle, let alone a full camera bag.
You can watch my full vlog of my Angels Landing hike below 👇
What Gear is Best for Angels Landing Photography?
Choosing the right gear for Angels Landing pictures is all about balance…literally.
You’re balancing weight, safety, and quality while clinging to a rocky scramble that feels like it belongs in an Indiana Jones movie.
Here’s the breakdown of your options:
1. Smartphones
Best for: Hikers who want amazing shots without carrying extra bulk.
Pros:
- Compact and pocket-friendly
- Built-in HDR handles harsh canyon lighting beautifully
- Perfect for quick snapshots, group selfies, and wide canyon shots
- Best option for convenience
Cons:
- Limited zoom range (phones are getting better, but don’t expect camera magic)
- Struggles with low light and extreme shadows unless edited later
Safety Considerations for Using a Phone
It’s tempting to whip your phone out mid-chain section, but resist. There’s nowhere stable to plant your feet, and stopping blocks the line behind you.
Always wait for a safe pull-off before setting up any shots. Your phone isn’t worth a tumble (or an angry hiker mob).
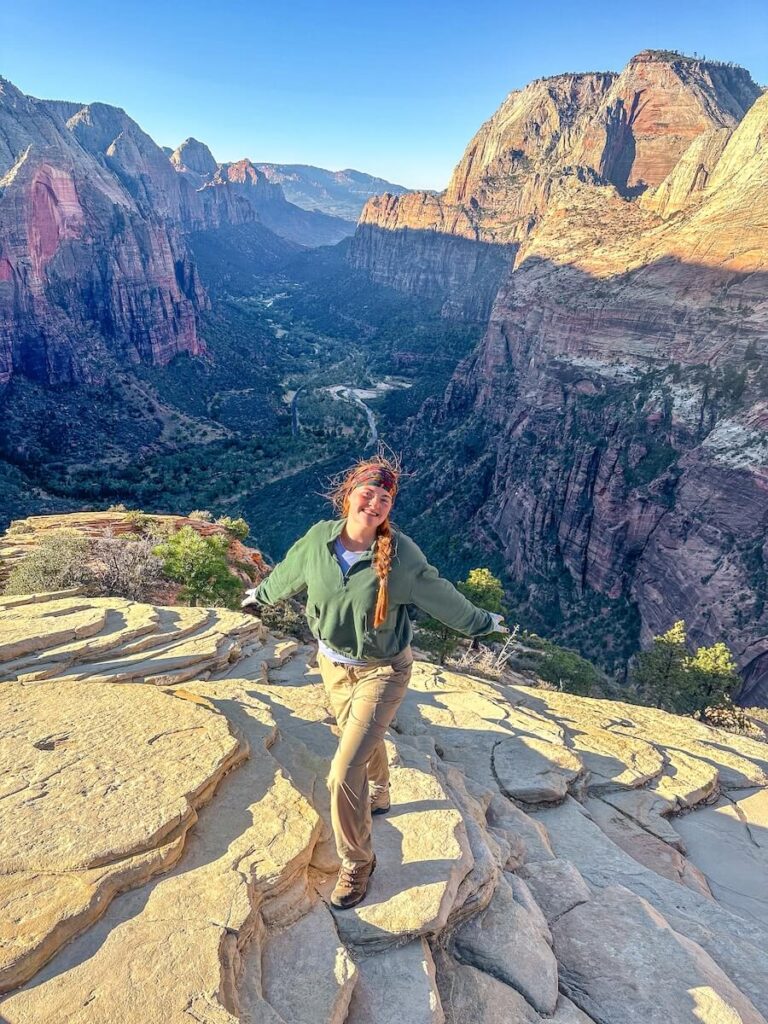
All of my phone photos were taken with an iPhone 16 Pro.
2. Mirrorless or DSLR Cameras
Best for: Adventure photographers (hi, that’s us) chasing top-tier image quality and dynamic range.
Pros:
- Crisp, professional image quality
- Full control over exposure in tricky canyon lighting
- Flexible lens options for dramatic wide shots or detailed close-ups
- Best option for quality
Cons:
- Heavy and bulky, which is what you are trying to avoid on this hike…
- Changing lenses mid-hike? Hard pass unless you like adrenaline spikes
- The gear risk is real! Your beloved camera could sing “sayonara” while falling down a 1,000 foot cliff.
If I had to do it over again, I would have taken my Canon ESO M50 Mark II.
Safety Considerations for Cameras
DSLRs and mirrorless rigs require two hands to handle properly and that’s not ideal when you’re gripping chains.
Keep your camera clipped to a chest harness for easy access but never, ever set up or swap lenses in exposed sections.
Stage shots only from stable, wider pull-offs. Or, better yet, just get camera shots at Scouts Landing or the summit.
Pick one versatile lens (like a 24–70mm or wide prime) and commit. The fewer moving parts, the better.
Read More – Best Lenses for Travel Photography
3. Action Cams (GoPro, Insta360, etc.)
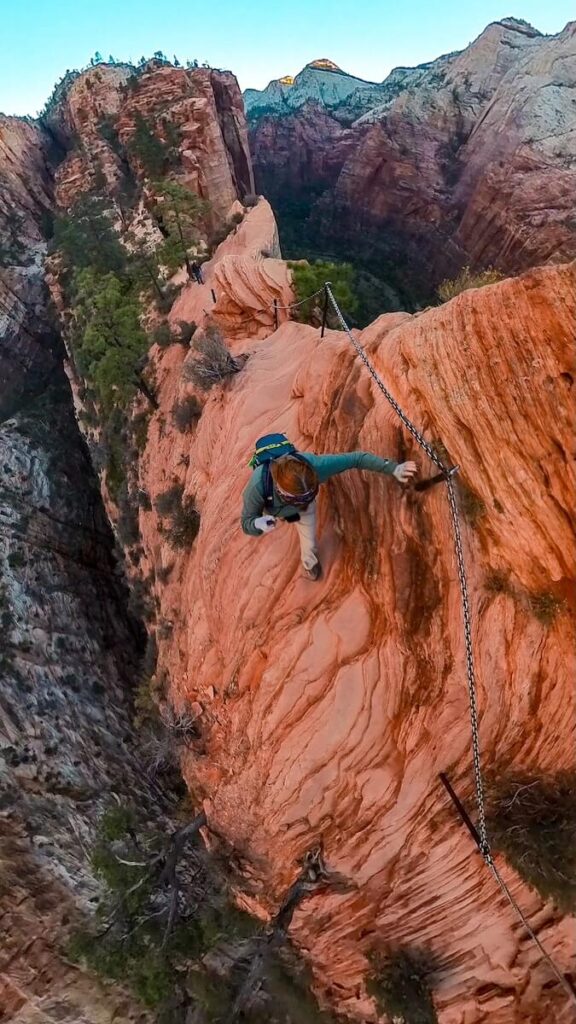
This is the option that I went for: my trusty Insta360. True, my photos are not as clear as a phone/camera, but I mounted it to my body and never sacrificed my safety.
Plus, I got some EPIC footage of the trail itself.
Best for: Capturing immersive “I’m-on-the-edge-of-the-world” vibes without actually dangling off a cliff.
Pros:
- Ultra-wide angles make ridgelines look extra dramatic
- Hands-free mounting on your chest, helmet, or hiking pole
- Insta360’s “invisible selfie stick” = cinematic hero shots without the awkward stick in frame
- Best option for safety
Cons:
- Smaller sensors = lower still-image quality than DSLRs or phones
- You might have to take still shots from video, which means lower quality
- Better for POV videos than large prints
Safety Considerations for Using an Action Camera
Action cams shine because they keep your hands free. There is no fumbling, no risky mid-chain setups. Just mount it before the climb and hit record.
Should You Bring a Tripod?
If you are thinking about setting up a tripod, just don’t. Nothing is stable here and if it falls…it FALLS.
Plus, setting up a tripod, getting the shot, hiking back down, and grabbing your gear takes time. And this is time you don’t have when you have crowds.
Angels Landing is like a very intense conga line, and there is little time for tripods and content creation. You have to have a solid plan and just roll!
If you are going to bring, keep it light and compact, and only use it on the trail and at the summit if needed.
Quick Gear Cheat Sheet
| Gear Type | Best For | Pros | Cons | Safety Rating |
| Smartphone | Casual hikers, selfies | Lightweight, HDR-friendly | Limited zoom, weaker in shadows | ⭐⭐⭐ |
| Camera | Quality-focused pros | Best image quality, lens control | Bulky, tricky to manage | ⭐⭐ |
| Action Cams | POV shots, immersive vids | Wide angles, hands-free mounting | Lower still-image quality | ⭐⭐⭐⭐ |
Best Time for Angels Landing Photography
Timing is everything when it comes to Angels Landing photography.
The difference between “wow, that’s my new wallpaper” and “why does half my face look like a shadow monster?” comes down to light + crowds.
Best Time of Day for Photographing Angels Landing
Morning
If you can stomach an early start (and manage to snag a permit for that time slot), mornings are magic.
The sun rises behind the canyon, giving you soft, golden light without harsh shadows.
Try to be the FIRST one there. Yes, this means most likely parking at the visitor’s center and then waiting in line for the first shuttle.
Fewer hikers clogging up the chains, meaning you can actually pause for photos without becoming trail traffic.
Midday
By midday, the canyon becomes a giant reflector.
This means bright highlights, deep shadows, and your camera screaming for mercy. If this is your only option:
- Use your phone’s HDR mode or bracket exposures on a camera.
- If you are using a camera, try to shoot in RAW so that you can recover some details when editing later.
- Overexpose slightly to save detail in shadowed cliffs.
- Plan for extra editing later to balance tones.
Golden Hour & Sunset
This is when the canyon glows, but there’s a catch: peak crowds and limited daylight for your hike back down.
I would recommend hiking during sunrise instead of sunset.
If you must, bring a headlamp, know your pace, and stage summit shots quickly.
Best Time of Year for Angels Landing Photography
While timing your Angels Landing pictures around the time of day is crucial, the season you choose can make or break your experience…both for hiking conditions and photography.
Spring (March–May)
- Why it’s great: Cool mornings, lush greenery, and manageable crowds make spring a dream for Angels Landing photography. If you are lucky, wildflowers add pops of color, and the river glows under soft morning light.
- Watch out for: Snow in early spring. Afternoon thunderstorms in late spring. Always check weather conditions before you hike.
Summer (June–August)
- Why it’s tricky: Crowds hit peak insanity, temps often soar past 100°F, and harsh midday light can turn photos flat and washed out.
- Watch Out For: If summer is your only option, start at sunrise to beat both heat and crowds.
Fall (September–November)
- Why it’s amazing: I hiked during this time and although I didn’t see a ton of fall foliage like I was hoping, I definitely enjoyed less crowds and cooler temperatures.
- Watch Out For: It did snow while I was there, so keep an eye out for that. If you are going later, bring a headlamp just in case because the days are shorter.
Winter (December–February)
- Why it’s underrated: Minimal crowds, crisp visibility, and dreamy snow-dusted cliffs for unique photos.
- Watch out for: Ice on the chains and trail. Bring traction devices and skip risky shots if conditions are sketchy.
- This is dangerous and not recommended to attempt in winter.
Personally, I really enjoyed going on a fall morning. The permits were easier to get, the crowds were manageable, and I didn’t feel like I was going to burst into flames.
Best Spots for Angels Landing Pictures
Let’s be honest: getting epic Angels Landing pictures without slipping, panicking, or photobombing a stranger’s Instagram shot is an extreme sport of its own.
Luckily, I’ve scoped out the safest (and most jaw-dropping) spots so you can plan ahead, grab your shots, and still make it back with all your limbs intact.
Scout Lookout (Before the Chains)
If you want killer views without risking, well, plummeting…this is your spot.
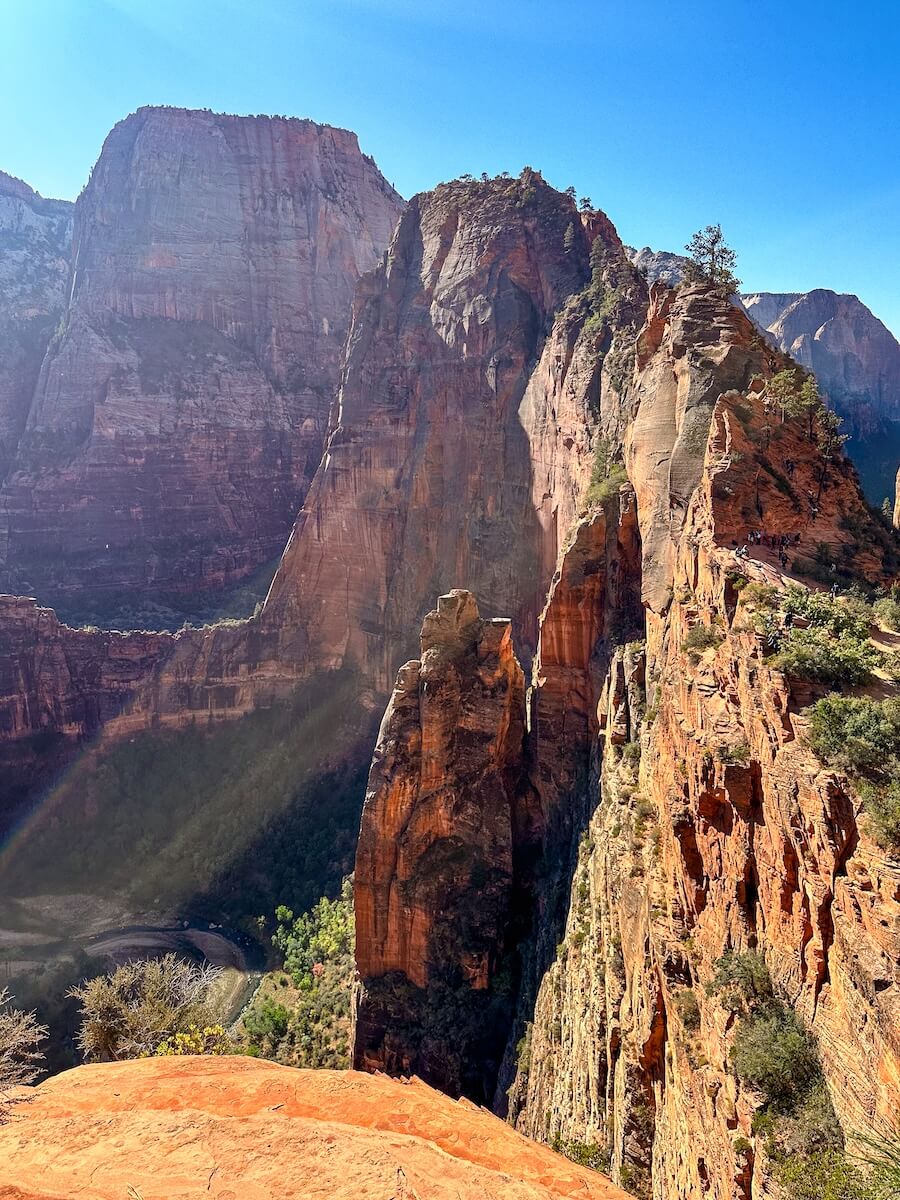
Scout Lookout is the last stop before things get real, and it delivers panoramic shots of the Virgin River carving through the canyon without requiring you to dangle off a ledge like Spider-Man.
It is also the last spot you can hike without a permit.
- Best for: “I-hiked-Angels-Landing-but-my-mom-won’t-yell-at-me” shots.
- Framing tip: Use hikers on the ridge line ahead to show scale and drama.
- Lighting tip: Morning light hits the cliffs perfectly without blinding you.
This is also your backup hero shot if you decide the chains aren’t for you. Zero shame. Zero judgment. Still epic.
The Chains Section (Iconic but Risky)
This is the Instagram-famous zone.
Unfortunately, here’s the deal…don’t take photos while you’re holding the chains.
That’s a one-way ticket to canyon-floor content. Instead:
- Plan ahead: Watch for wider pull-offs and prep your camera settings before moving into position.
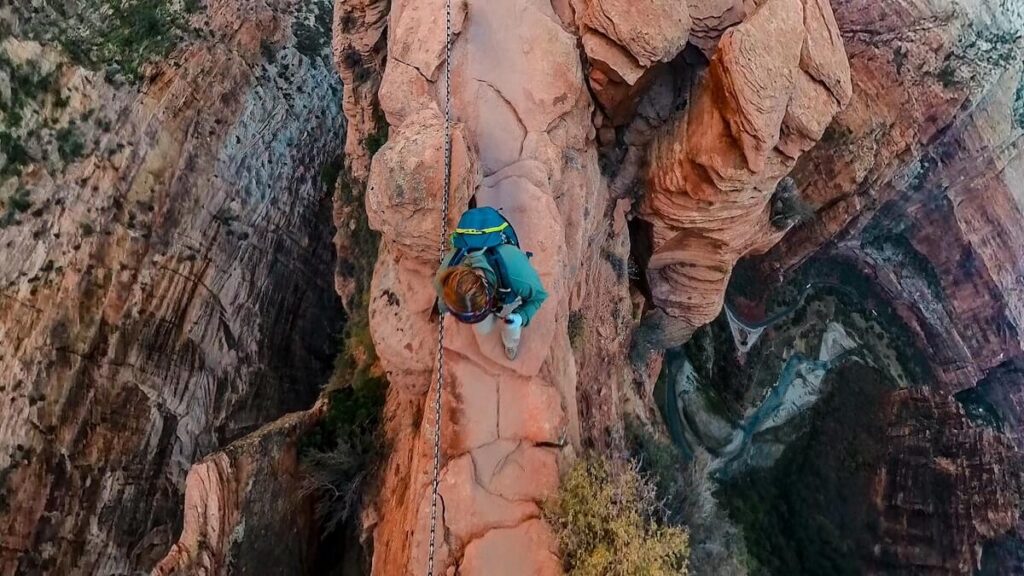
- Action shots: Stage them carefully. Show one person gripping the chains, framed against the drop. Instant drama, zero recklessness.
- Timing tip: If you want cleaner shots, aim for early mornings or weekdays when there are fewer hikers breathing down your neck.
What worked well for me in the chain section was mounting my Insta360 to my CamelBak, setting it to record, and the leaving it.
This meant that I had a ton of footage to go through, but it kept my hands free and my sanity solely focused on my safety.
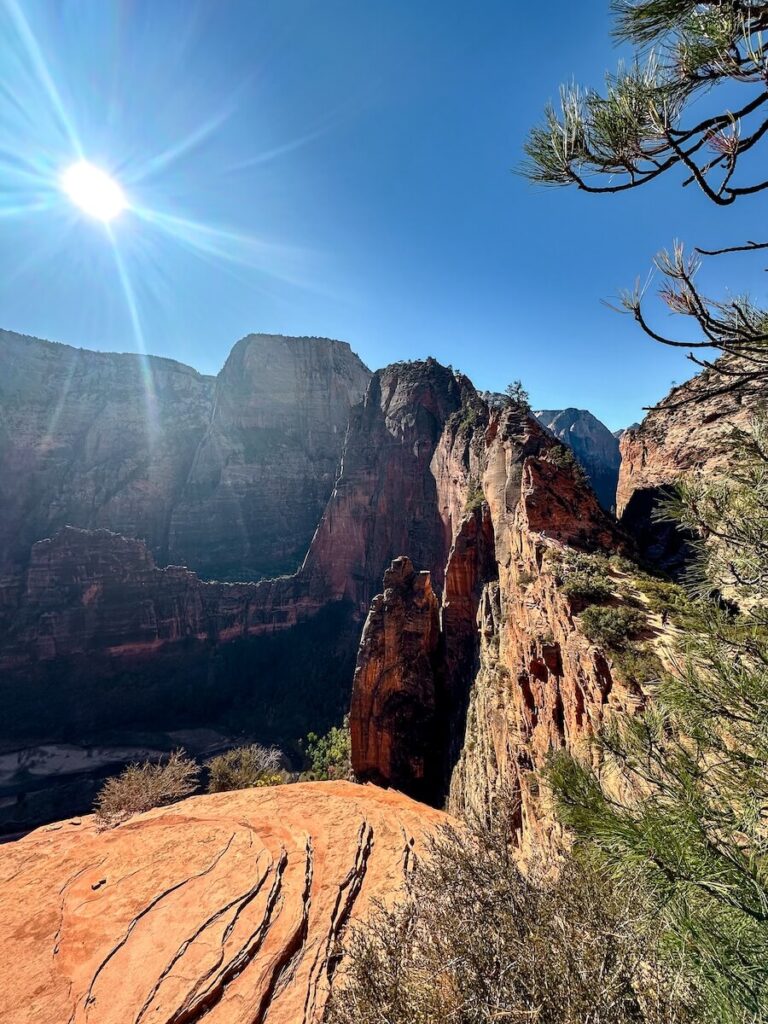
The Final Summit (Epic Panoramic Shots)
You made it. You’re sweaty. You’re probably questioning your life choices.
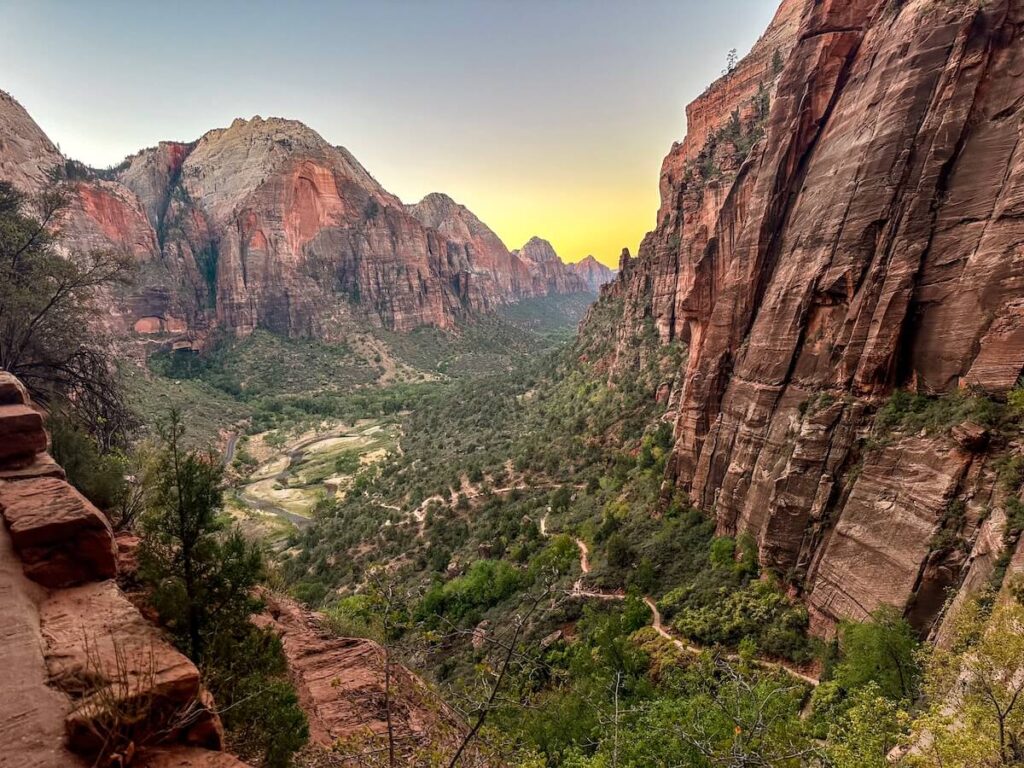
But wow – the summit delivers 360° views that scream desktop wallpaper material.
- Best for: Wide-angle panoramas and “conquered-the-beast” selfies.
- Golden hour magic: Sunrise brings softer shadows and fewer crowds, but sunset paints the canyon walls in molten gold.
- Patience pays: Space is tight, so wait your turn for uncluttered shots.
Composition Tips for Epic Angels Landing Pictures
Getting to the top is half the battle! The other half is making sure your photos look as jaw-dropping as the view itself.
Here are a few quick composition tips to elevate your Angels Landing photography game:
1. Get Inspired Before You Go
The one thing I regret not doing when I hiked Angels Landing is getting some inspiration before I went.
Of course, you never want to exactly copy, but if you see a photo that you love, recreate it with your own unique twist!
2. Use People for Scale
Angels Landing is massive, and photos don’t always do it justice. Include hikers in the frame to highlight just how dramatic the drop-offs really are.
3. Lead the Eye with the Ridge
Use the natural curves of the ridge line or Virgin River to guide the viewer’s eye into your photo.
4. Go Wide, But Stay Grounded
A wide-angle lens makes the cliffs look even more epic, but avoid tilting your camera too much because nobody wants a horizon that looks like a roller coaster.
5. Frame the Drama
Use canyon walls, chains, or tree branches as natural frames around your subject.
It gives your shots depth and makes them stand out from the typical “point-and-shoot” angles.
6. Safety Over Symmetry
Yes, symmetrical summit shots look amazing, but don’t step onto sketchy ledges to get them.
Always choose stable footing first, even if it means slightly imperfect framing.

How to Get a Picture of Yourself on Angels Landing
You didn’t hike a death-defying ridgeline just to come home with zero proof, right?
The good news: even if you’re hiking solo or in a small group, getting epic shots of yourself is possible.
You just need a little planning and some clever strategy.
Bring a Lightweight Tripod + Remote Shutter
A compact, foldable tripod is your best friend for summit shots and ridge line drama.
Pair it with a Bluetooth remote or your camera’s timer so you’re not sprinting into frame like a wannabe parkour athlete.
Again, I would not recommend this on the chain section – only on the hike up, Scouts Landing, or the summit.
Ask Fellow Hikers (Nicely!)
Everyone on this trail wants epic photos and teamwork makes the dream work.
Offer to swap quick shots with other hikers at safe pull-offs or the summit.
Be specific about your framing (“Include the ridge behind me!”) so you don’t end up with a blurry forehead close-up.
Frame Yourself Like a Pro
Want that “conquered-the-beast” vibe without actually dangling off the ledge?
Position yourself so the background shows scale (like the sweeping Virgin River or other hikers on the ridge).
Wide angles make the exposure look epic while keeping you safely away from danger zones.
Safety Tips for Getting Pictures on Angels Landing
Here’s the reality check: no photo is worth dying for.
Angels Landing is gorgeous…but it’s also one of the most dangerous hikes in the U.S.
If you want epic pictures and a safe trip back to the parking lot, here’s what you need to know:
Ditch the Chains Photos
I get it…the chain section is the Instagram shot.
But here’s the rule: do not take photos while holding the chains or moving along narrow ledges.
Scout safe pull-offs ahead of time where you can pause, plant both feet, and stage your shot without becoming tomorrow’s cautionary tale.
If anything, mount an action camera and then take still shots from the video later.
Watch the Crowds
Trail traffic is real, especially during peak season.
Stay aware of hikers around you and avoid blocking the path while setting up a shot.
If you need a few seconds, step into a wider alcove or wait for gaps in the line. Everyone’s here for the same reason, so be courteous and cautious.
Have a Photo Plan
Before you start the climb, decide where you want to stop for photos: Scout Lookout, a couple of wider ledges, and the summit are safest.
Winging it while balancing on a two-foot-wide ridge? Hard pass.
Prepare for Emergencies
Bring a small first-aid kit, plenty of water, and a charged phone in case something goes sideways.
Looking for another iconic hike? Let’s compare Angels Landing to Half Dome!
Pro Editing Tips to Make Your Angels Landing Pictures Pop
You made it back with all your limbs, your sanity, and some killer shots – now it’s time to make those photos shine.
With Angels Landing, the biggest challenge is balancing harsh lighting, deep shadows, and fiery red rocks without overcooking the edit.
Read More – How to Edit Adventure Photos
1. Tame Harsh Lighting
In Lightroom or an equivalent, start by lowering highlights to save detail in sunlit cliffs and slightly lifting shadows to recover canyon depth.
Use the “Dehaze” slider sparingly. It can bring out sky drama without making things look artificial.
2. Enhance Red Rock Tones
To make the sandstone pop, bump up the vibrance instead of saturation (keeps skin tones natural) and warm the temperature slightly for that classic Zion glow.
A touch of clarity adds crispness to rock textures without going full “HDR-gone-wrong.”
Personally, I find that the new HDR on the phones make the skies look very blue, so I always tone down the blues while enhancing the reds/oranges.
If you are turning into an Oompa Loompa in your Angels Landing pictures, I would recommend creating a mask for just the rocks so that you can edit it in isolation.
3. Speed Up With Presets
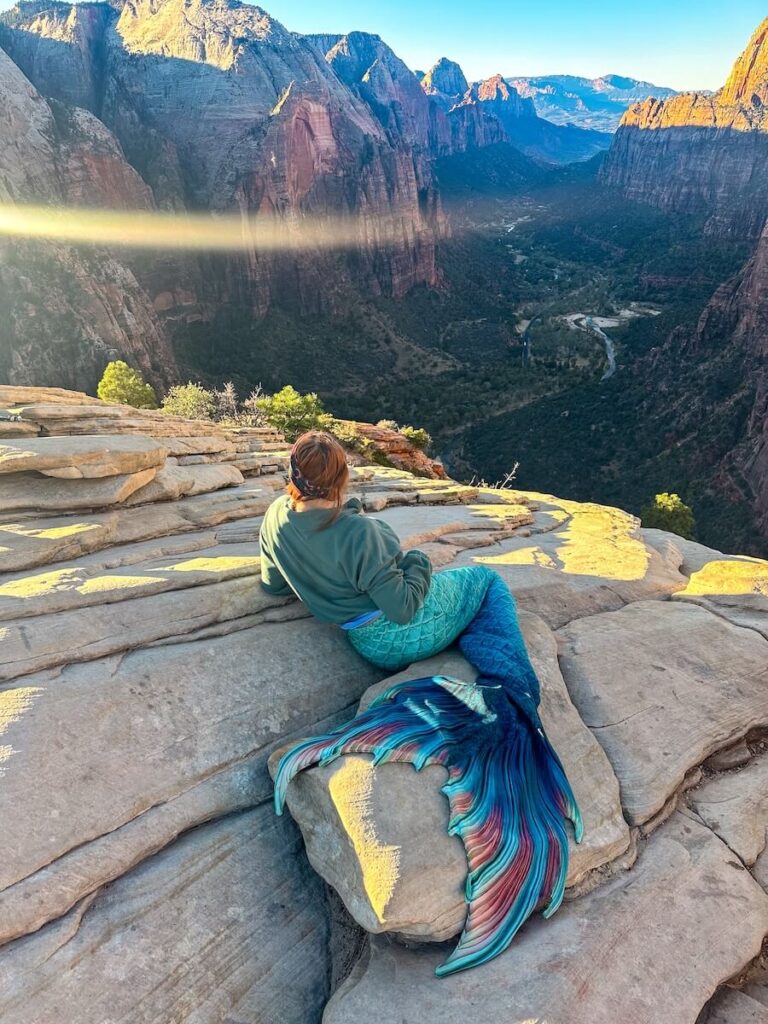
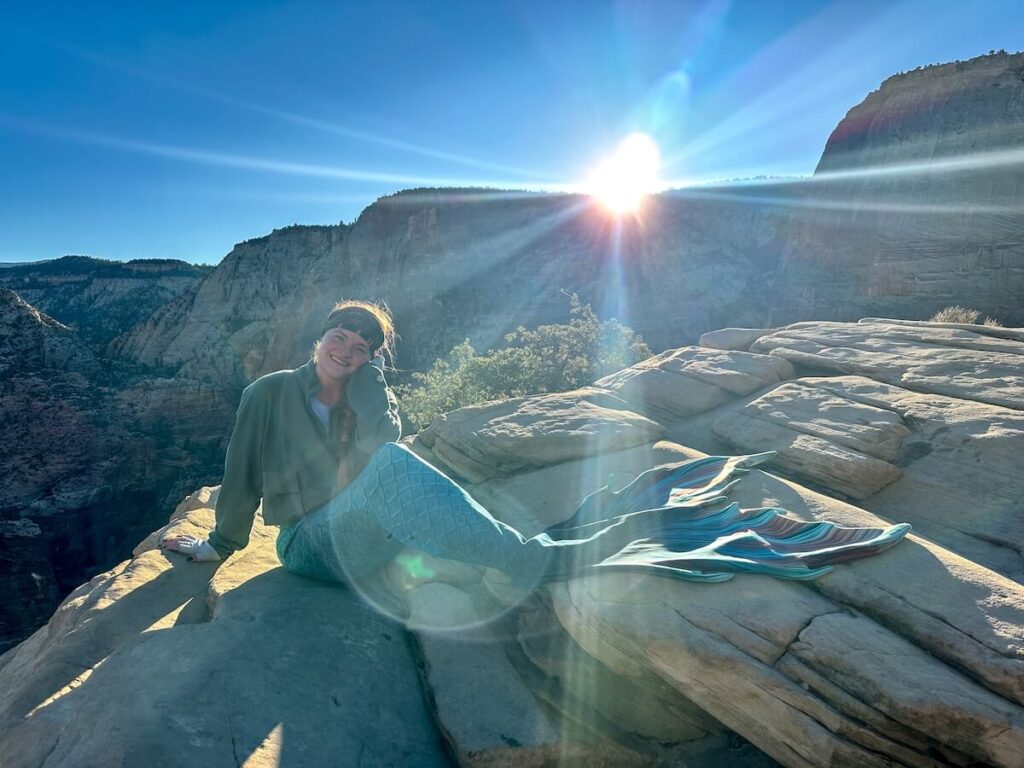
If you want a one-click glow-up, use my Mermaid Adventure Presets that are designed for wild landscapes and dynamic lighting (shameless plug, but they work).
I also offer editing services and custom Lightroom presets if that’s your jam. My goal is to do the boring stuff so you can spend more time adventuring.
Photography Checklist for Angels Landing
Before you tackle Angels Landing, here’s your quick, copy-and-save photo checklist to make sure you capture every epic shot without missing a beat:
- Scout Lookout Shot → Safe, wide-angle views before the chains. Perfect for those “hero shots” without risking your life.
- Chains Action Shot → Stage it at a safe pull-off—capture the drama, not the danger.
- Summit Panorama → Go wide! Snap a few 360° shots to showcase the jaw-dropping ridgeline.
- Golden Hour Canyon Glow → Hit the trail early or late to catch those warm tones lighting up the red rock walls.
- POV Shot (Optional) → Clip on your GoPro or Insta360 for hands-free drama while climbing.
- Gear Check → Camera ready, extra batteries packed, memory cards cleared, and lens wipes handy.
Save this list, plan your stops, and you’ll head home with scroll-stopping Angels Landing pictures without missing a single iconic shot.
Final Thoughts on Angels Landing Photography
At the end of the day, conquering Angels Landing isn’t about getting the perfect shot…it’s about soaking in the experience, testing your limits, and walking away with a story you’ll never forget.
The photos? They’re the bonus prize.
But with this Angels Landing photography guide, you’re now equipped to plan your stops, shoot safely, and capture scroll-stopping Angels Landing pictures without risking your life (or your gear).
I get it…I’ve been there. As an adventure photographer, I’ve hauled cameras up unbelievable ridges and learned when to press the shutter…and when to just stand still and breathe it all in.
Trust me, balance both, and you’ll walk away with unforgettable memories and epic content.
Save this guide for your hike, and when you post your shots, tag me at @TheBucketListMermaid so I can cheer you on! Now go conquer that ridge – you’ve got this!
FAQ: Angels Landing Photography Guide
Let’s answer your questions about Angels Landing Photography and capturing those incredible bucket list memories!
More Adventure Photography Guides
More Travel Resources
Adventure Bucket List Resources
I am here to help your travel adventures go as smoothly as possible! That way you can check off that bucket list with minimal complications and spending!
SHOP – Shop the best adventure gear and essentials on my Amazon Storefront – handpicked by a full-time adventuring mermaid!
AIRFARE – There are a few I use, but Aviasales is normally my go-to for flights without any extra fees or markups.
ACCOMMODATION – My two favorites are Booking.Com for hotels and VRBO for rentals.
GUIDED TOURS – If you are looking for quick and easy tours, check out GetYourGuide and Viator.
MULTI-DAY TOURS – For more in-depth tours that span several days, TourHub has many great options with reputable travel companies. Use my code (ALEXANDRA1GURU) for up to 5% off your next bucket list adventure.
TRANSPORTATION – You can either rent a car yourself with Discover Cars or do a guided bus tours like Big Bus Tours.
SIM CARDS – Avoid expensive roaming charges with an eSim card with Airalo. Personally, I prefer wifi boxes, and recommend WiFi Candy (get 10% of with the code THEBUCKETLISTMERMAID).
TRAVELER’S INSURANCE – Check out VisitorsCoverage for affordable insurance plans. If you are a nomad or remote worker, I would check out SafetyWing.
SEE MORE – Adventure Resources | Photography Resources
See Some Photos You Like?
Check out my full photography page for a full gallery and prices.