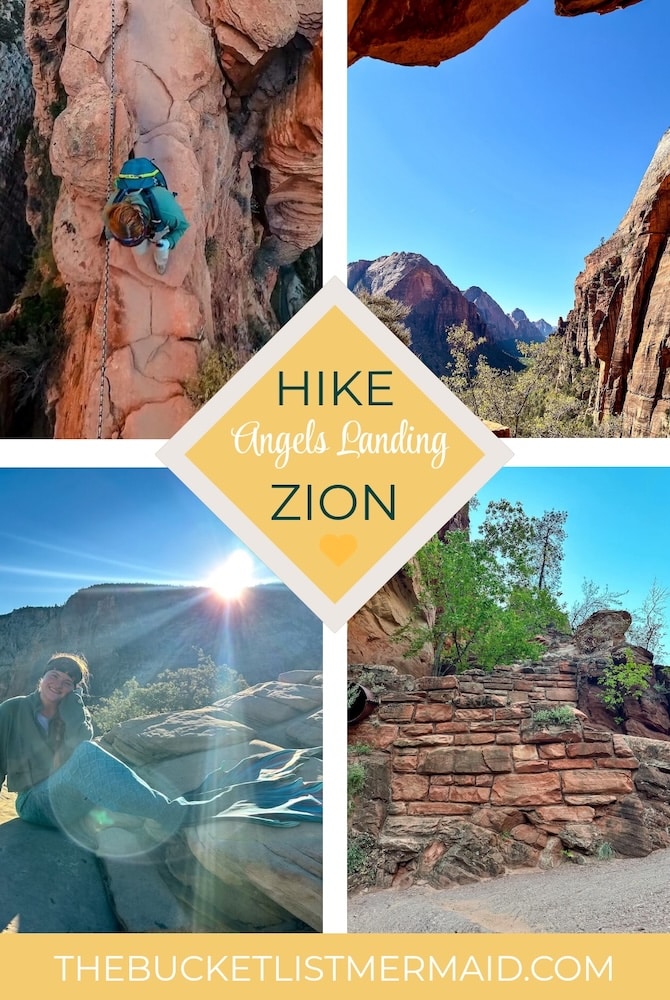
Angels Landing Tips: How Not to Panic, Plummet, or Pee Yourself
This website contains affiliate links from trusted partners. If you purchase through a link on this site, I may earn a commission at no extra cost to you. As an Amazon Associate, I earn from qualifying purchases. See my Privacy Policy and Disclosure for more information.
If you’ve got Angels Landing on your bucket list, congrats – you’re a thrill-seeking and fun-loving adventurer.
But let’s get one thing straight right out of the trailhead: this hike is not just “kinda hard” or “a little sketchy.”
It’s full-on “don’t-look-down-or-you’ll-crap-your-hiking-pants” scary in parts.
And yet, it’s also one of the most iconic, jaw-dropping, soul-reviving hikes in the entire U.S. – if you do it right.
I’ve made it a mission to chase down some of the wildest, gnarliest, and most adrenaline-pumping trails on Earth.
This isn’t about scaring you off. It’s about getting you up and down that spine of rock in one glorious, memory-making piece.
In this guide, I’m dishing out 20 real Angels Landing tips – not the generic “bring water” fluff. It’s focused on helping you actually experience the hike safely, confidently, and joyfully (not just chase the perfect photo). We’re talking:
- How to not die on the chains (literally),
- The exact moment you should turn back (yes, that’s allowed),
- Trail etiquette that could save your life,
- And all the weird-but-wise advice I wish I’d known before doing it.
So grab your backpack, tighten those laces, and let’s get you prepped to hike Angels Landing like a legend… not a statistic.
Key Takeaways
- 🥾 Angels Landing is just as mental as it is physical — conquer fear with preparation, confidence, and a solid plan.
- 📸 Hiking smart is non-negotiable — from grippy shoes and early starts to hydration, chain etiquette, and knowing when to let people pass, your safety depends on it.
- 🏔️ You don’t need to be fast, just focused — tune out peer pressure, breathe with intention, and climb like every step counts (because it does).
Want to know what Angels Landing is like? Check out my full vlog below👇
1. Know the Angels Landing Trail Stats
Knowledge is power, my altitude-loving friends.
- Distance: 5.4 miles round trip
- Type: Out & Back
- Elevation gain: 1,488 feet
- Water: Fill up before the hike — no water on the trail
- Time: 3–6 hours (depending on crowds, speed, and photo ops)
- Bathrooms: Available at The Grotto & Scout Lookout (but they’re vault toilets… manage expectations)
- Exposure level: Absolutely mind-blowing 🤯
- Pets Allowed: No
- Guided Tour: Angels Landing Summit Guided Hike with Permit
Trail Breakdown
Start at The Grotto shuttle stop (Stop #6): This is where your hike officially begins (and where your time slot applies if you have a permit). You’ll cross the Virgin River and start up the West Rim Trail.
Refrigerator Canyon: The first section climbs steadily but gives you a breather in this cool, shady canyon. Don’t get too comfortable, though…
Walter’s Wiggles: A series of 21 tight switchbacks that feel like an uphill StairMaster designed by a sadistic park ranger. It’s steep, relentless, and a real thigh-burner.
Scout Lookout (2 miles in): This is your last “safe zone” before the final push. No permit required up to this point. It’s also the last place with a bathroom. From here on out, it’s you, the chains, and your will to live.
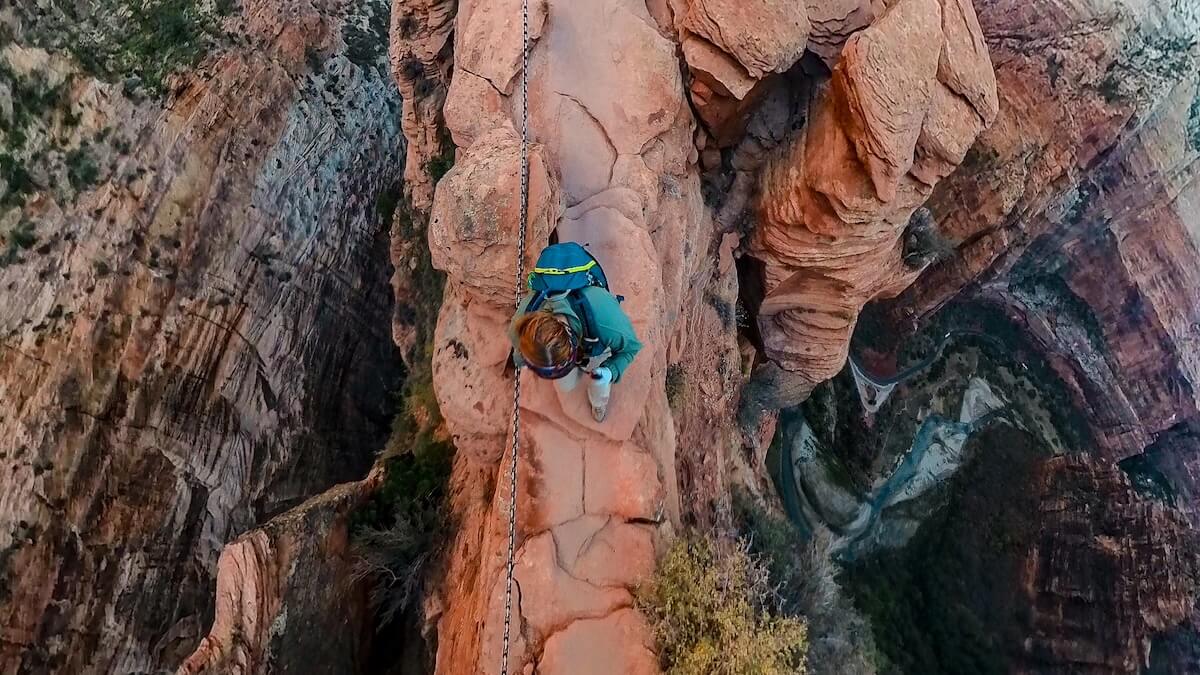
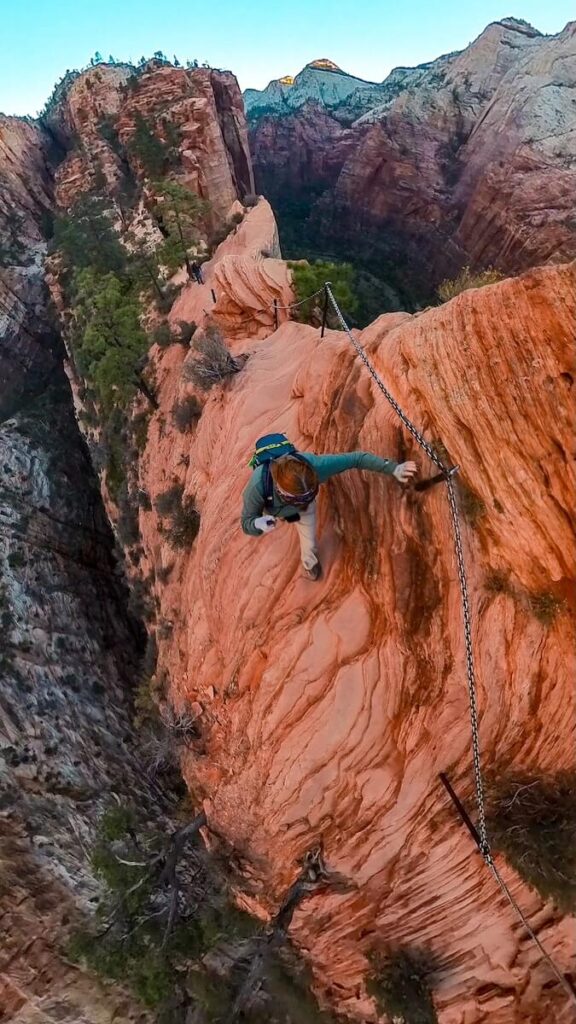
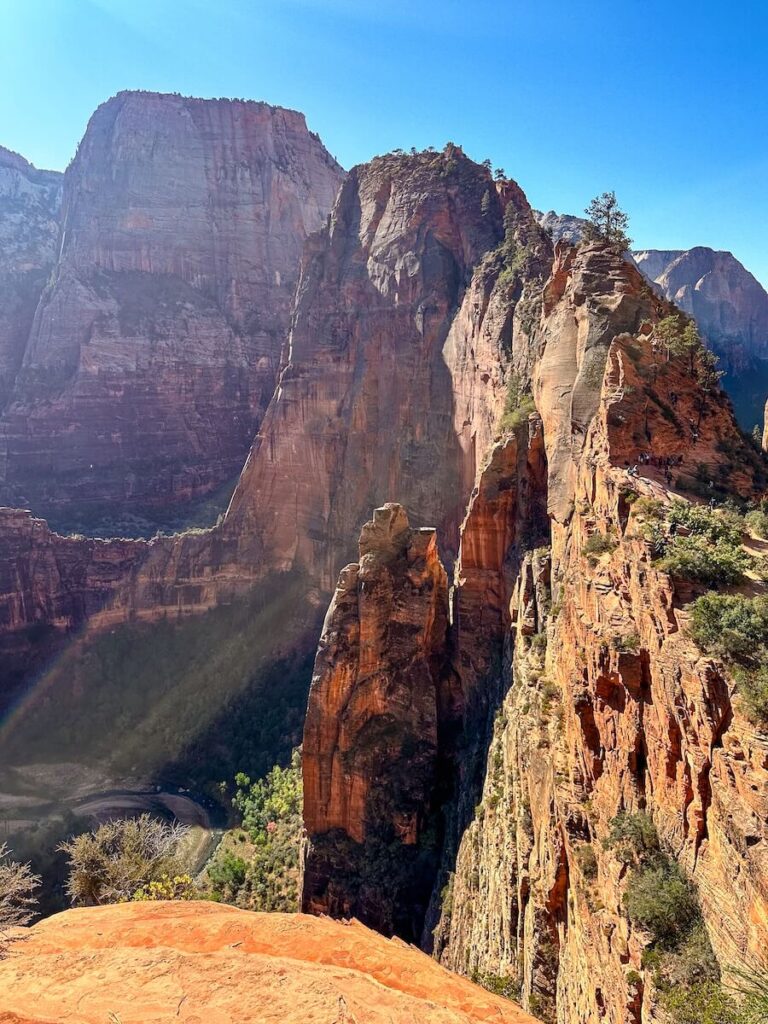
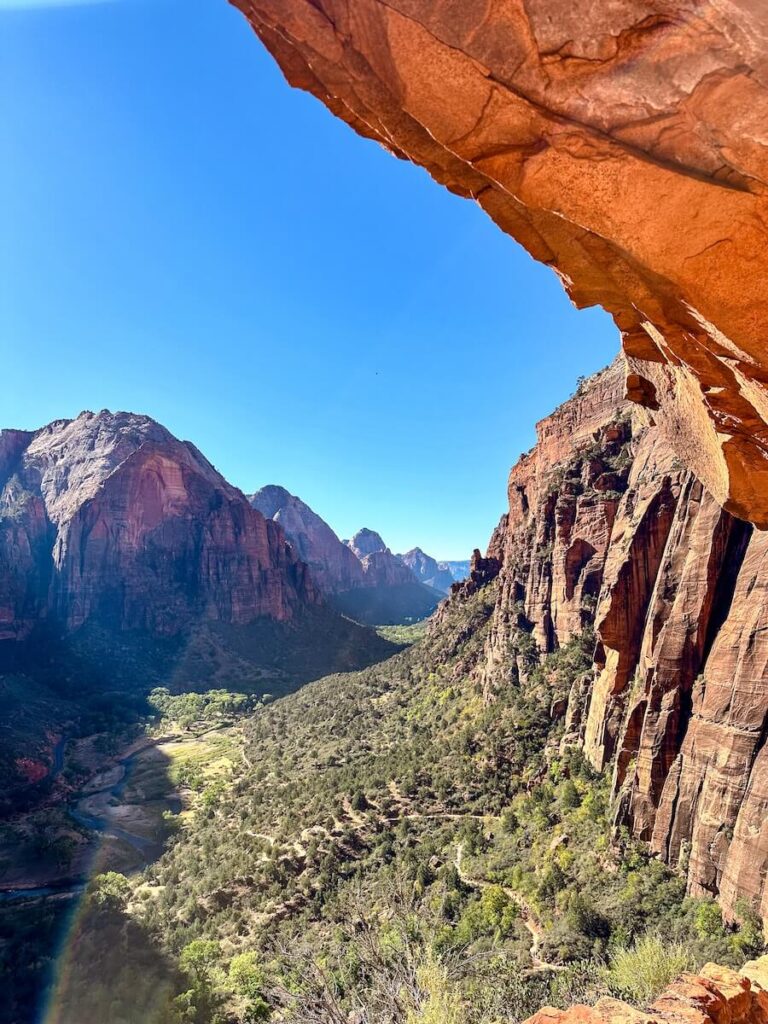
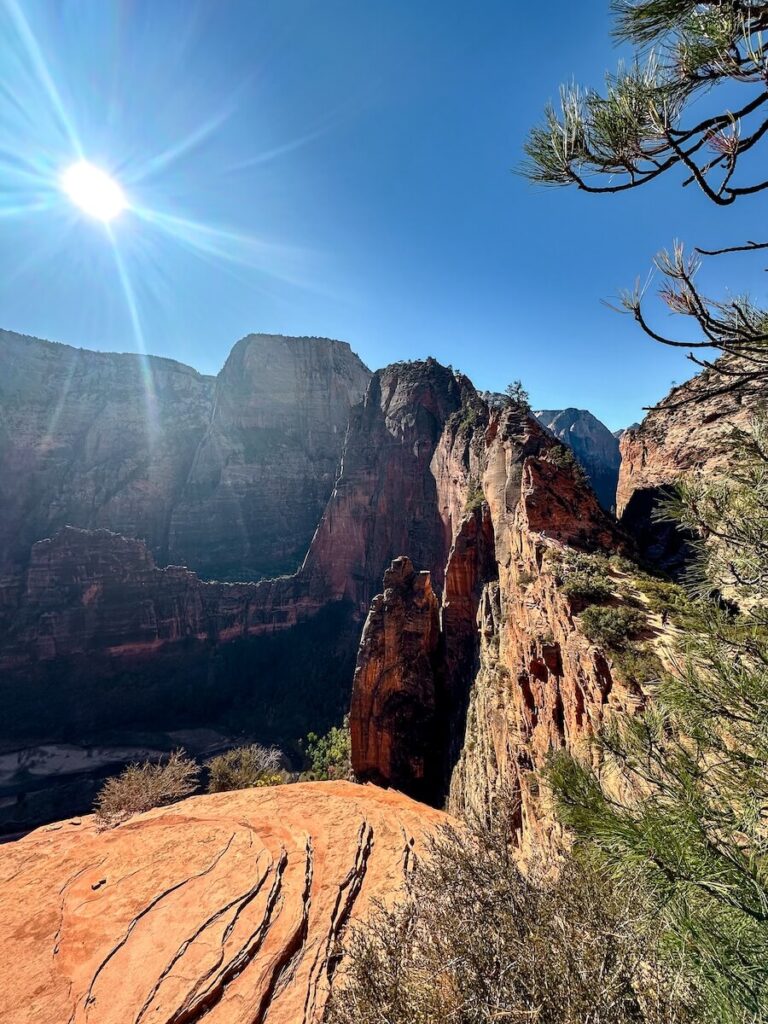
The Chain Section (roughly 0.5 miles one-way): This is the infamous stretch to Angels Landing proper. Narrow ridgelines, huge drop-offs (1,000+ feet on both sides), and chains bolted into the rock for grip. This section isn’t long, but it’s mentally intense, physically demanding, and absolutely not for the faint of heart.
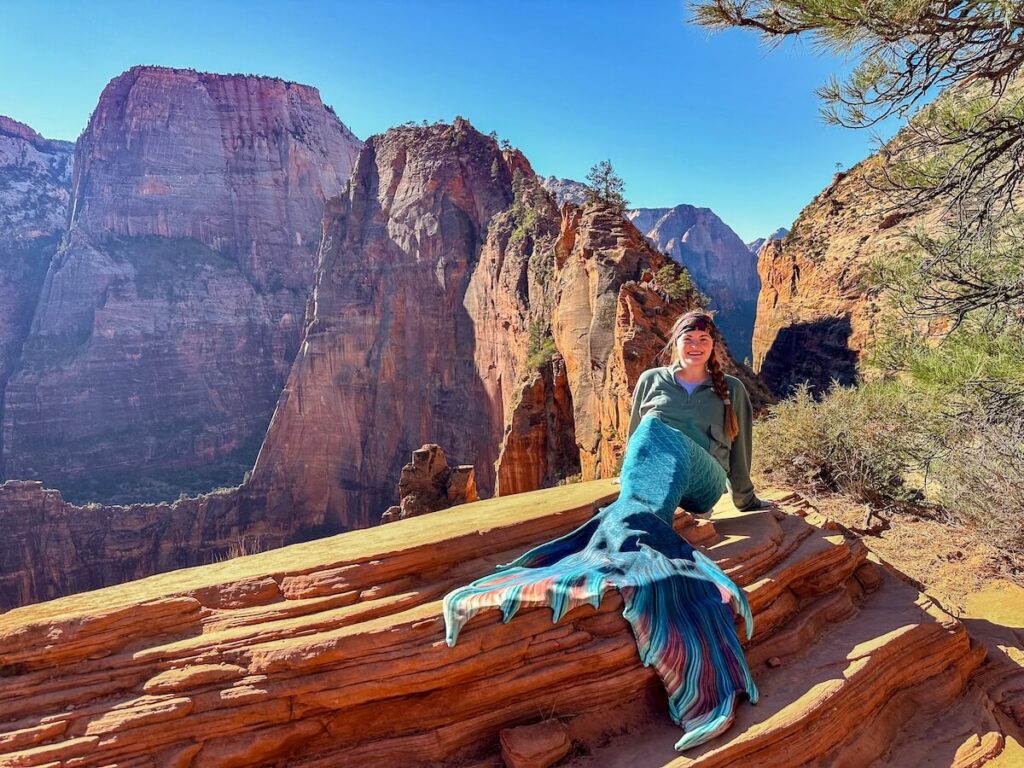
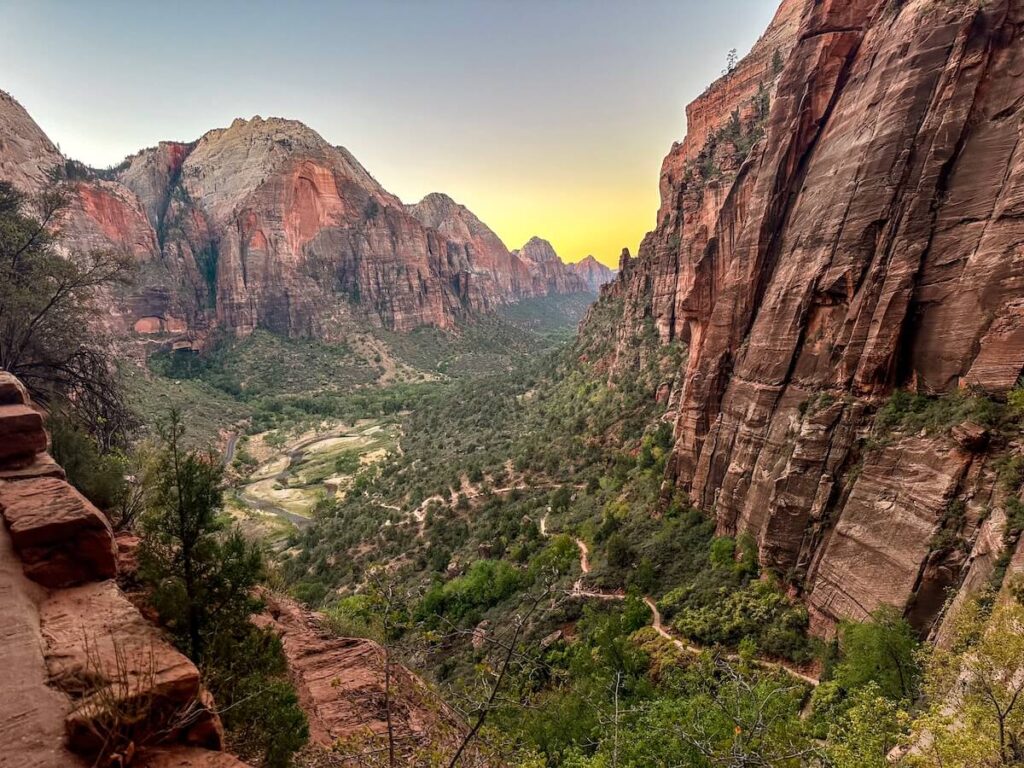
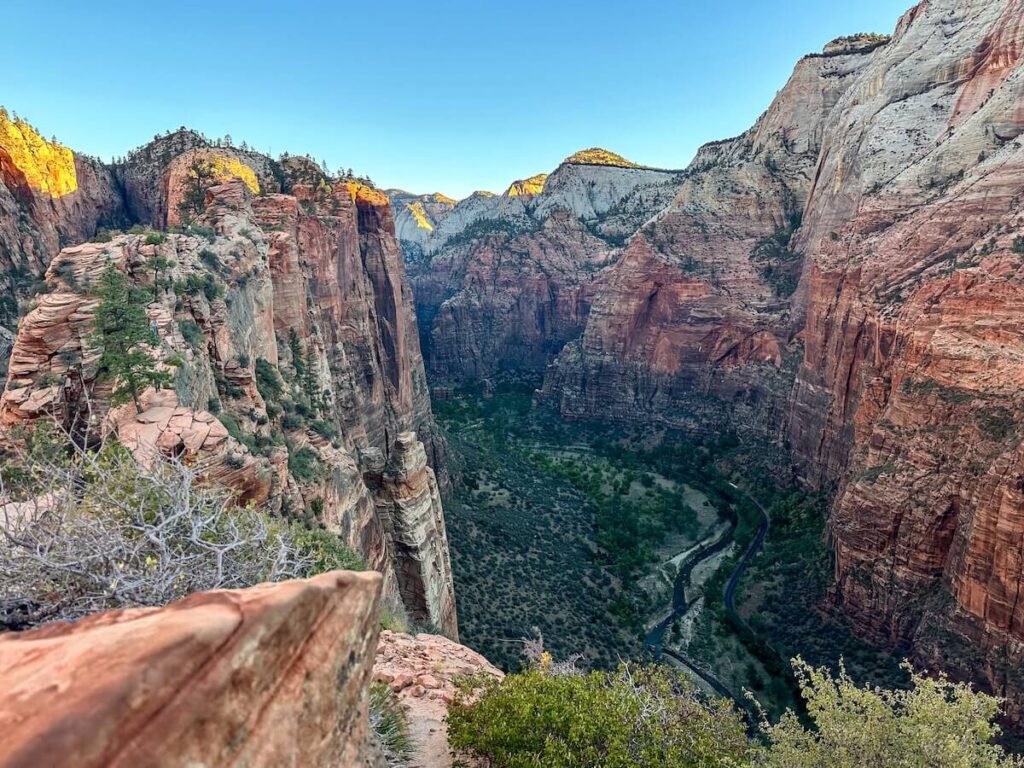
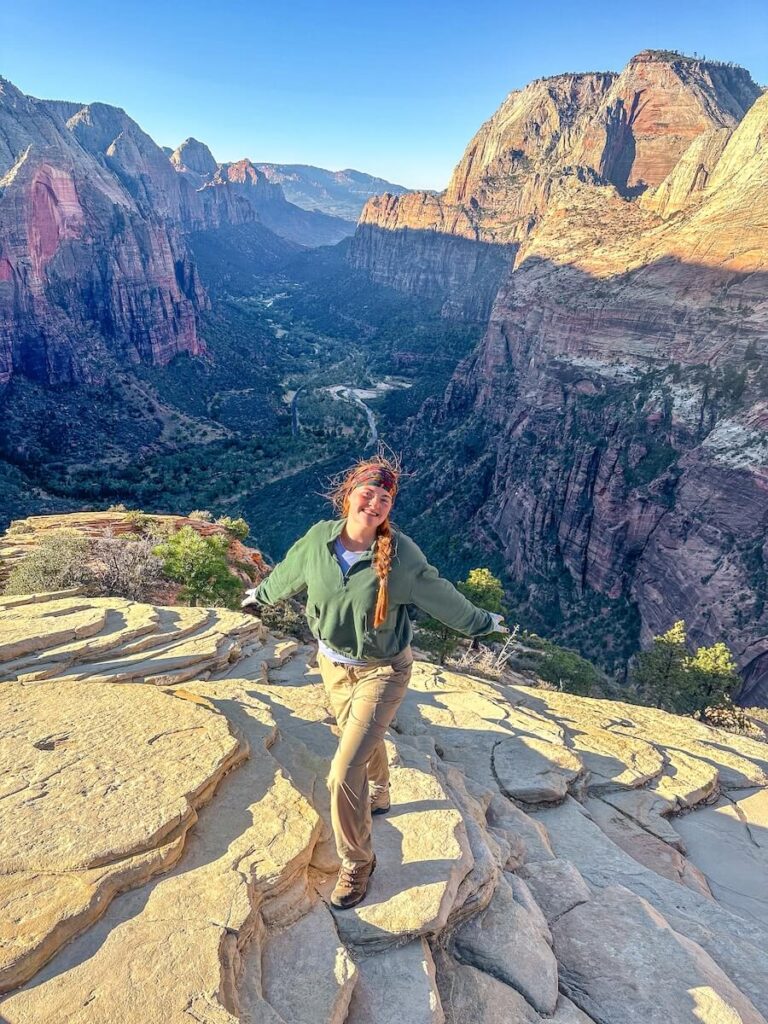
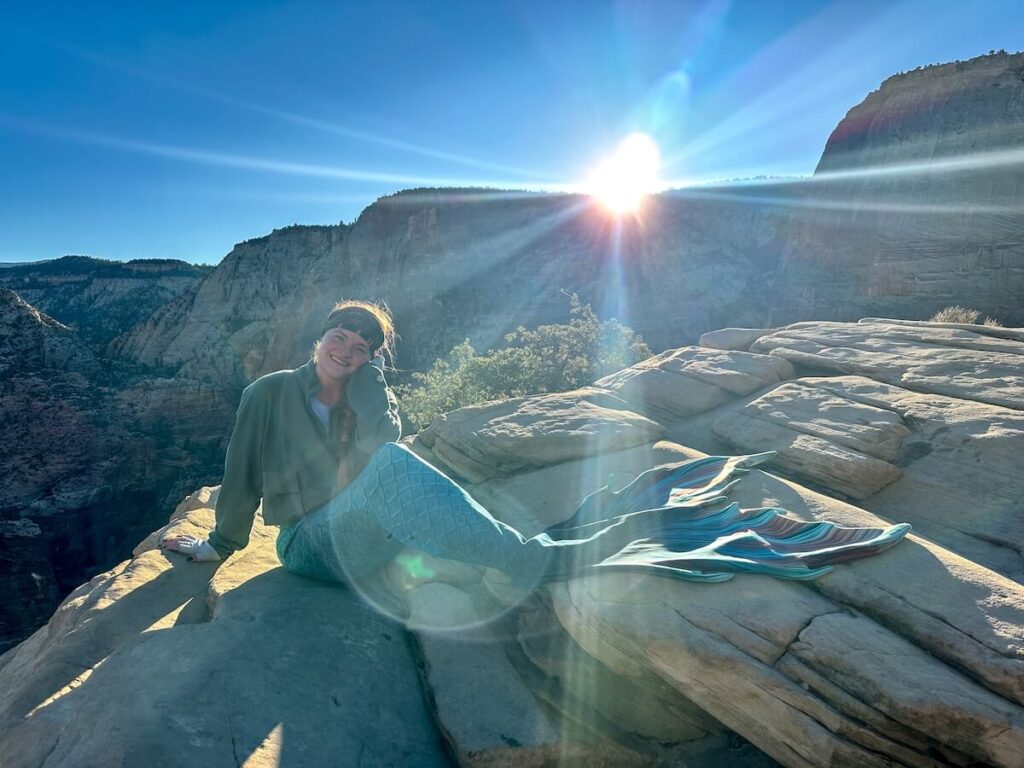
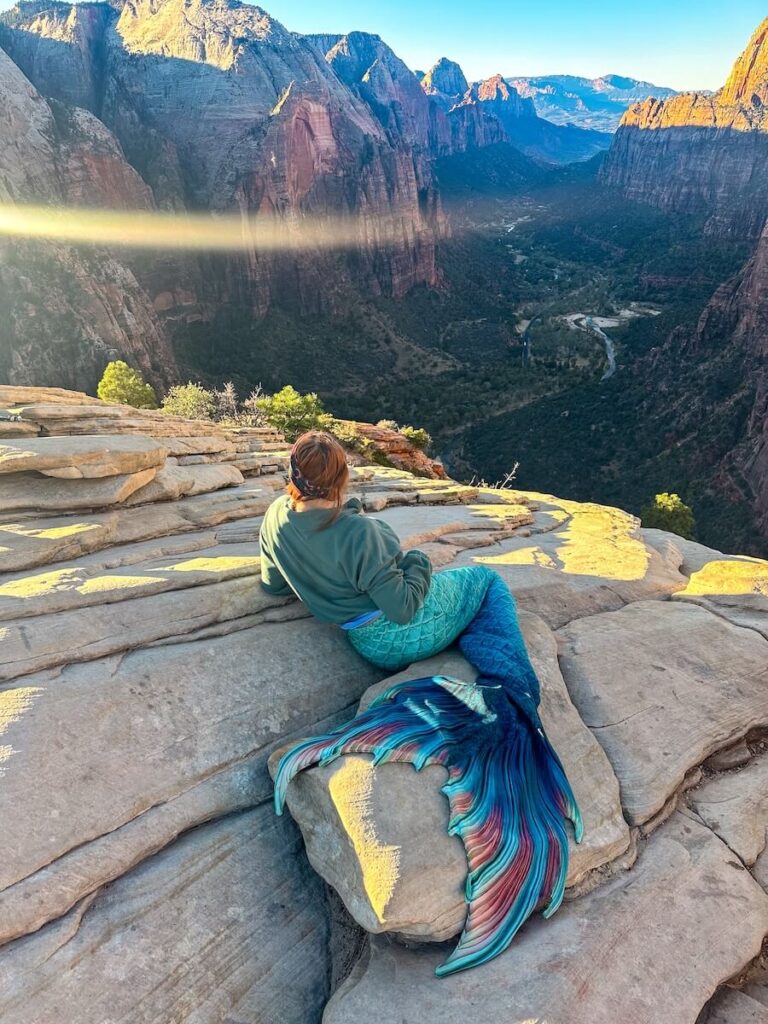
Summit Views: If you make it all the way up, congrats! You’re rewarded with one of the most iconic panoramas in the national park system – Zion in full glory. Just, uh, don’t get too close to the edge.
Then, turn around and do it all again…backwards.
Is Angels Landing worth it?
This is one of the highest rated hikes on All Trails – ranking at 4.9 stars with over 32,000 reviews!
It is also rated by several sources as one of the most dangerous hikes in the US and even the world.
Translation? This is one of the most EPIC bucket list hikes you will ever do!
2. Plan Your Hike During the Right Time
You know what doesn’t mix well with a 1,000-foot drop on a 3-foot-wide rock spine? People. Lots of them.
If there’s one thing that’ll make Angels Landing more dangerous than it already is, it’s crowds — panicked, impatient, chain-grabbing crowds.
Let me gently hold your hand when I say this: the hike itself is intimidating… but the crowds? They’re downright terrifying.
I hiked Angels Landing in the fall and made it to the top early, thanks to my morning permit (and the fact that I hike like a cautious little tortoise).
A few experienced hikers politely passed me on the way up – no big deal. But the descent? That was a circus.
Even in late October, I was stuck navigating around clusters of people who were unsure of their footing, didn’t understand trail etiquette, or decided now was the time to turn into YouTube vloggers mid-chain section. 🙃
Let me be crystal clear: the more people on that chain, the more risk you’re taking.
Every extra hiker adds pressure, unpredictability, and potential for disaster.
Best Time To Hike Angels Landing
Shoulder Seasons – The Clear Winner
Hike mid-week (Tuesday–Thursday) in early spring (March–April) or late fall (October–early November).
These shoulder seasons bring cooler temps, fewer crowds, and a better shot at that golden permit.
Peak Season
Avoid Major holidays, long weekends, and anything between Memorial Day and Labor Day.
You’re not climbing Angels Landing then — you’re climbing over people. And unless your idea of fun is a death-defying conga line, skip it.
Winter
I would also avoid winter. Although you will skip the crowds, the potential for snow is not worth the risk.
3. How to Get a Permit for Angels Landing (Without Losing Your Mind)
Let’s be real—getting a permit for Angels Landing is almost as stressful as the hike itself.
Thanks to the new permit system rolled out by Zion National Park in 2022, you can’t just show up and hope to summit anymore.
And while that helps reduce crowding (in theory), it also means you’re at the mercy of lotteries, luck, and logistics.
Types of Permits for Angels Landing
There are two ways to snag a permit:
- Seasonal Lottery – For the ultra-planners. Basically, you pick 7 days ranked and time of day you want to hike.
- Day-Before Lottery – For the gamblers and spontaneous adventurers. Yeah…I knew that seasonal lottery seemed wayyy to responsible for me. This seems more my speed. You apply the day before your hike and cross your fingers.
➡️ Apply through Recreation.gov for both types.
Permit Logistics You Need to Know
Here’s the breakdown so you can plan without losing your sanity:
Seasonal Lottery
- When to Apply:
- Spring (March–May): Apply in January
- Summer (June–August): Apply in April
- Fall (September–November): Apply in July
- Winter (December–February): Apply in October
- Cost: $6 to apply (non-refundable), and $3 per person if selected.
- Prices subject to change.
Day-Before Lottery
- When: Opens from 12:01 a.m. to 3:00 p.m. MT the day before your intended hike.
- Results posted: Around 4–5 p.m. MT.
- Pro tip: Set a calendar reminder and apply early in that window. Sometimes it crashes close to the deadline.
If you are worried about permits, there are tour companies that do it for you and then take you on a guided tour👇
My Experience with Permits and the Day-Before Lottery
I did meet a hiker who proudly boasted that she got it on the first attempt and it took everything in me not to whack her with one of my hiking shoes (just kidding…kinda).
However, even in the fall during the tail end of the season and – no joke – it still took 6 freaking attempts in the seasonal lottery to finally win a permit.
It isn’t a huge deal, but those application fees to just apply add up!
Best Time of Day to Select for Angels Landing Permits
Another thing that threw me for a loop is it had me choose the time of day.
According to the ranger, the “before 9 a.m.” is the most popular. She mentioned that if you pick the “after 12” time slot, you might increase your chances of a successful permit since it is less popular.
After being rejected over and over again, I started experimenting with choosing different options.
News flash: It didn’t matter for me and I still managed to get a permit for the “before 9 a.m.” start time.
It was the best choice in hindsight (cooler, fewer crowds), but it didn’t feel like a strategy so much as a shot in the dark.
Where Does Your Hike Start and when does your time start?
To hike Angels Landing, you’ll need to head to Zion National Park in southern Utah.
The trail starts at The Grotto shuttle stop (stop #6) along Zion Canyon Scenic Drive, which is only accessible via the park’s free shuttle system most of the year (spring through late fall).
My overly logical and semi-anxious brain had this thought: If I have the time slot “before 9 a.m.”, does that mean I have to be at the chain section at 9 a.m.?!
What if the Walter Wiggles kick my butt and I’m late? Does that mean I’m outta luck?
Instead of reading a helpful blog like this, I literally sprinted up the trail for no reason.
Repeat after me: The start time for your hike is at the Grotto.
…which still makes no sense to me because you don’t need a permit to hike up to Scout Lookout…Whatever. Not my problem.
Where Do Rangers check Permits?
Rangers may ask to see permits at any point on the trail. However, it is most likely at the Grotto or Scout Lookout.
Quick clarification: The grotto is Shuttle stop #6 where the hike starts. Scout Lookout is the area right before the “Oh, crap” chain section up to the summit.
My mother couldn’t secure a permit (and she is a sane human) and hiked with me to Scout Lookout and then covered her eyes as I did the permitted section by myself.
Personally, no one checked my permit the entire time I was hiking up.
Not at the trailhead, not at Scout Lookout, not even near the chains. This permit was a PAIN to get…at least check my work!
But just because you might not get checked doesn’t mean you can risk it.
On my way back down, I witnessed an absolute mess: a guy was literally turned around at Scout Lookout because he didn’t have his ID. Yep, even though he had a valid permit. He was yelling, others were arguing, it was a whole drama-fest.
If I had to do Walter’s Wiggles again after being turned around, I would’ve sat on the trail and cried. Hard pass.
💡 Pro Tip: Keep your permit somewhere easily accessible, like a hip pocket or the top of your pack. Don’t make the ranger wait while you unpack your trail mix, chapstick, and 3,000 receipts.
Important Reminders for Angels Landing Permits
- You must carry photo ID that matches the name on your permit. No ID = no summit.
- Each permit has your time slot. Morning means enter the chains before 9 a.m.; mid-day is 9–12; afternoon is after 12 p.m.
- Only the section past Scout Lookout (the chains) requires a permit. You can hike up to Scout Lookout without one.
4. Expect Parking to be an Absolute Disaster
Now for my hiking tangent: the parking is terrible, especially if you have a later time slot.
Even with the “before 9 a.m.” slot, the earliest I could start was 6 a.m. due to the shuttles.
Because of Zions shuttle system, no cars are allowed up on the main road (depends on the season).
This means that everyone going up that main road has to park at the visitor’s center. And it fills up…fast. Like “if you aren’t there by 7 a.m. you are out of luck” kind of fast.
Parking is chaotic, messy, and just a downright headache.
Because of this, I ended up getting to the lot around 5:30 a.m. and there was STILL a line to be on the first shuttle.
Again…my brain thinks, “what if I miss my time slot because I’m too busy driving around praying for a parking spot?”
My point to all of this is that most people do not realize that they need to factor in a lot of extra time to park. I would plan for even more time if you have a permit with a later time slot.
As an alternative, I would consider parking right outside of Zion and then taking the shuttle in.
Shuttles start at 6 a.m. (spring–fall), and they run every 10 to 15 minutes.
Looking for another Bucket List Hike in Zion National Park?
If you don’t get a permit for Angels Landing, are scared of heights, or just want to check off another epic hike in Zion National Park…I cannot recommend The Narrows enough!
5. Wear Grippy Shoes
This is not the trail to break in your cute new trail runners with questionable tread.
This is a “one slip and you might yeet yourself off a cliff” kind of trail. You need shoes that are basically Spider-Man for your feet.
Look for
- Sticky soles with aggressive tread
- Rock-solid arch support
- A secure fit so your foot isn’t sliding around during steep ascents and descents
My personal pick: As with most things, I put on my trusty Merrells and never had any issues whatsoever.
Trail Conditions Breakdown
- The first section is paved and mellow – but don’t let that lull you into laziness. Things escalate quickly.
- Once you hit Walter’s Wiggles, you’ll want serious traction for those tight, zigzagging switchbacks.
- On the chains section, you’re walking along slick rock, narrow ledges, and exposed cliffs.
What NOT to wear
- Converse (no grip, flat as pancakes)
- Fashion boots (you’ll look great in the ER)
- Smooth-soled sneakers
- Flip-flops. I’m not even joking – I saw someone attempt this in sandals. Don’t be that person.
Don’t forget to break in your shoes beforehand. Blisters or a sprained ankle at Scout Lookout? Not exactly the bucket list vibes you were going for.
👉Looking for more hiking gear? Check out my hiking gear guide or my Amazon Storefront👈
6. Don’t Overpack, But Still Pack the Essentials
You need enough to stay safe – but not so much that you feel like a sherpa hauling a mini-fridge.
Must-haves
- 2L+ of water (add electrolytes!) – I always hike with at least 3L, but you might want to consider 4L if it is hot.
- Trail snacks (salty > sweet) – My go-to snacks are yogurt covered raisins and beef jerky.
- Sunscreen + lip balm
- Basic first aid kit
- Headlamp (just in case)
- Light gloves with grip (NOT ski gloves — you’ll regret it when you are drowning in hand sweat…ew)
- I used some lightweight gardening gloves that I previously used on Half Dome and I was totally fine.
💡Bonus tip: Use a hydration bladder so you can sip without stopping. The last thing you want to be doing on that last section is pulling out a water bottle.
7. Don’t Burn Out on Walter’s Wiggles
Ahhh…the infamous Walter’s Wiggles. The 21 tight, thigh-burning switchbacks that appear out of nowhere like a plot twist in a horror film.
I’ll be real with you – I was not mentally prepared. They look small on the map, but in real life? They’re spicy. And they hit you right before the main event.
Walter’s Wiggles aren’t technical. They’re paved. They’re short. But they’re also steep, repetitive, and exhausting.
If you charge up them like you’re late for leg day, you’re going to burn through your energy reserves before you even see the chains.
Tips for the Walter’s Wiggles
- Pace yourself. Think “hike like a tortoise, not like a caffeinated mountain goat.”
- Stop at the turns. Each switchback gives you a mini flat spot – use those to catch your breath without blocking the trail.
- Hydrate and refuel. Walter’s Wiggles is your last big climb before the exposure. If you’ve been holding off on a snack or sip of water, now’s the time.
You don’t want to roll up to Scout Lookout already cooked.
Oh, and if you’re looking up at the Wiggles thinking, “Is this the hard part?” – bless your heart. You’re just getting started.
8. Go to the Bathroom at the Grotto or Scout Lookout
Listen, there are no “natural rest stops” once you hit the chains.
No trees, no rocks, no polite little shrubs. Just you, the wind, and a thousand-foot drop.
And let’s be honest – squatting on a sheer cliff face is not a core memory anyone needs.
There are two places to handle your business
- The Grotto Shuttle Stop: This is your last chance before you start climbing. They’ve got standard pit toilets, and it’s worth a quick visit even if you think you’re good.
- Scout Lookout: This is your very last option before the chains. It’s a solar-powered composting toilet with a view (and usually a bit of a smell). But trust me – it beats the alternative.
Once you hit the spine, it can sometimes take hours to go up and come back down, depending on crowds and your pace.
And there’s no “pulling over” once you’re in it. Getting stuck mid-chain with a bathroom emergency? That’s how trail nightmares are made.
Ladies, a GoGirl or Kula Cloth can be a game-changer for outdoor bathroom strategy, but they’re no substitute for proper facilities on this hike.
So be proactive. Pee with pride. Respect the trail – and don’t make Angels Landing infamous for another reason.
9. Have a Pre-Hike “Panic Plan”
Let’s be real: Angels Landing is intense – even for experienced hikers.
That exposed ridge and the sheer drop-offs? Yeah, it’s normal for nerves to kick in.
Panic doesn’t mean you’re weak – it means your brain is doing what it was wired to do: protect you from falling off a cliff.
Before you even hit the chains, talk through a “Panic Plan” or a mental plan with your group.
This can save you from confusion, frustration, or unsafe decisions in the moment.
Mental Preparation Ideas for Angels Landing
Choose a safe word
Something like, “I need to stop,” or even, “banana pancake.” Just pick a clear, no-questions-asked phrase for when someone needs to pause or turn around.
Fill in a template
“If I get scared, I’ll say ___.” or “If we get separated, meet at ___.”
Pick a regroup spot
If anyone gets separated, agree to meet back at Scout Lookout – not halfway up the spine, where passing is tight and risky.
Come up with a mantra
When my cousin hiked Angels Landing, she kept repeating: “You are so lucky to do be able to do this. You CAN do this.”
Sometimes mantras work wonders when your brain starts screaming.
Think of your “why”
If you are stuck, think to yourself – why are you doing this?
What motivation can you give yourself when instinct kicks in and your brain starts running wild?
Meditate Beforehand
I am a yoga teacher so I have to recommend this, but it has a purpose.
On the chain or spine section, you are going to be trusting yourself to know how to move and how to step.
Your intuition needs to be on point. Plus, you need to be calm and collected.
Because of this, why not take a few moment to clear your mind, get in the zone, and get ready to take on one of the wildest hikes in North America?
Why have a mental plan?
Angels Landing is as much mental as it is physical. It is good to have a mental plan too just in case!
Most hikers wont need it, but its better to be safe than sorry and to figure it out early.
This prevents awkward mid-trail meltdowns or unsafe decisions made under stress.
10. Know Your Limits and When to Skip the Chains
Here’s the truth no influencer tells you: you don’t have to do the chains to be a next-level bucket list hiker.
If you get to Scout Lookout and your gut says, “nope” – LISTEN TO IT.
Fear of heights? Wobbly legs? Just not feeling it? That’s all valid. Scout Lookout has stunning views and zero shame.
Real bravery = knowing when to turn around.
If you are worried about going by yourself, there are guided tours that you can book that include permits👇
What If I’m Afraid of Heights? (Spoiler: Angels Landing Might Not Be Your Hike — and That’s OK)
If your palms sweat just thinking about standing on a second-story balcony… Angels Landing might not be the flex you think it is.
This trail is not like a scary rollercoaster where you scream for 90 seconds and then it’s over.
It’s an exposed rock spine with drop-offs over 1,000 feet – on both sides – for nearly half a mile.
There are no railings. The only thing between you and a vertical free-fall is your grip on a chain and your ability to stay calm under pressure.
And that’s not even counting the crowds that try to pass you while you’re frozen mid-panic.
So ask yourself honestly
- Do you freeze up when you’re exposed to heights?
- Does your body go into full “nope” mode near cliffs?
- Do you trust yourself to make safe choices while terrified?
Scout Lookout is not a consolation prize. It’s a stunning viewpoint, and it still gives you the satisfaction of a tough hike without gambling with your nervous system (or life).
Thousands of people intentionally stop there – even seasoned hikers – because they know their limits.
If you still want to try the chains, that’s your call. Just know that once you commit to that ridge, there’s very little room for second-guessing. You need to be 100% mentally dialed in.
Bravery isn’t about pushing through fear blindly – it’s about knowing when to say, “This isn’t for me.”
And trust me: you don’t have to stand on that summit to be a badass hiker.
Interested in another bucket list hike? → Angels Landing vs Half Dome in Yosemite
My Experience with The Fear
Honestly, I don’t have any issues with heights. In fact, I hiked Half Dome a few weeks earlier and did Rim to Rim solo about a week after this.
I put myself in the zone and did what needed to be done.
However, I do remember distinctively thinking these exact thoughts:
- They want me to climb up WHERE?
- Did I actually willingly want to do this? What is wrong with me?!
- Wait…THAT’S the trail? No way!
I’d be lying if I told you my heart didn’t skip a few beats.
I wasn’t casually strolling along like it was a Sunday walk in the park – but I also wasn’t clinging to the chains in a puddle of tears.
Adrenaline kicked in, and I basically told my brain, “We’re not thinking about the 1,000-foot drop right now. Eyes up, hands tight, move forward.”
The funny part? Most people I talk to say the same thing: they powered through it, felt okay-ish in the moment… and then watched a YouTube video later and thought, “Wait. THAT’S what I just did?!”
It doesn’t fully hit you until you’re safe and sweaty at the bottom.
Here’s my point:
Is it terrifying? Yes.
Is it dangerous? It is if you aren’t careful or prepared.
Is it doable? Absolutely.
Would I recommend it to someone with a fear of heights? Not in a million years.
Would I do it again? In a heartbeat!
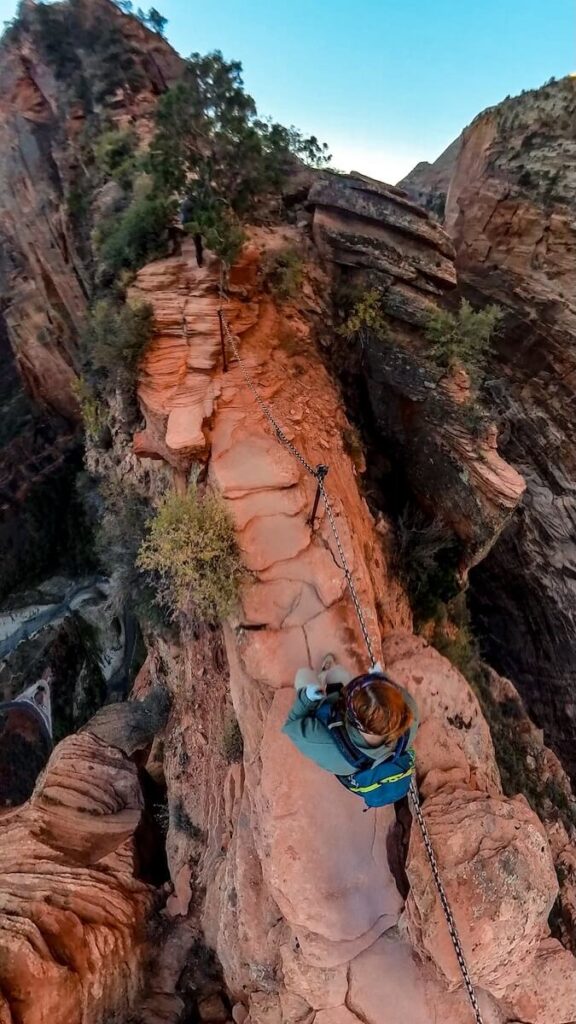
11. Use the Chains Wisely, But Don’t Cling for Dear Life
So, you have made the decision to ascend to the summit! Let’s talk about the dreaded chains.
The chains are your lifeline… but they’re not a crutch.
They’re there to guide and stabilize you when the drop-offs get gnarly – not to carry your full body weight while you white-knuckle your way across every inch.
If you cling to the chains nonstop, your arms are going to feel it. Fatigue = mistakes. And mistakes =… well, let’s not go there.
Use the chains strategically. When the trail narrows or the wind picks up, absolutely grip tight.
But when there’s solid footing and low exposure? Trust your feet, trust your body, and move mindfully. Think at least three points of contact at all times – not full-body panic mode.
Listen to your gut. If something feels sketchy, pause. Don’t just follow the crowd or try to “keep up.”
There’s no medal for speed on Angels Landing – only safety and smart decision-making.
12. Don’t Forget to Breathe (Seriously, Breathe)
Imagine me reading you this section in my calm yoga teacher voice…
It sounds basic, but your breath is one of the most powerful tools in your kit.
When your heart’s pounding, your palms are sweating, and you’re staring down a sheer drop, your breath can either help you through it…or make things worse.
A lot of people unconsciously hold their breath when they’re nervous or focused.
That shallow, panicked breathing? It tells your brain you’re in danger and makes everything feel harder – physically and mentally.
Instead, breathe on purpose.
Inhale slowly through your nose. Exhale steadily through your mouth. Repeat.
Use your breath as an anchor when fear starts creeping in. It helps you stay calm, stay steady, and stay smart.
It can also help physically. That ascent is no joke cardio wise! It’s a true full body work out!
Your breath is your on-demand mental reset button. Use it as often as you need to. It’s free, it weighs nothing, and it just might save your hike.
13. Go Super Slow on the Danger Zone
That famous spine? It’s breathtaking and butt-clenching. Take your time.
This is not a race. Breathe. Move with intention. Plant your feet. Double-check your hand placement. One step at a time, and you’ll be golden.
Don’t panic, don’t rush, don’t zone out. And have fun!
14. Don’t Let Anyone Rush You
Angels Landing isn’t high school and peer pressure doesn’t belong on the edge of a cliff.
Depending on the time of day (especially mid-morning to early afternoon), you will most likely encounter a line of hikers going up or down the chains.
And you might feel it – that subtle pressure to move faster, take that sketchy step, or push outside your comfort zone just to avoid holding people up.
Now is not the time to be polite at the expense of your safety.
You’re not here to impress strangers. You’re here to finish the hike and make it out in one piece. Period.
Your comfort zone exists for a reason – it’s your body’s way of saying, “This is where I can focus, balance, and move with confidence.”
So…
- Move at your own pace.
- When it’s safe, step aside and let others pass – but only if you feel stable enough to do so.
- Don’t be afraid to say, “I need a second,” or “I’ll move when there’s space.”
You’re not being dramatic. You’re being smart. And honestly? People will respect the hiker who knows their limits way more than the one who rushes into a rescue situation.
15. Communication is Key!
This isn’t your average “smile and nod” hiking trail. On Angels Landing, communication isn’t just polite – it’s a safety strategy.
There are sections where only one person can pass at a time. And you know what doesn’t mix well with 1,000-foot drop-offs? Silent hesitation and surprise encounters.
Here’s what worked best for me:
I joined a small group and we nominated a “leader” – someone at the front who could call out to oncoming hikers, assess the situation, and communicate whether we should wait, move, or hold position. It made the entire thing smoother and safer.
Here’s what you need to do
- Speak clearly. Say “Coming up on your left,” “Passing through,” or “We’ve got a few more behind me.” Use your voice.
- Make eye contact. It builds trust fast and ensures people actually see you.
- Coordinate your move. Ask, “Do you want to go first?” or “Should we wait here?” Don’t assume.
- Let uphill hikers pass when possible – it’s trail etiquette 101.
- Don’t tailgate. One slip from the person ahead of you and you’re both in trouble.
- Check in. If someone looks shaky or scared, ask if they’re okay. Just because someone can be there doesn’t mean they’re doing well.
Chains or no chains, your biggest lifeline out there might just be good, old-fashioned teamwork.
Speak up. Be kind. Look out for each other. This is one hike where strangers become trail family real fast.

16. Take Out the Headphones and Leave the Speaker Back at Camp
Trail tip #42: No one wants your playlist – especially not in a place where you need all five senses dialed in.
You need to hear people approaching, rocks shifting, and possibly someone yelling “rock!” or “help!”
Plus, nature sounds better without EDM….
17. Put Your Camera and Phone on a Leash
I get it – you are accomplishing something truly amazing and downright unbelievable here. It is only natural to want to capture it.
How else are you going to prove to your family and friends what a badass you are?
Since I am an adventure photographer, here are some quick tips
- If you’re planning to photograph the hike, choose a secure cross-body strap or mount an action camera so your hands stay free on the chains.
- Scout Lookout is where I always take a breath, reset my mind, and decide how I want this story to feel before even touching my camera.
- The chains are where crowds gather, so if you’re taking pictures, be mindful not to block the trail or rush others. Safety > shot.
Read More – How to Become an Adventure Photographer
However, if your phone, GoPro, or DSLR takes a dive off Angels Landing? Let. it. go. No selfie is worth risking your life for, no matter how epic the backdrop.
I am not saying that you shouldn’t bring a camera or phone. You have the opportunity to get photos and videos that most people just dream about! Just be smart about it.
Or…here is the full photography guide for Zion National Park.
Here are some ideas for keeping your gear and YOU safe
- Use a wrist strap, neck strap, or chest mount and double-check it’s clipped in tight.
- No gear juggling on the chains. When in exposed sections, everything should be secured. Your camera is not more important than your balance.
- Pre-set your camera settings before the sketchy stuff. This way, you’re not fumbling with buttons when you should be gripping a rock.
- Avoid selfie sticks in tight areas. They get in the way, throw off balance, and can smack someone behind you.
- If it drops, LET IT DROP. You are not replaceable, but your phone is…
Are you wondering how I got some of this footage and photos, I brought my Insta360. If you are looking to bring an action camera, it is the clear winner for Angels Landing!
👉Use this Insta360 link for a FREE accessory!👈
18. Don’t Be an Idiot in Bad Weather
Rain? Ice? Thunderstorms? Turn around.
I know, I know – But this is a once in a lifetime experience and the permit was a pain! We have to at least try!
NO!
Sandstone gets hella slick when wet. Wind can be out of control on that exposed ridge. Lightning and chains? That’s a hard no.
I once watched a video of a guy slipping on snow and it was worse than watching a horror movie. Don’t be that guy.
Check the weather before you go. If conditions look sketchy, save it for another day.
19. Descend Like a Ladder (Not Like a Hiker)
Going down Angels Landing can be even scarier than going up. Your legs are tired, the crowds have arrived, and suddenly that narrow spine feels a whole lot sketchier.
Here’s a trick that saved my sanity: face the rock and descend like you’re climbing down a ladder.
Yup – turn around, keep three points of contact (both feet + one hand or both hands + one foot), and move slow, like you would on a scramble or a via ferrata.
I tried going down forward at first… and let me tell you, it was rough. Slippery sandstone, weird angles, and way too much momentum. Once I turned around and treated it like a climb, it was way more controlled and less terrifying.
Key points for the descending Angels Landing
- Move with intention. Every step should have a purpose. This is not the time to rush.
- Communicate! Tell oncoming hikers what you’re doing. Say, “Descending!” or “Coming down behind you!” to avoid surprises.
- Don’t let peer pressure push your pace. If someone’s crowding you from behind, let them pass at a safe spot – your safety isn’t worth speeding up.
20. Don’t Show Off
This isn’t the place to flex your Insta yoga poses, trail-running skills, or “I-don’t-need-the-chains” ego. One wrong move here doesn’t just bruise your pride, it could end in a rescue (or worse).
Adrenaline makes people do reckless things. Stay self-aware.
The best hikers out here aren’t the fastest or flashiest, they’re the ones who respect the trail and make it back down in one piece.
Be bold, be adventurous, be humble. That’s the ultimate combo.
Find Other Things to Do in Zion
Angels Landing isn’t the only thing to do in Zion National Park! There are so many things to do in this incredible destination!
Final Thoughts: You’ve Got Angels Landing!
Angels Landing isn’t just a hike – it’s a mental game, a physical challenge, and a massive bucket list victory all rolled into one red rock rollercoaster.
With these tips in your back pocket (and maybe some grippy shoes on your feet), you’re not just surviving it – you’re owning it.
Take it slow. Trust your gut. Respect the chains, the trail, and the people around you.
And when you reach that epic summit? Breathe it in. Savor the view. You earned every step.
🎉 Now I want to hear from you!
Did these tips help? Or, Did your heart pound like a drum solo? Did you cry a little, laugh a lot, or fist-bump a stranger at the summit?
Tag me or send me a DM on Instagram @TheBucketListMermaid – I seriously want to celebrate your climb, see your shots, and cheer you on like the trail fam we are. 🧜♀️❤️
And if you want to capture your Angels Landing moment in a way that really tells the story, don’t forget to grab my full Angels Landing Photography Guide here → Angels Landing Photo Guide
More Travel Resources
Adventure Bucket List Resources
I am here to help your travel adventures go as smoothly as possible! That way you can check off that bucket list with minimal complications and spending!
SHOP – Shop the best adventure gear and essentials on my Amazon Storefront – handpicked by a full-time adventuring mermaid!
AIRFARE – There are a few I use, but Aviasales is normally my go-to for flights without any extra fees or markups.
ACCOMMODATION – My two favorites are Booking.Com for hotels and VRBO for rentals.
GUIDED TOURS – If you are looking for quick and easy tours, check out GetYourGuide and Viator.
MULTI-DAY TOURS – For more in-depth tours that span several days, TourHub has many great options with reputable travel companies. Use my code (ALEXANDRA1GURU) for up to 5% off your next bucket list adventure.
TRANSPORTATION – You can either rent a car yourself with Discover Cars or do a guided bus tours like Big Bus Tours.
SIM CARDS – Avoid expensive roaming charges with an eSim card with Airalo. Personally, I prefer wifi boxes, and recommend WiFi Candy (get 10% of with the code THEBUCKETLISTMERMAID).
TRAVELER’S INSURANCE – Check out VisitorsCoverage for affordable insurance plans. If you are a nomad or remote worker, I would check out SafetyWing.
SEE MORE – Adventure Resources | Photography Resources
See Some Photos You Like?
Check out my full photography page for a full gallery and prices.