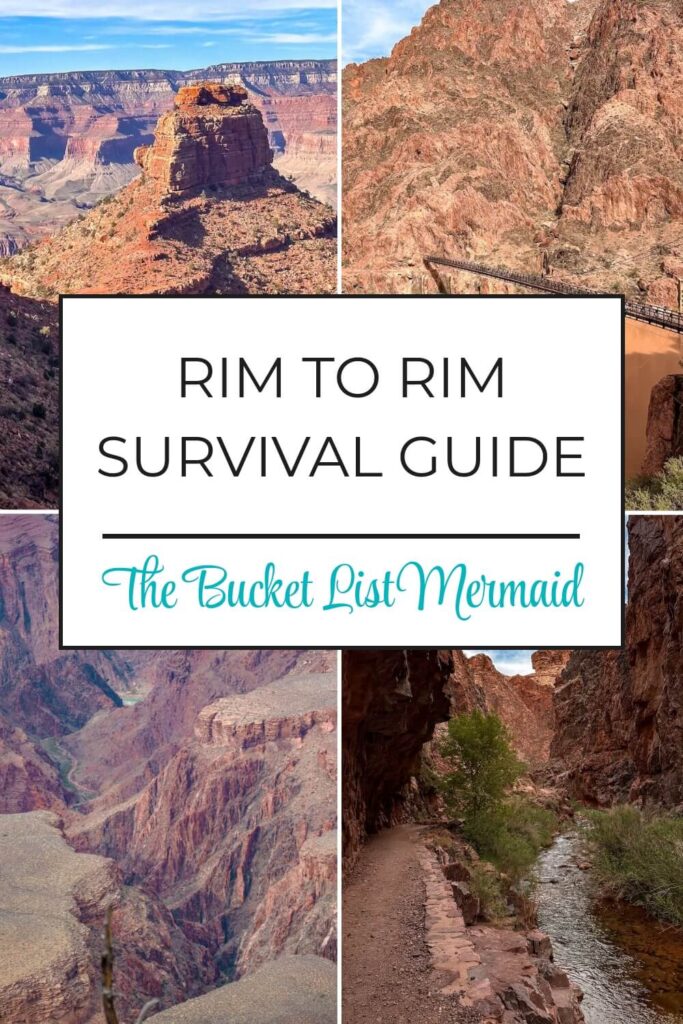
Ultimate Survival Rim to Rim Guide for Extreme Adventurers (+Podcast)
This website contains affiliate links from trusted partners. If you purchase through a link on this site, I may earn a commission at no extra cost to you. As an Amazon Associate, I earn from qualifying purchases. See my Privacy Policy and Disclosure for more information.
The Grand Canyon’s Rim to Rim hike isn’t just a bucket list item—it’s a beast of a challenge that will test your endurance, mental grit, and preparation skills like nothing else.
This is not your average day hike. We’re talking about a 21+ mile trek with over 10,000 feet of elevation change, scorching temperatures, unpredictable conditions, and absolutely zero room for underestimating the difficulty.
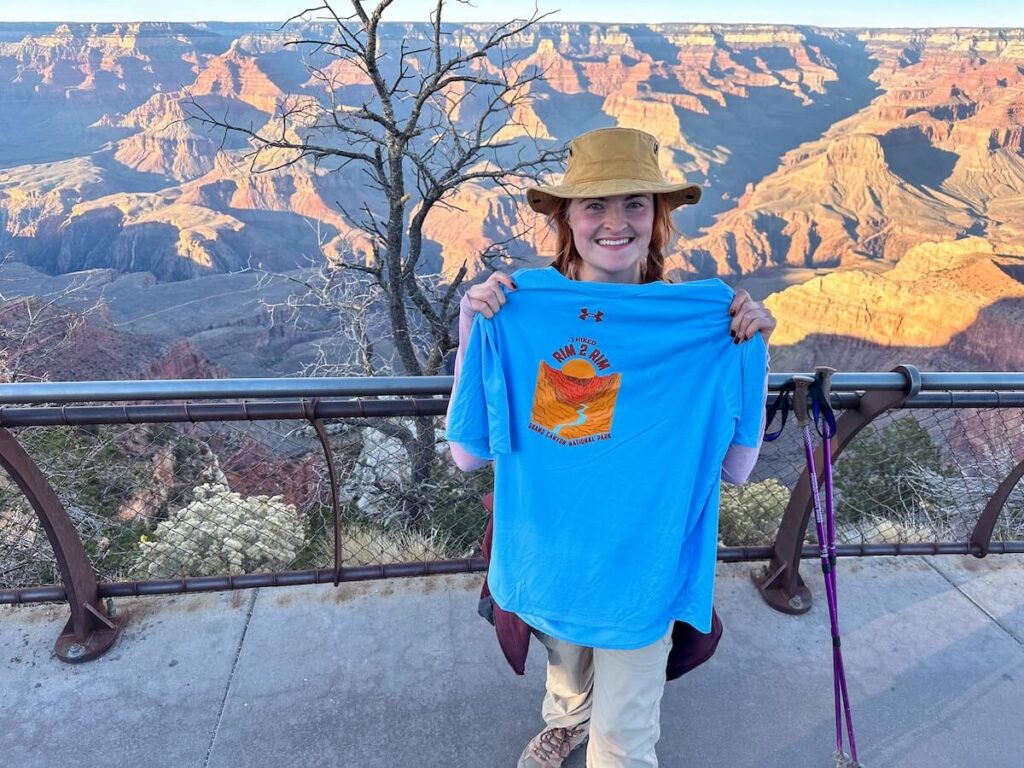
I know this firsthand because I took on the Rim to Rim hike as a solo female hiker—all in one day.
Completing this hike in a single push was one of the most physically and mentally demanding things I’ve ever done, but with the right preparation, it’s absolutely doable—and incredibly rewarding.
If you’re dreaming of conquering Rim to Rim, this guide will break down everything you need to know to do it safely and successfully.
From choosing your route and managing water sources to training, gear, and pro tips for beating the brutal canyon conditions, I’ve got you covered.
A note on Length
This is going to be a long one, folks. I apologize.
However, we have a lot to talk about in order to keep you prepared, safe, and ready to tackle Rim to Rim!
My goal was to create a guide for you that literally has everything all in one place so that you can bookmark this and it can be your Rim to Rim bible, so to speak.
Have fun, stay safe, and happy hiking!
Key Takeaways
- Rim to Rim is an intense, bucket-list challenge – A 24+ mile trek through the Grand Canyon that demands endurance, preparation, and mental toughness.
- Preparation is everything – Training, hydration, and nutrition are critical for success, whether you’re doing it in one day or multiple days.
- The North and South Rims are very different – The North Rim is higher, more remote, and has a shorter season, while the South Rim has more services and exit options.
- It’s a physically and mentally transformative experience – The grueling effort is rewarded with breathtaking scenery, a massive sense of accomplishment, and a hike you’ll never forget.
Listen to This Podcast Episode About Hiking Rim to Rim
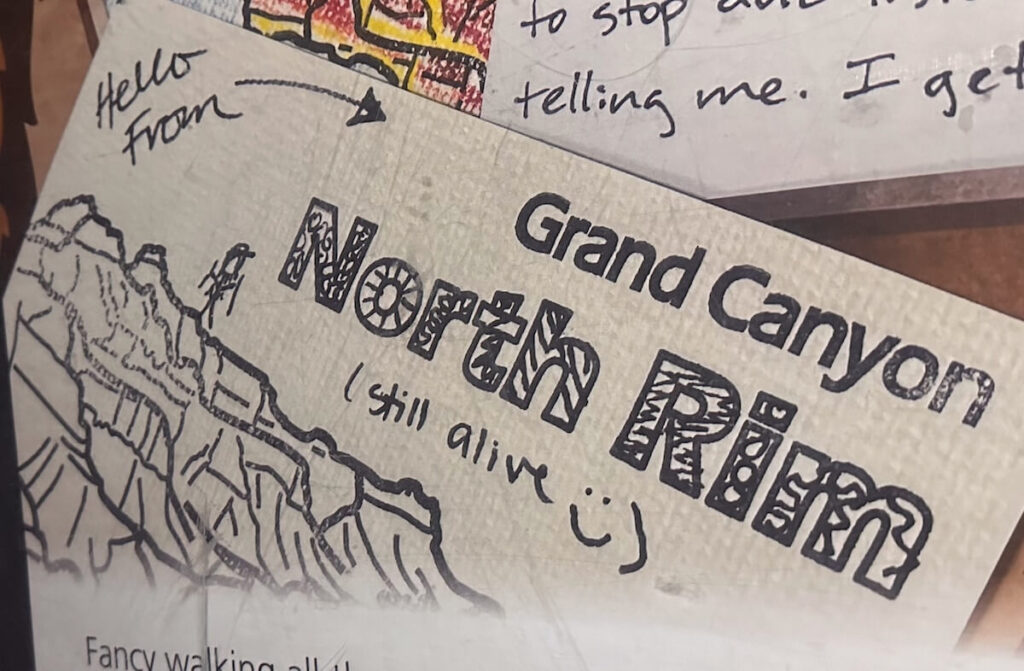
What Is the Rim to Rim Hike?
The Rim to Rim hike (also called Rim 2 Rim and R2R) is an extreme trek across the Grand Canyon, starting from one rim, descending all the way to the Colorado River, and then climbing back up to the opposite rim.
Covering 24 miles (depending on your route), this hike involves over 10,000 feet of elevation change and takes you through one of the most rugged and breathtaking landscapes in the world.
I’ll be honest: when I first heard about this hike, I thought it meant hiking across the canyon in a semi-circle, literally crossing from one side to the other. I was wrong.
You start at either the South Rim or the North Rim, hike all the way down into the canyon to the Colorado River, and then hike back up on the other side.
How Wide is the Grand Canyon?
The Grand Canyon is actually only about 4 to 18 miles wide.
However, to drive from the North Rim to the South Rim (or vice versa), you have to go around the entire Grand Canyon, and it takes about 4 to 5 hours.
Logistically, this makes the Rim to Rim hike even more difficult.
To put it into perspective, I drove about 5 hours and then hiked for about 13 hours straight. Translation? I was a VERY tired hiker.
Why Is Rim to Rim a Bucket List Hike?
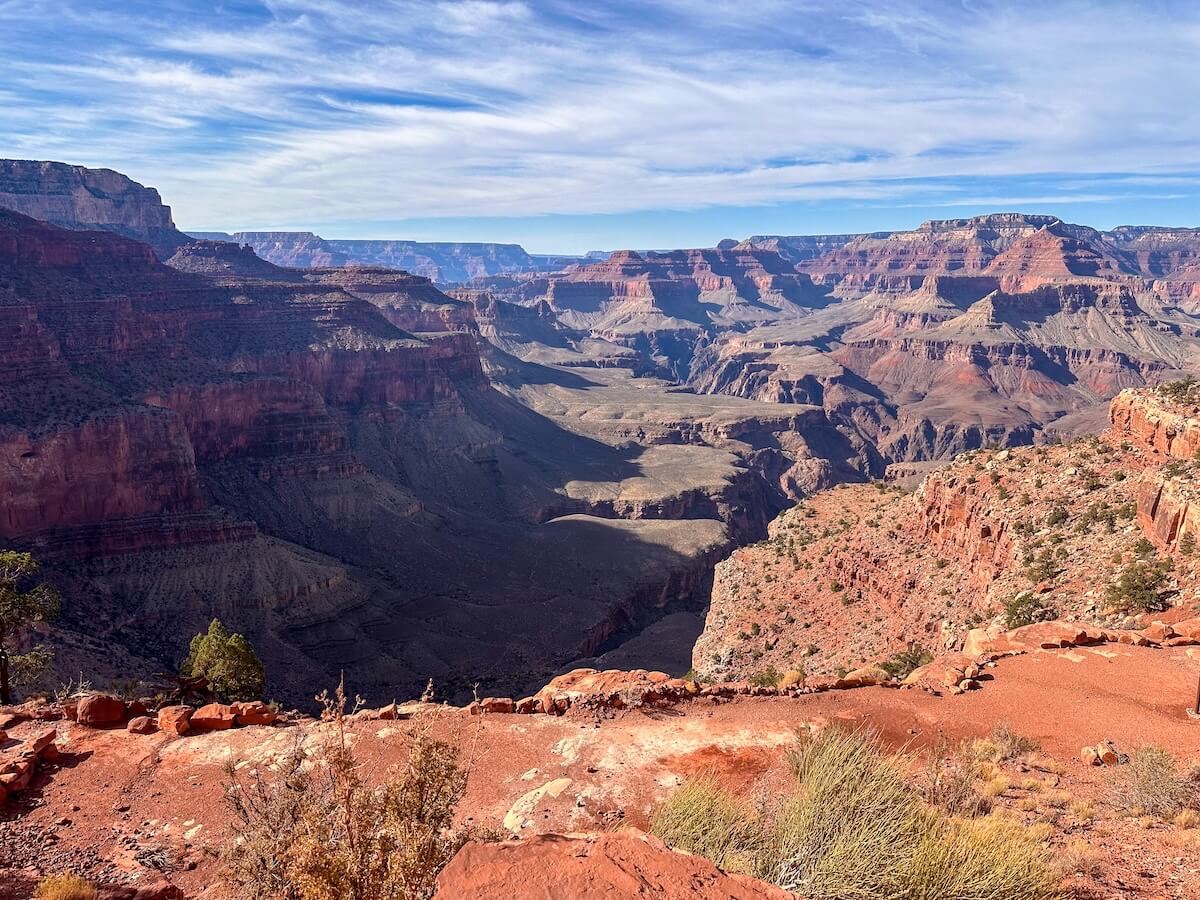
The Grand Canyon Rim to Rim hike isn’t just a long trek—it’s one of the most iconic, demanding, and rewarding hikes in the world.
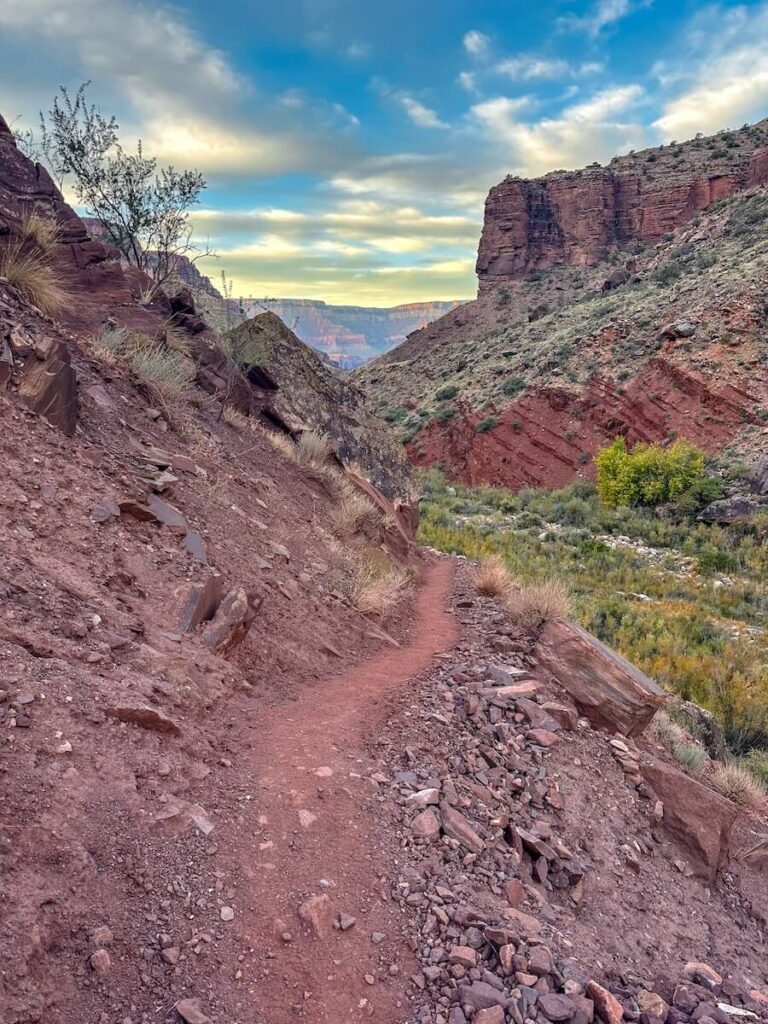
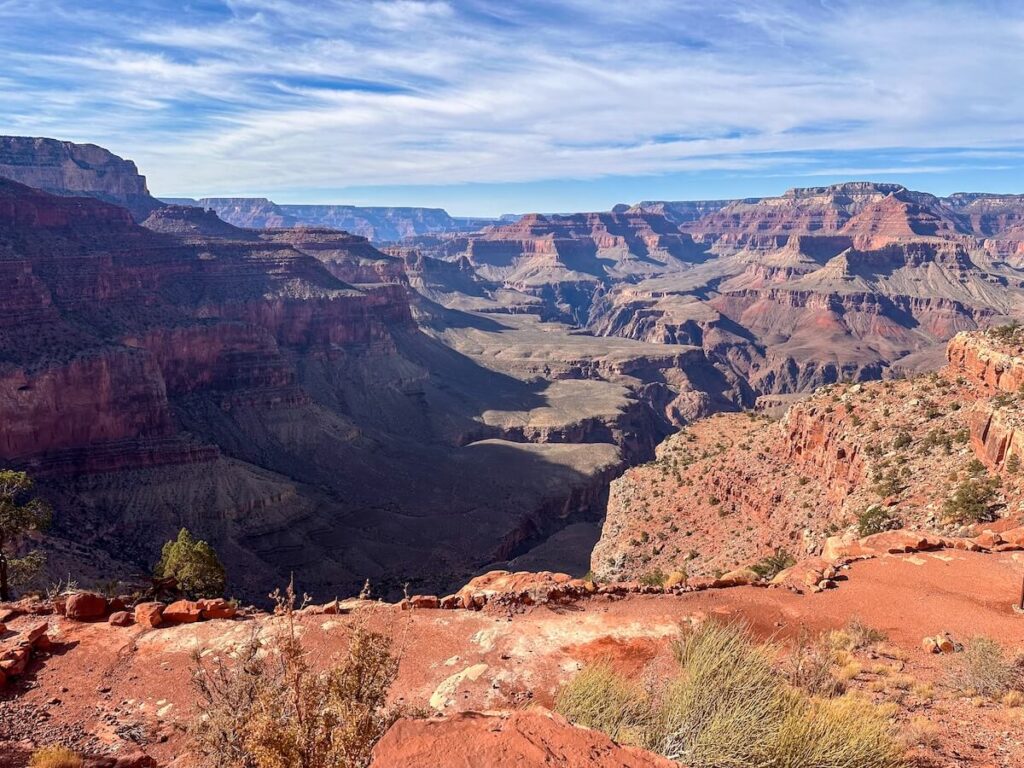
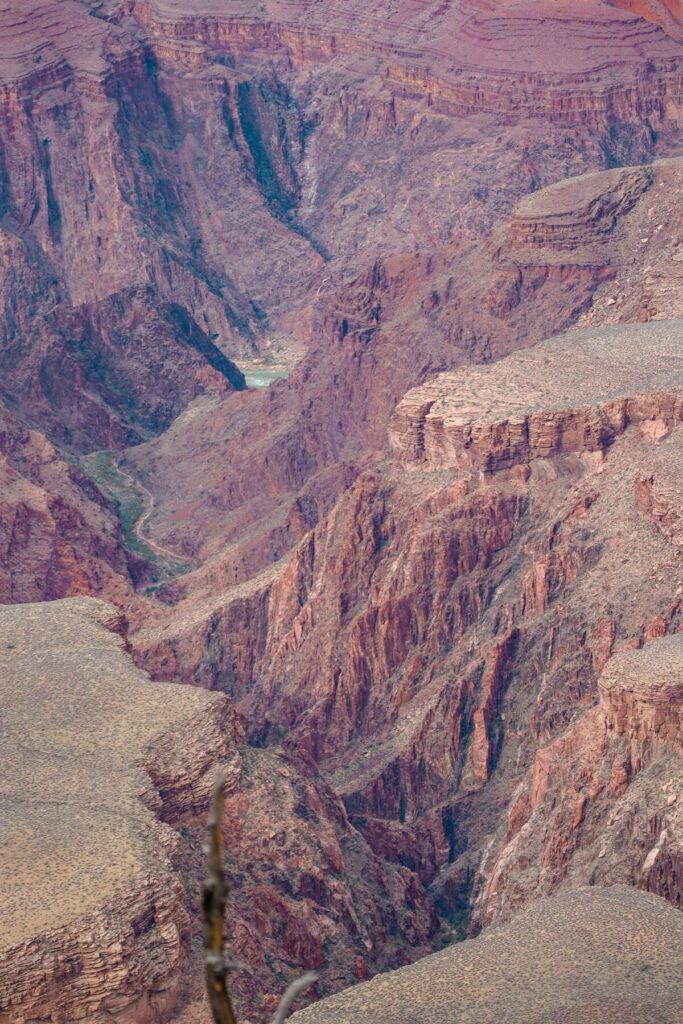
This adventure takes you through nearly two billion years of geological history, from the alpine forests of the North Rim to the scorching desert at the Colorado River and back up to the towering cliffs of the South Rim.
The sheer scale, beauty, and challenge make it a must-do for extreme hikers and adventure seekers.
What Makes Rim to Rim different?
What sets Rim to Rim apart is its brutal difficulty and epic payoff.
With over 24 miles of rugged terrain, 10,000+ feet of elevation change, and temperatures that can swing from freezing to over 100°F, this is no ordinary hike—it’s an endurance test that pushes even the most seasoned hikers to their limits.
But crossing the entire canyon on foot is an incredibly rare and unforgettable experience. You get to say, “I’ve seen the Grand Canyon from the river up!” It’s truly a sense of accomplishment.
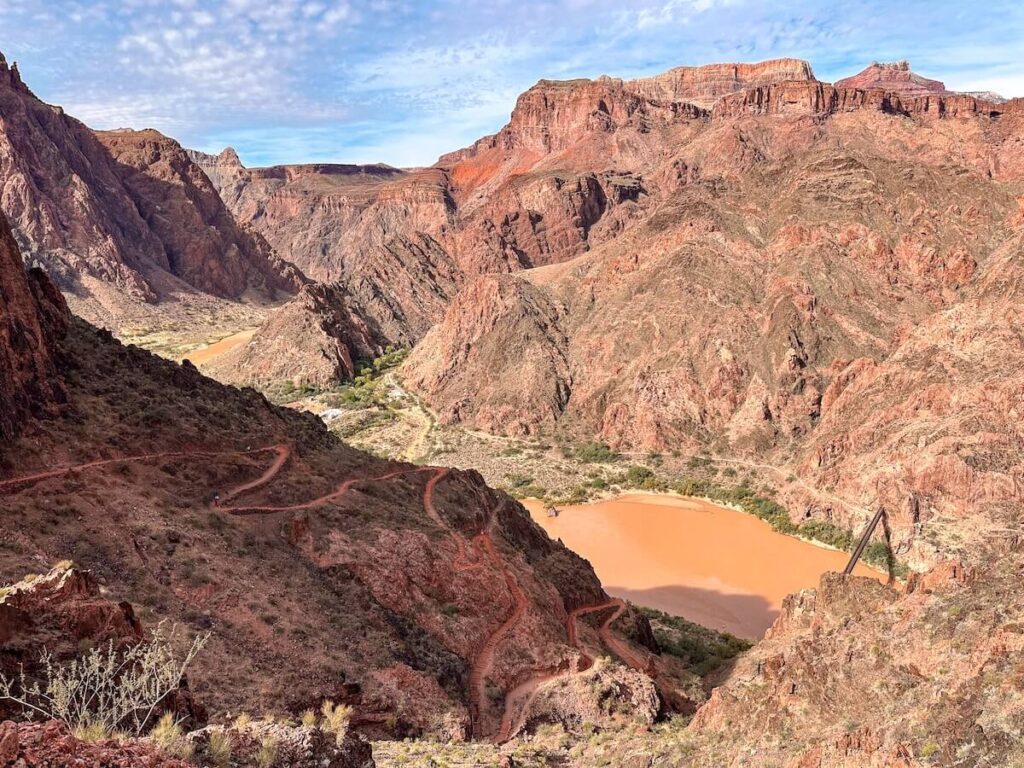
You’ll witness sunrise over towering canyon walls, traverse hidden oases, cross the mighty Colorado River, and climb switchbacks that feel endless—but when you reach the opposite rim, the sense of accomplishment is unbeatable.
Sure, you can see the Grand Canyon from the top—at places like Mather Point near the Visitor Center—but to see it from the Colorado River? That takes a lot of effort.
It’s a hike that demands preparation, resilience, and respect for the canyon, but the reward? A once-in-a-lifetime journey through one of the most breathtaking landscapes on Earth.
A backwards Hike
Another thing that I have to mention is that hiking Rim to Rim is backwards!
Normally, you start ascending until you reach the summit, only to hike back down.
In the case of Rim to Rim, you actually start off in the descent and the “summit” is at the bottom of the canyon by the river.
This alone makes it a unique bucket list hike that is a must-add for adventurers!

Why I Decided to Hike Rim to Rim
Now, you might be wondering, what made me decide to do Rim to Rim?
Besides the fact that it’s such a prestigious bucket list hike, I’ve been on a kick lately where I tackle the most difficult and bucket-list worthy hikes in every national park I visit.
So when I got to the Grand Canyon, I thought, “Why not add Rim to Rim to the list?”
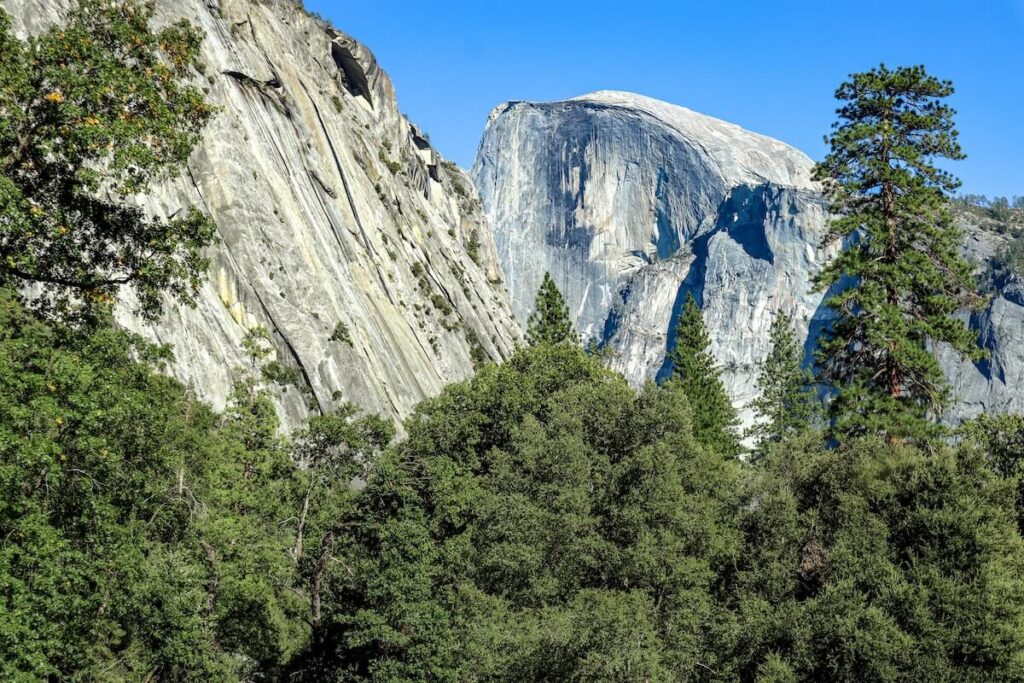
I didn’t really realize how intense Rim to Rim was at the time, but I thought, “Sure, I did Half Dome (17 miles and about 5,400 feet of elevation gain). Let’s add a few more miles to that and see how it goes.”
Read More – The Full Survival Guide to Half Dome in Yosemite | Half Dome vs Angels Landing
So, it was very ironic that I chose to hike Rim to Rim on Halloween. And yes, hiking this was scarier than ghost, goblins, and vampires.
Full disclaimer: Unlike the majority of smart athletes, it was a very spontaneous decision to hike Rim 2 Rim (as in 2 days prior).
This worked out for me because I thrive on chaos and had previously done intense hikes. However, I don’t recommend this.
THIS is why I’m writing this massive article – it’s all the information I wish I would have had!
North Rim vs. South Rim
So, what’s the difference between the North Rim and the South Rim?
| North Rim | South Rim | |
| Elevation & Climate | Higher Elevation (8,250 feet) Cooler alpine conditions | Lower Elevation (7,000 feet) Warmer year-round |
| Trailheads & Routes | Only one main trail (North Kaibab) | Two Main Trails (Bright Angel & South Kaibab) |
| Accessibility & Services | Harder to Access Open Mid-May to October | Easier Access from major cities More lodging, restaurants, shuttles, and visitor services Open Year Round |
| Crowds & Atmosphere | Far less crowded, a more remote and peaceful experience | More Touristy, especially around Grand Canyon Village and Bright Angel |
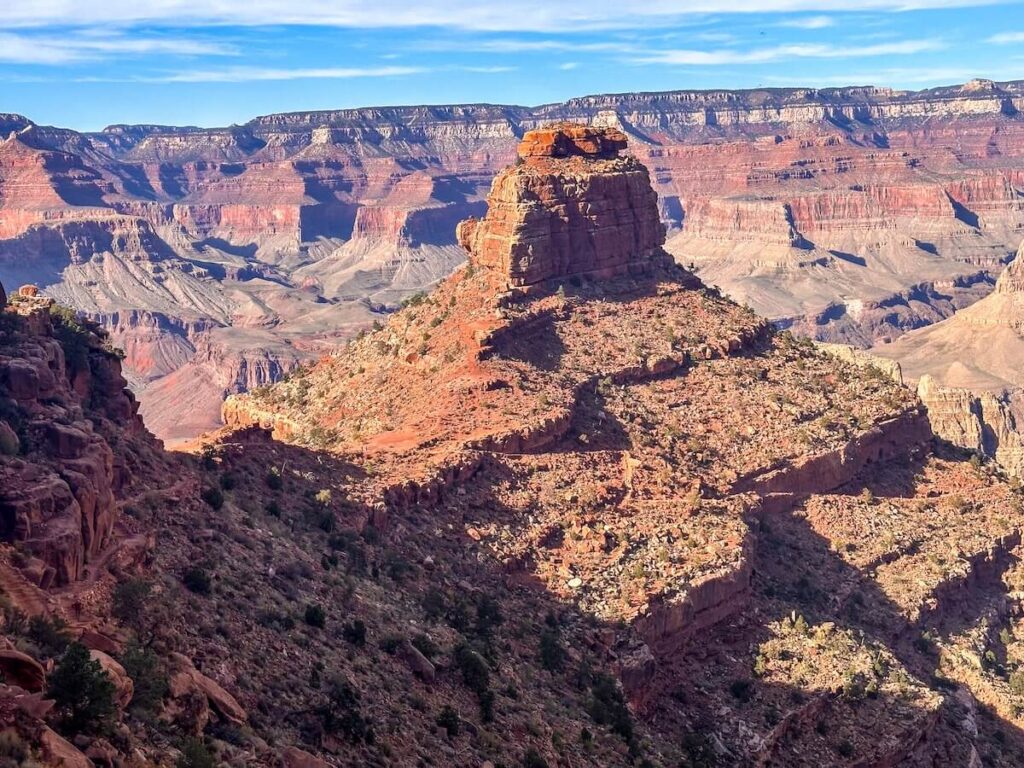
| Scenery & Views | More forested, rugged, and dramatic due to higher elevation. | Classic wide-open canyon views with famous overlooks like Mather Point and Yavapai Point. |
You can see more in my short vlog about doing Rim to Rim solo in one day👇
The Stats: Distance, Elevation, and Difficulty
It’s a little tricky to put an exact number on distance and elevation due to the fact that you can take multiple routes and side trails.
Below is a general idea of the stats of this monster of a hike!
| Category | Details |
| Total Distance | ~24 miles (North Kaibab to Bright Angel Trail) |
| Elevation Gain | ~4,800 feet (from river to South Rim) |
| Elevation Loss | ~5,800 feet (from North Rim to river) |
| Highest Point | 8,250 feet (North Rim) |
| Lowest Point | 2,400 feet (Colorado River at Phantom Ranch) |
| Estimated Time | 10-15+ hours (for a single-day hike) |
| Trail Options | North Kaibab → Bright Angel OR North Kaibab → South Kaibab *Order can be reversed* |
| Shuttle Time Between Rims | ~4.5 hours by car/shuttle |
| Challenges | Extreme heat, long & steep ascents/descents, remote terrain |
Rim to Rim Hiking Options
Hiking Rim to Rim is no small feat, and how you tackle it depends on your experience level, endurance, and how much time you want to spend in the canyon.
Here are the main ways to complete this beast, from a brutal one-day push to a multi-day adventure.
Keep in mind that I have heard on many accounts that R2R is comparable to the difficultly of a marathon…
I am a firm believer that with a little preparation and determination, anyone can hike this.
However, it’s important to be realistic with yourself and choose the safest option for you👇
1. Rim to Rim in One Day (Ultra-Endurance Challenge)
Best for: Highly experienced hikers, endurance athletes, and those who love a challenge.
Stats & Difficulty:
- Distance: ~24 miles
- Time Required: 10-15+ hours
- Elevation Change: 10,000+ feet total gain/loss
- Difficulty: Extreme
Pros:
✅ Ultimate test of endurance and mental toughness.
✅ No need for overnight permits.
✅ Get to experience the entire canyon in one go.
Cons:
❌ Brutally exhausting with little time for rest or side trails.
❌ Risk of dehydration, heat exhaustion, and overuse injuries.
❌ Requires logistical planning, including very early start times and a shuttle back.
Who Should Do This?
If you’ve trained for long-distance endurance hikes, are comfortable hiking in extreme conditions, and are prepared for mental and physical fatigue, this could be for you.
⚠️ Attempting this hike in one day is extremely difficult and not recommended for most hikers.
It requires serious training, proper hydration, and an early start to avoid the canyon’s dangerous midday heat.
2. Rim to Rim in Two Days (Balanced Challenge)
Best for: Strong hikers who want to push themselves but also enjoy the scenery.
Stats & Difficulty:
- Distance: 24 miles total (~12 miles per day).
- Time Required: 2 days, 1 night.
- Difficulty: Very hard but more manageable than a single-day push.
Pros:
✅ Less physically punishing than a one-day trek.
✅ More time to enjoy the canyon, take photos, and explore side trails.
✅ Still a challenging and rewarding endurance hike.
Cons:
❌ Requires an overnight permit (can be difficult to get).
❌ Need to carry extra gear (sleeping bag, tent if camping, etc.).
❌ The second day’s climb out is still very tough.
Most Common Itinerary:
- Day 1: Hike from North Rim to Phantom Ranch (14 miles). Stay overnight at Phantom Ranch (lottery-based cabins) or Bright Angel Campground, Havasupai Gardens Campground, or Cottonwood Campground.
- Day 2: Hike up Bright Angel Trail (10 miles) to the South Rim.
Who Should Do This?
If you want to challenge yourself but not suffer as much, this is a great balance between endurance and enjoyment.
3. Rim to Rim in Three or More Days (Best for Exploration & Comfort)
Best for: Adventurers who want to soak in the canyon’s beauty, enjoy the hike without rushing, and have time for side trips.
Stats & Difficulty:
- Distance: 24+ miles (depending on side trails).
- Time Required: 3+ days.
- Difficulty: Moderate to Hard (still strenuous, but with time to recover).
Pros:
✅ More time to explore side trails like Ribbon Falls or Clear Creek.
✅ More rest & recovery, making the experience more enjoyable.
✅ Less stress about water, exhaustion, and extreme conditions.
Cons:
❌ Requires multiple overnight permits.
❌ Need to carry extra gear, which adds weight.
❌ Still a physically demanding hike, just spread out.
Popular 3-Day Itinerary:
- Day 1: North Rim → Cottonwood Campground (~7 miles).
- Day 2: Cottonwood → Phantom Ranch (~7 miles) + side trip to Ribbon Falls.
- Day 3: Phantom Ranch → South Rim (~10 miles via Bright Angel Trail).
Who Should Do This?
Perfect for those who want to explore without feeling rushed and prefer to enjoy the Grand Canyon’s hidden gems rather than just pushing for speed.
4. Rim to Rim to Rim (Double Crossing – The Ultimate Beast Mode Challenge)
Best for: Ultra-runners, extreme endurance hikers, and people who enjoy pain (just kidding…kinda)
Stats & Difficulty:
- Distance: 48+ miles round trip.
- Time Required: 2-3 days (or one brutal day for the elite few).
- Elevation Change: 20,000+ feet total gain/loss.
- Difficulty: Outrageous.
Pros:
✅ The hardest version of Rim to Rim—an ultimate bragging rights hike.
✅ See the canyon from both perspectives.
✅ Wild endurance achievement for ultra-athletes.
Cons:
❌ Brutal on the body—very few attempt it in a single day.
❌ Requires peak fitness, mental toughness, and meticulous planning.
❌ Water, food, and temperature management are extremely difficult.
Typical Itinerary:
- Day 1: South Rim → Phantom Ranch → North Rim (~24 miles).
- Day 2: North Rim → Phantom Ranch → South Rim (~24 miles back).
Although this is typical, I would highly encourage you to spread R2R2R out as long as you can! Do it in multiple days and I would suggest going with a a guide.
Who Should Do This?
Only for the most extreme hikers and ultra-runners who want the ultimate Grand Canyon challenge.
When I was talking to the staff of the Grand Canyon, they stated that this was “Olympic level”.
Camping and Lodging Options on the Rim to Rim Trail
1. Bright Angel Campground (Bottom of the Canyon)
📍 Location: Near Phantom Ranch, along the Colorado River
📏 Distance from North Rim: ~14 miles via North Kaibab Trail
💧 Amenities: Potable water, restrooms, picnic tables, food storage, and ranger programs
📜 Permit Required: Yes, Backcountry Permit
➡ Best for: Those looking for a comfortable overnight stay at the bottom of the canyon before heading up to the South Rim. Also a great option if you want to pair your hike with a night at Phantom Ranch (lottery-based reservations).
2. Cottonwood Campground (Midway on North Kaibab Trail)
📍 Location: ~7 miles below the North Rim on North Kaibab Trail
📏 Distance from Bright Angel Campground: ~7 miles
💧 Amenities: Seasonal potable water (May–October), vault toilets, picnic tables, food storage
📜 Permit Required: Yes, Backcountry Permit
➡ Best for: Breaking up the North Kaibab descent, especially if you’re starting late from the North Rim. Also, a solid halfway point if doing R2R in 3 days.
3. Havasupai Gardens Campground (On Bright Angel Trail)
📍 Location: ~4.5 miles below the South Rim along Bright Angel Trail
📏 Distance from Bright Angel Campground: ~5 miles
💧 Amenities: Potable water, restrooms, picnic tables, food storage, ranger station
📜 Permit Required: Yes, Backcountry Permit
➡ Best for: A comfortable last-night stop before hiking up to the South Rim if you’re taking Bright Angel Trail. The campground has some shade and a water source year-round.
4. Phantom Ranch (Lodging at the Bottom)
📍 Location: Near Bright Angel Campground, by the Colorado River
🏡 Accommodation: Dorms & private cabins (requires lottery reservation)
💧 Amenities: Beds, meals, drinks, and a canteen
📜 Permit Required: No, but reservations are required (lottery-based)
➡ Best for: Hikers who want a real bed and meals instead of camping at Bright Angel Campground. Booking is competitive, so plan months or even a year ahead.
Permits for Hiking Rim to Rim
You need to be aware of current permit requirements for this hike.
- One-day hike? No permit needed! Just show up and suffer.
- Overnight hike? Yes, you need a backcountry permit for campsites.
- Staying at Phantom Ranch? You need a lottery reservation, often booked a year in advance!
How to Get a Permit
Backcountry Camping Permits: Apply through the Grand Canyon Backcountry Office.
Phantom Ranch Reservations: Enter the lottery.
Hiking tours
If you’re going with a group, someone should sort out the permits for you. But I would advise caution here, as permits can be very difficult to get.
If you’re going this route, consider going with a company that handles your permits to avoid any stress.
What time Should To Start and How Long Does it Take?
The time it takes to complete the Rim to Rim hike depends on your pace, fitness level, weather conditions, and whether you’re doing it in one day or multiple days.
No matter your approach, timing your start correctly is crucial to avoid the worst of the Grand Canyon’s heat and exhaustion.
Single-Day Hike
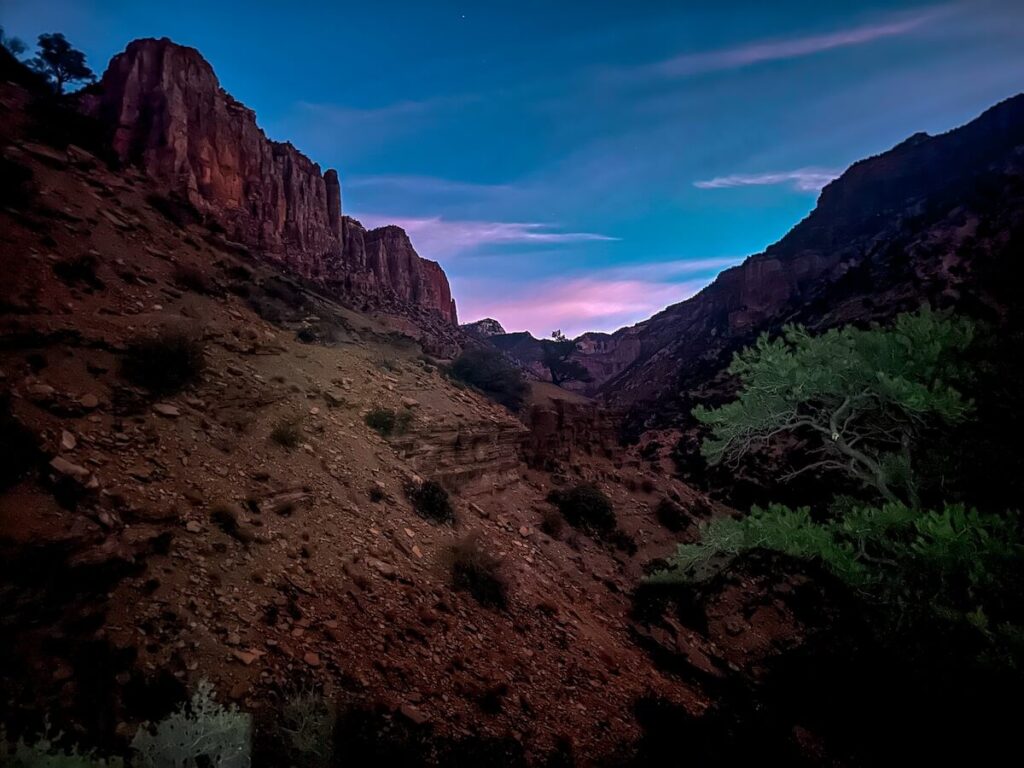
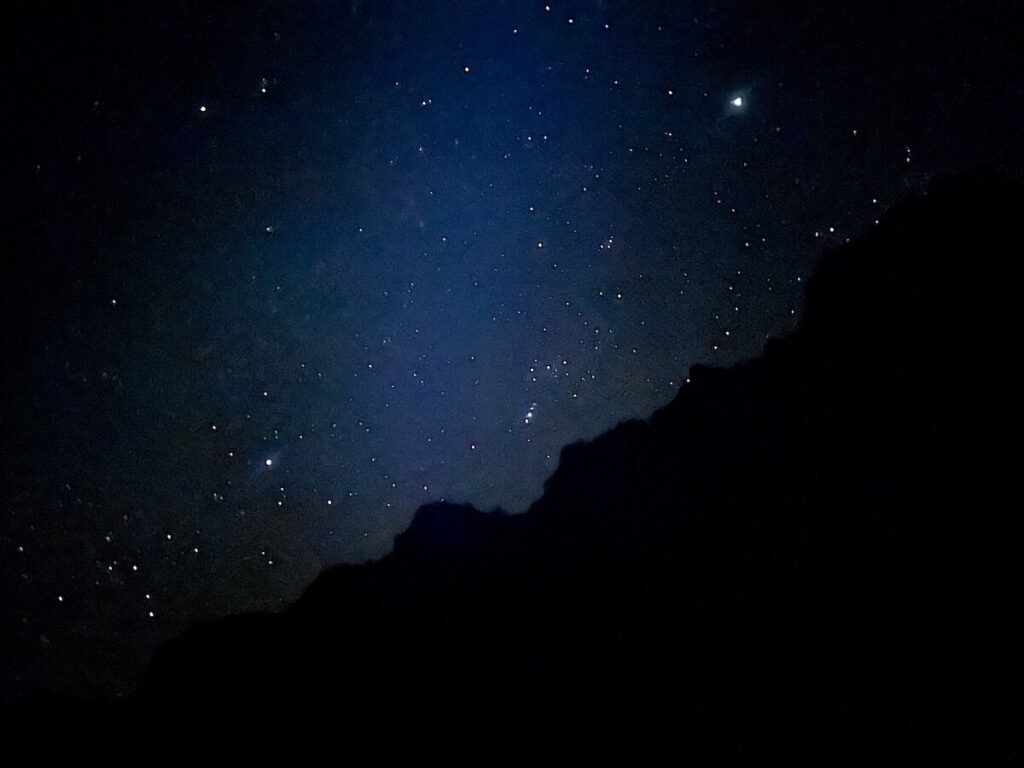
- Recommended Start: Between 3:00 – 4:30 AM
- Why?
- Avoids dangerous midday heat in the lower canyon
- Gives you plenty of daylight to finish before dark
- Increases safety by allowing for emergency buffer time
This generally takes about 10 to 15 hours (give or take). I did it in about 12.5 all by myself 😃
Multi-Day Hike
- Day 1 Start Time: 5:00 – 7:00 AM
- Why?
- Still avoids much of the heat while allowing for a more relaxed morning
- Plenty of time to set up camp and recover before sunset
⚠️Warning: Avoid starting too late (after 7:00 AM)—this increases your chances of hiking through the hottest and most dangerous parts of the canyon (aka “The Box”) when temperatures can soar above 110°F (43°C).
South Kaibab Vs Bright Angel
Whether you choose to start at the North or the South Rim, you will be faced with a choice: take South Kaibab or Bright Angel?
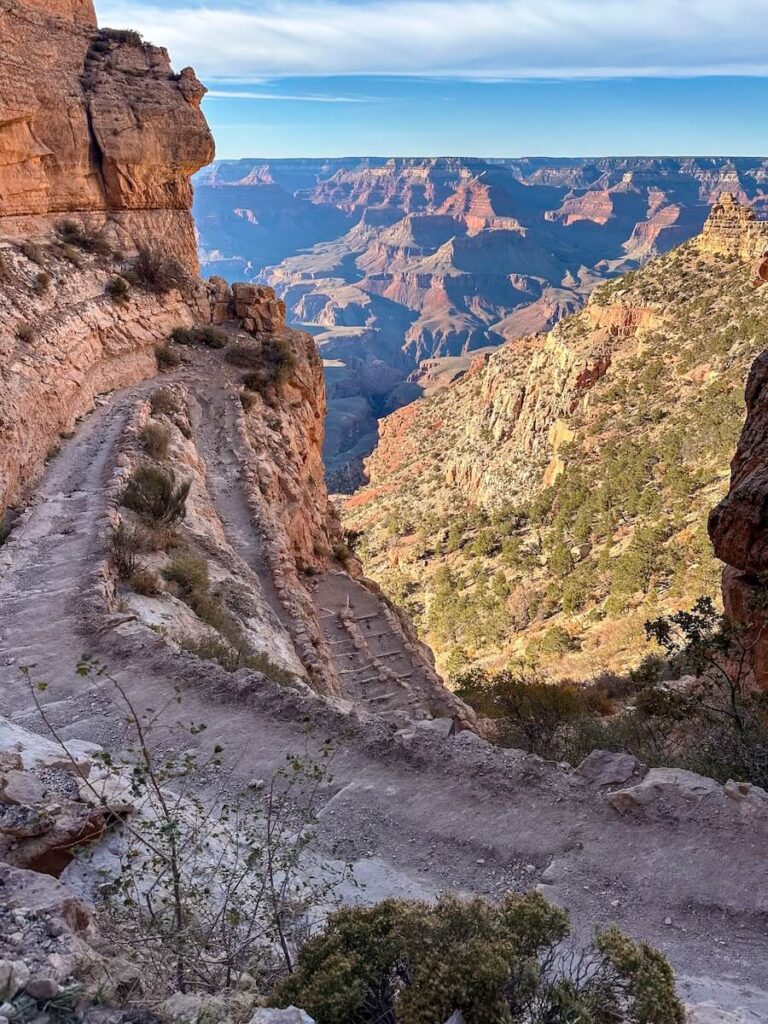
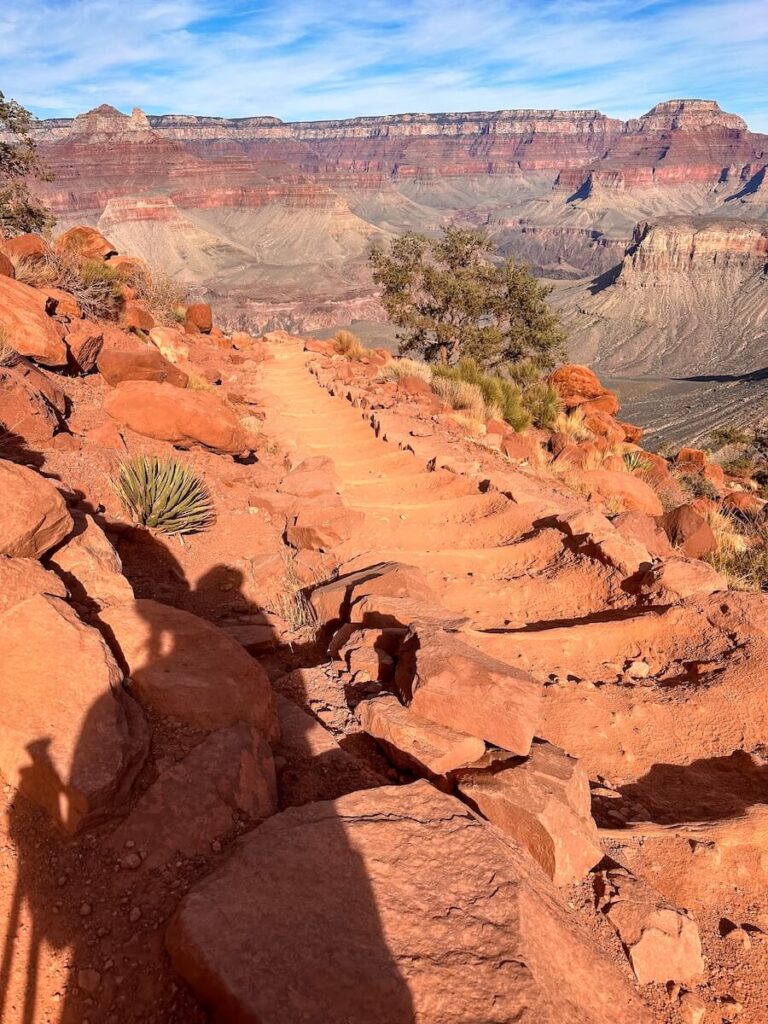
South Kaibab Trail
What to Expect:
- Trailhead: South Kaibab Trailhead
- Distance: 6.3 miles to the Colorado River
- Elevation Gain/Loss: about 4,860 feet
- Parking: Need to take a shuttle to visitor’s center or nearby parking lot.
- Water: ❌ No water—must carry all you need. There were some spots for you to treat water, but I found nothing that I could drink right away.
- Difficulty: Steep, knee-pounding descent
- Scenery: Epic. Wide-open canyon views, dramatic switchbacks, and famous landmarks. Not much shade!
Highlights:
- Ooh Aah Point – First jaw-dropping viewpoint
- Cedar Ridge – Great rest spot with stunning vistas
- Skeleton Point – Last big viewpoint before dropping deep into the canyon
- The Tip-Off – Final major landmark before descending to the river
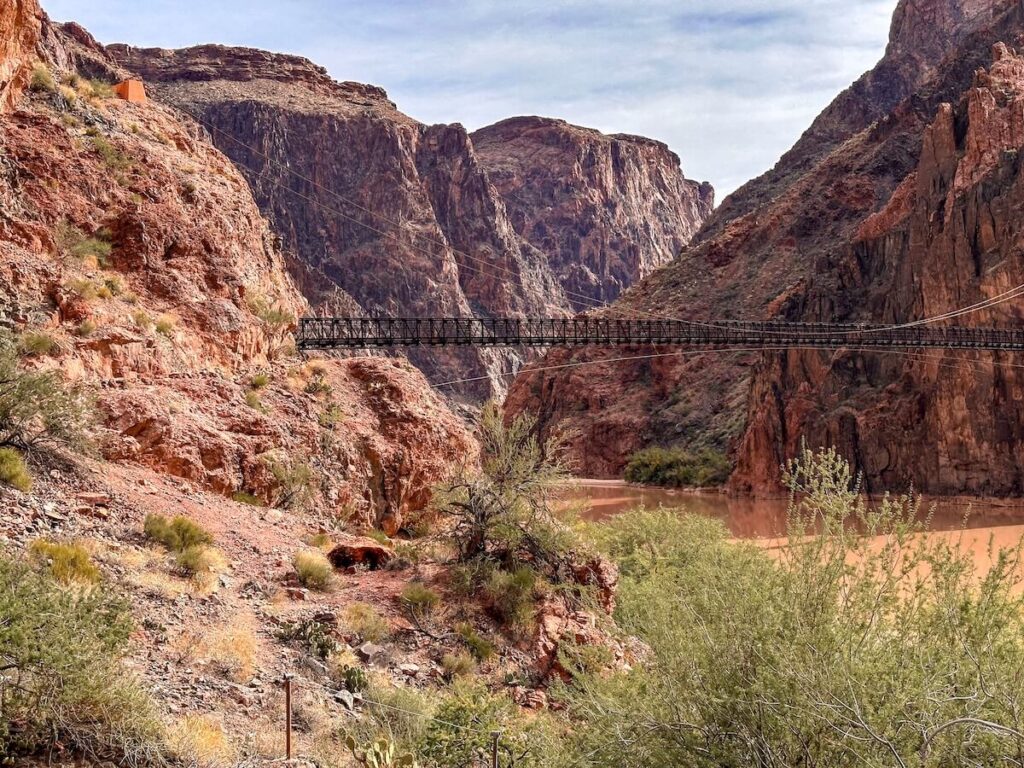
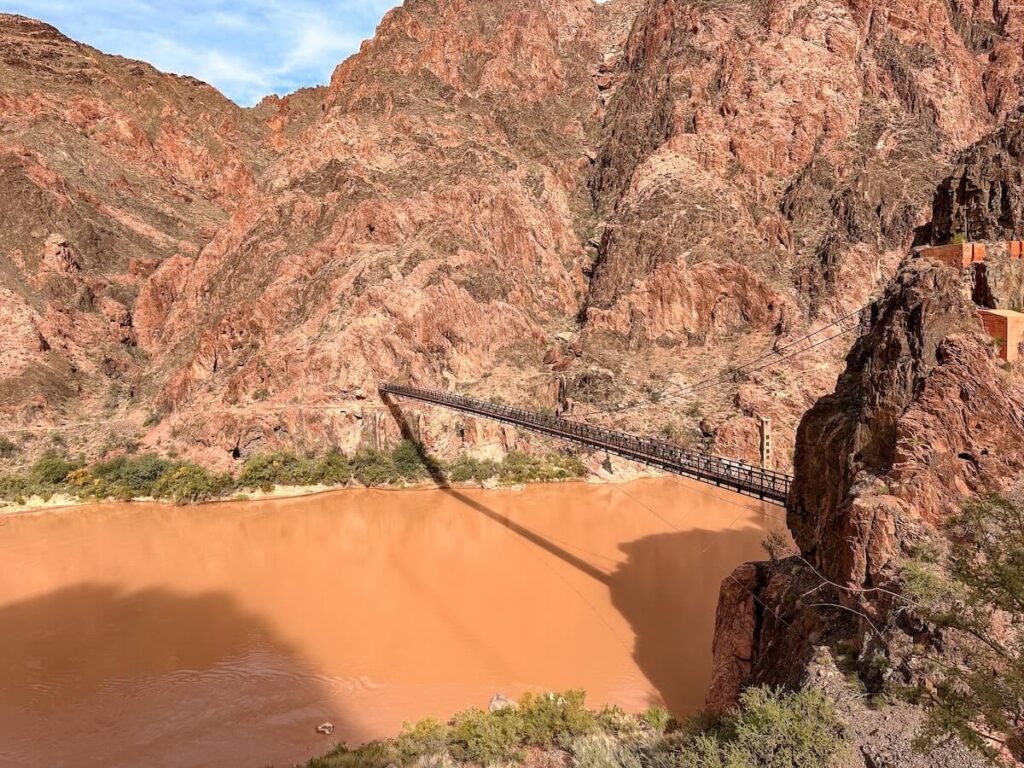
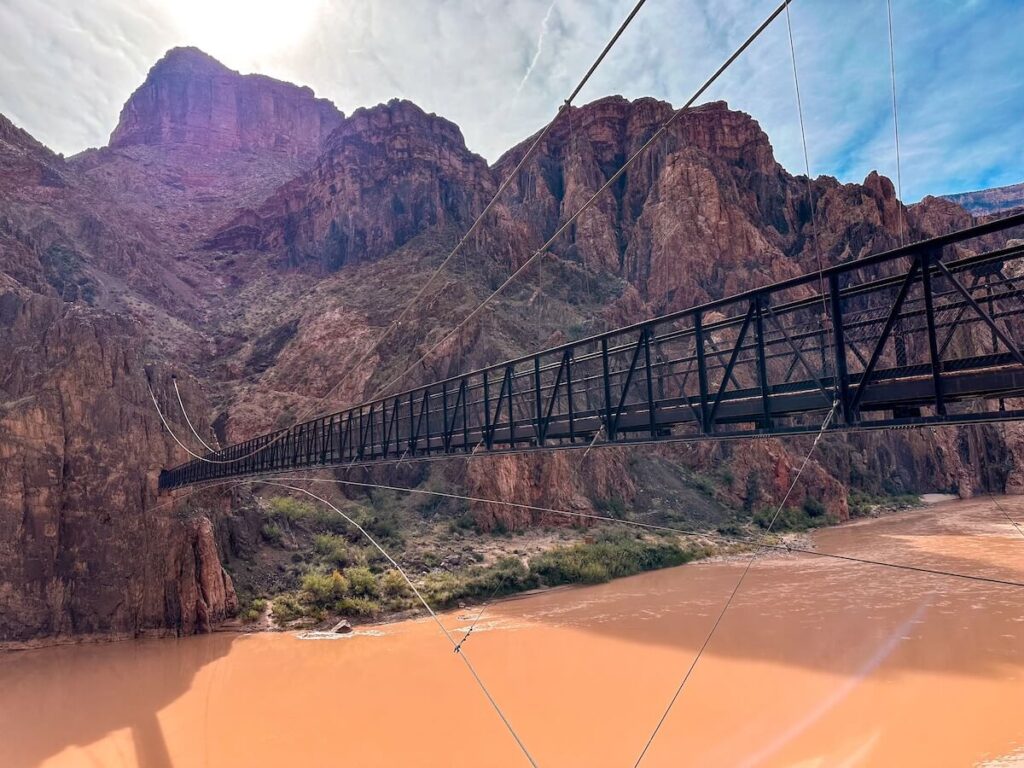
- Black Bridge – Crosses the Colorado River to Phantom Ranch & Bright Angel Trail
Bright Angel Trail
What to Expect:
- Trailhead: Bright Angel Trailhead
- Distance: 7.8 miles from the Colorado River
- Elevation Gain/Loss: About 4,460 feet
- Parking: Limited parking found in the area by the Bright Angel Trailhead. There is a ton to do around this area.
- Water: ✅ Available at Havasupai Gardens and 3 & 1.5 Mile Resthouses (seasonal at River & Plateau Point junction)
- Difficulty: Long, gradual climb with shaded rest areas
Highlights:
- River Resthouse – Shady area near the river, occasional water available
- Havasupai Gardens – Lush oasis with water and shade—great place to rest
- 3-Mile Resthouse – Water and a chance to catch your breath
- 1.5-Mile Resthouse – Last water stop before the final push
Ranger’s Recommendation
When I spoke to the rangers, they suggested taking the longer Bright Angel Trail.
Since it is longer, it is less steep. Plus, there are more chancer to fill up on water, making it safer.
Unfortunately, there was construction at Havasupai Gardens and the silver bridge, so I was forced to take South Kaibab.
Although I did make it out, I wished I would have ascended up Bright Angel Trail just for the water accessibility.
Spurs and Side Trails Along the Rim to Rim Route
The Rim to Rim hike primarily follows the North Kaibab Trail (from the North Rim) and connects to either the Bright Angel Trail or South Kaibab Trail (on the South Rim).
Along the way, several side trails and spur routes offer access to hidden waterfalls, scenic overlooks, and historical sites.
These can be worth exploring if you have extra time or are doing a multi-day hike.
| Trail Name | Location | Distance (Round Trip) | Why It’s Notable |
| Uncle Jim Trail | Near North Kaibab trailhead | 4.7 miles | Offers a scenic overlook of the canyon and a peaceful forested hike. |
| Roaring Springs Trail | ~4.7 miles down North Kaibab | 0.3 miles | Short detour leading to Roaring Springs, a key water source for the canyon. |
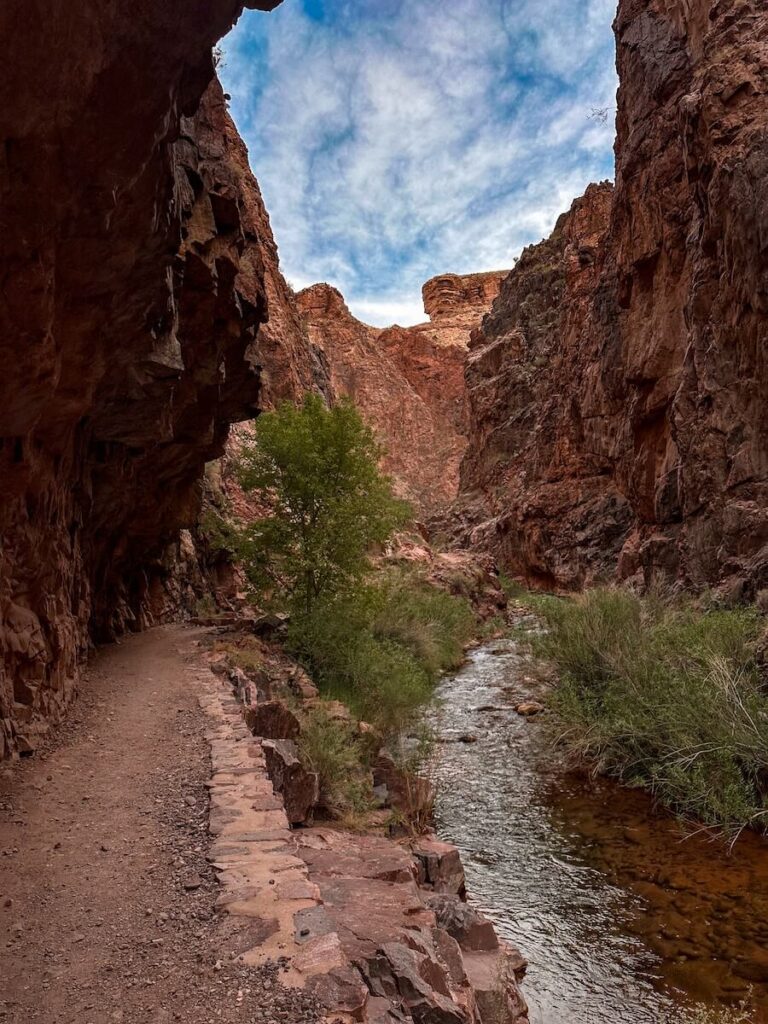
| Ribbon Falls Trail | ~6 miles down from North Rim | 1.2 miles | Leads to Ribbon Falls, a beautiful waterfall and oasis. A must-see if you have time! |
| Manzanita Rest Area Spur | ~5.5 miles from North Rim | Short detour | Small rest area with shade, restrooms, and a seasonal water station. |
Time of Year to Hike Rim to Rim
The best time of year to do this hike would be in spring or fall.
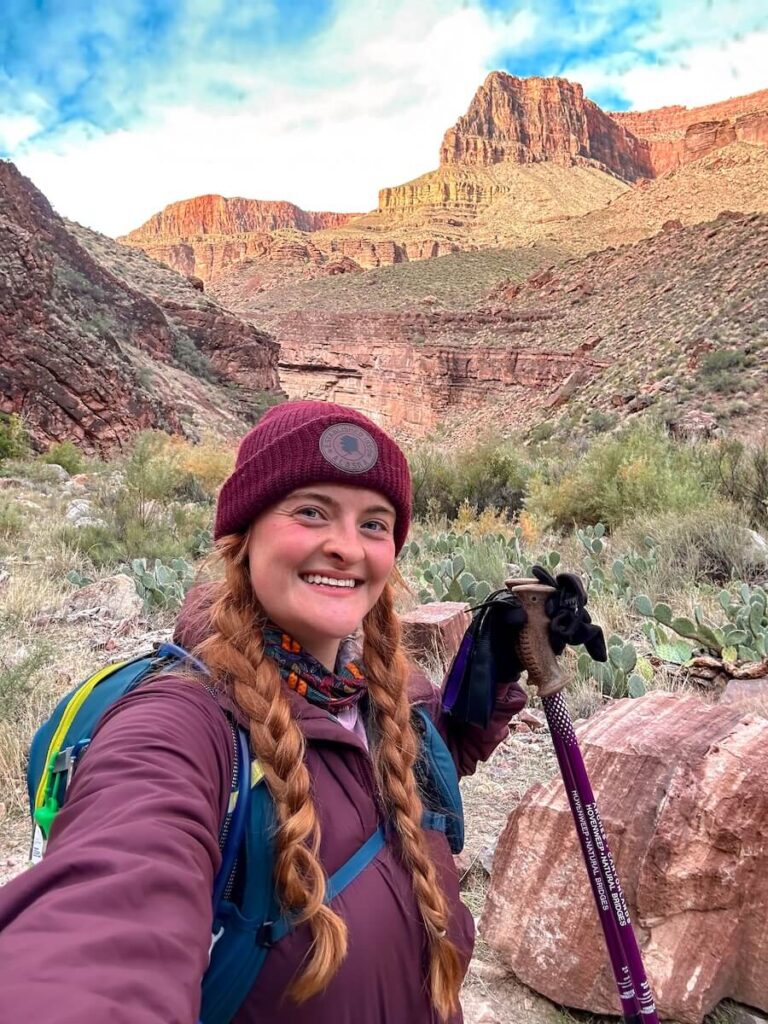
I hiked in the fall, but I was there right as they closed the North Rim (on October 15th).
I was actually surprised by the snow, since I thought the Grand Canyon would always be hot, but snow started to fall in October.
Read More – Fall Photography Guide
The temperatures were cooler, though. The day I hiked, it was around 55°F on the South Rim, but as you go down into the canyon, it gets way hotter. It can be up to a 20–30° difference.
This is why I would avoid summer like the absolute plague.
Sure, it’s the only time kids are out of school and you may have time off from work, but it’s incredibly hot inside the canyon—even in the shaded areas.
The canyon floor can hit 110°F (43°C) or more, making it incredibly dangerous.
People often suffer from heat stroke during summer, so avoid it if you can. Or, at the very least, make sure you can personally tolerate heat.
But if you do decide to go in summer, good luck. And let me know how it went when you make it out! (You got this!)
Choosing the Right Route: North to South or South to North
Your starting and ending points will determine your experience. There are two main routes:
North Rim → South Rim (Most Popular)
✅ Pros:
- Starts at a higher elevation, meaning more downhill miles at the beginning.
- More water sources on the way up Bright Angel Trail.
- More shuttle & lodging options on the South Rim.
❌ Cons:
- North Rim has a shorter season (closed in winter).
- Logistics can be tricky—it’s a long drive to the North Rim.
According to the Rangers, the North to South route is considered a little easier.
South Rim → North Rim (Much Harder)
✅ Pros:
- Ends on the quieter, less crowded North Rim.
- More lodging options before the hike (since the South Rim is more developed).
❌ Cons:
- Hardest part is at the end (steepest climb is last).
- Less water available on North Kaibab Trail.
- Shuttle logistics are trickier.
Here’s How I Would Choose
Honestly, I’d suggest picking the side where your accommodation is located.
Personally, I was staying at an RV park on the South Rim. So, I drove from the South Rim to the North Rim and hiked from North to South.
As mentioned previously, there was a lodge at the North Rim, but it was closed at the time that I was hiking.
Logistically, this makes it easier in regards to transportation. I ended at the South Rim and could go straight to bed.
If I ended at the North Rim after hiking 13 hours and then had to drive 4.5 hours back to the South Rim, I am not sure that would have been safe or enjoyable.
Don’t Be Fooled…
I know that I mentioned that the North to the South Rim is considered “easier”.
Let me burst your bubble…every route is difficult. Don’t underestimate the hike just because it is considered the easier route.
This hike will kick your butt! And that is why this hike is so infamous as a “bucket list hike”.
Is there Service/Signal at the Bottom of the Grand Canyon?
Expect little to no cell service in the Grand Canyon, especially below the rim. While you may get a weak signal at the South Rim and North Rim lodges, once you descend into the canyon, service is unreliable or nonexistent.
Staying Safe & Not Getting Lost:
- Download offline maps (AllTrails, Gaia GPS, or National Park Service maps).
- Carry a GPS device (like a Garmin inReach or SPOT) for emergency communication.
- Stay on marked trails—side trails can be misleading, and the canyon’s vastness makes navigation tricky.
- Know key landmarks like Phantom Ranch, Bright Angel Campground, and water stations to track progress.
- Start early and give yourself extra time—navigating in the dark can be dangerous.
If you’re going solo or in a small group, leave your itinerary with someone and check in when you finish. The Grand Canyon is breathtaking but unforgiving—preparation is key!
Since I was attempting this hike solo, I used AllTrails as well as sent my location to multiple people during this hike.
I also talked extensively with the rangers about safety, navigation, and landmarks.
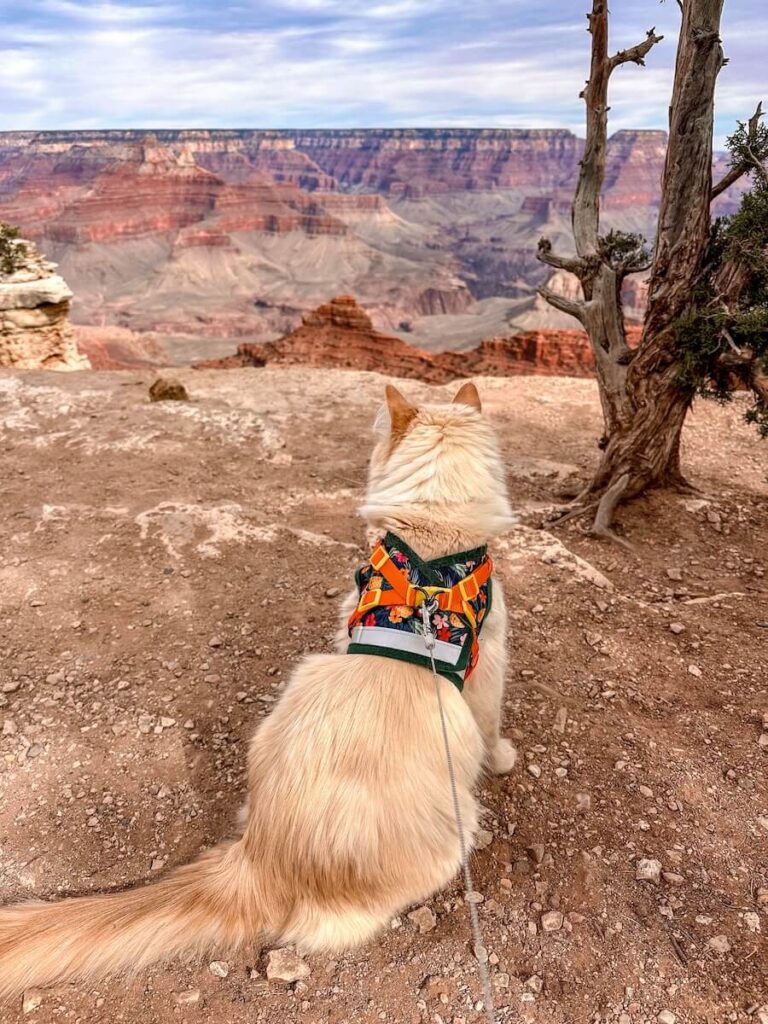
Can Pets Hike Rim 2 Rim?
No, pets are not allowed on the Rim to Rim trails, including Bright Angel, South Kaibab, and North Kaibab.
The Grand Canyon’s extreme temperatures, rugged terrain, and long distances make it unsafe for animals.
Alternative Options for Pets:
- Grand Canyon Kennel: If you’re hiking from the South Rim, Grand Canyon Kennel offers boarding for dogs and cats. Reservations are recommended.
- Pet-Friendly Rim Walks: Leashed pets are allowed on the Rim Trail (above the canyon) and at developed areas on the South Rim but not below the rim.
- Leave them at home—For their safety, it’s best to arrange pet care while you’re tackling the hike.
The canyon is too hot, too strenuous, and lacks water sources for pets, so it’s strictly a human-only adventure!
What To Pack For Rim to Rim
Now, let’s talk about the gear that I packed, what I actually used, and what I didn’t use.
Note: I do get a small commission if you choose to buy my trusted gear. Since I literally spent days writing this MASSIVE guide, I would be so grateful if you could use my links. Thank you so much for your support ❤️
Here is a list of everything that was recommended to me👇
- Lightweight backpack (15-25L), preferably a CamelBak or similar
- Trail runners or broken-in hiking shoes
- Electrolytes
- High-calorie food (energy bars, nuts, jerky, etc.)
- Sun protection (hat, sunglasses, sunscreen)
- Trekking poles (lifesavers on the steep climbs)
- Emergency gear (first aid kit, headlamp, whistle)
- Light jacket (temps can drop fast at night)
What I Actually Used
The only things I honestly used for this hike were my CamelBak, a headlamp, some snacks, trekking poles, good footwear, and layered clothes.
Honestly, that was kind of it. I packed a lot more than I needed.
I packed these microspikes because, again, it snowed, and they were like, “Oh, use crampons.”
I didn’t end up using any of that. I also didn’t eat as much as I should’ve because I was afraid that if I sat down, I just wouldn’t get back up.
One thing that I brought too much of was layers! Frankly, the temperature differences that I experienced during this hike was wild!
I don’t think I needed as many layers as I had. Again, it was really cold when I started, so I thought, “Oh, I’m going to have a hat, gloves, and 16 layers,” but they ended up just being draped off my backpack for most of the hike.
I wish I would’ve just sucked it up, been cold for about an hour, and then the rest of it would’ve been fine.
What I Wish I would Have Packed
Now, things that I wish I would’ve had: I wish I would’ve had more sunscreen.
I didn’t expect the sun to be that intense down there, which is funny because they said, “Oh, avoid the box because that turns into an inferno.” That section was fine for me because of my timing.
It was that little section right as I was going up Kaibab that was just brutal. Honestly, it can just get hot anywhere.
Water Treatment
Another thing I wish I would’ve had, which I tried to get earlier but it wasn’t going to get here in time, was a water filtration straw.
I filled up at Phantom Ranch and soon became panicked as I was forced to ascend South Kaibab.
I was sweating so hard on that trail and I needed water. I was concerned I would run out!
There were water stations, such as the The Tipoff, but you had to treat the water.
The stuff I bought at the little general store in the village said you needed to put purification tablets in, and it took like four hours. I don’t have time for that!
So, I think I would’ve preferred a filtration straw that I could’ve used to filter some water. It’s not ideal and I wouldn’t use it unless absolutely necessary. However, it could have been life saving.
Blister Supplies & Cooling Towers
I also wish I would’ve had more blister care supplies and some lightweight cooling towels.
I use these for my yoga instructor training, and I actually had one but took it out of my bag because I thought it was going to be cold. So foolish! Bad hiker!
Anyway, it’s basically a cooling towel you wet, then put on your face and neck to cool you down.
I would’ve literally chopped off my left pinky toe for a cooling towel about three-fourths of the way up that South Kaibab trail.
A Note on Multi-day Trips
Obviously, if you’re choosing to camp and get a permit, you’ll need to carry a lot more gear.
If you are interested in a multi-day trip, I would hire a guide or have an extensive chat with the rangers regarding safety and gear.
Being honest, I don’t know how people pack and carry all of their camping gear down that steep incline.
But, good for you—so much respect.
Hydration Plans: The Most Critical Factor
With long distances, extreme elevation changes, and scorching temperatures, proper hydration and nutrition aren’t just important—they’re essential for survival.
If you don’t fuel and hydrate correctly, you risk bonking, dehydration, or even heat exhaustion, which can turn an epic adventure into a dangerous situation.
The Grand Canyon is notorious for dehydrating hikers fast due to the combination of:
- Dry desert air that pulls moisture from your body.
- Extreme heat at the bottom of the canyon, which can exceed 100°F (38°C).
- Massive sweat loss from intense exertion.
In extreme cases, dehydration can accompany rhabdomyolysis (when the muscles break down and release myoglobin).
How Much Water do you Need to Hike rim to Rim?
- Plan for at least 3 liters per person and refill whenever you can!
- If temperatures are hot, you may need up to 8 liters total.
- Drink consistently, not just when you feel thirsty.
Pro Tip: Start hydrating the night before and morning of your hike—don’t start this hike already dehydrated!
My Hydration Plan
Personally, I went through 1.5L during the descent, topping up at Manzanita, Cottonwood, and Phantom Ranch.
Once I hit Phantom Ranch, that was that was my last fill up and I went through the entire 3 L on the ascent up to the South Rim.
Best Hydration Strategies
- Use a hydration bladder (like a 3L CamelBak) for easy sipping.
- Bring a lightweight water filter/straw in case a water source is unexpectedly dry.
- Drink electrolytes (like Nuun tablets or Liquid IV) to replace salt and prevent cramping.
- Sip water consistently every 10-15 minutes instead of gulping large amounts at once.
Warning: Overhydration can be dangerous too! If you drink excessive water without electrolytes, you risk hyponatremia (low sodium levels), which can be life-threatening. Balance water with salty snacks or electrolyte drinks.
go to the Visitor’s Center a Day Before the Hike
Here is what I recommend – go to the visitor center, talk to the rangers, and ask, “Where can I get water?”
Although they have many stations for water, sometimes they turn them off or they are seasonal.
You need to know which ones provide drinking water and which ones you need to treat.
I would take extensive notes on what they tell you and know where the available water stations are.
From there, you can formulate a hydration plan.
Below is a table of the most common hydration stations on the trail:
| Water Source | Availability | Location |
| North Kaibab Trailhead | Seasonal | Start of North Rim |
| Supai Tunnel | Seasonal | 2 miles down from North Rim |
| Roaring Springs | Year-round | 5 miles down North Kaibab |
| Manzanita Rest Area | Seasonal | 5.5 miles down North Kaibab |
| Phantom Ranch | Year-round | Bottom of the canyon |
| Bright Angel Campground | Year-round | Bottom of the canyon |
| Havasupai Gardens | Year-round | 4.5 miles from South Rim |
| Pipe Creek Resthouse | Seasonal | 3 miles from South Rim |
| Mile-and-a-Half Resthouse | Seasonal | 1.5 miles from South Rim |
| Bright Angel Trailhead | Year-round | South Rim |
⚠️ Check with the National Park Service before your hike to confirm which water stations are operational.
I had to be very careful because I was hiking in late season, which means that the majority of the water stations were turned off.
Again, those purification tablets take four hours, which isn’t ideal. So, getting a sense of where you can fill up is crucial.
Signs of Dehydration & Heat Exhaustion
As I mentioned, this hike has been tough on some hikers. So, you need to listen to your body and know the signs of dehydration and heat exhaustion.
I definitely felt it—even when the high was only 55°F. I felt nauseous and wasn’t feeling good, even though I was drinking as much water as I could. Again, I didn’t want to run out of water.
This is a strategic hike. If you’re doing it in one day, you need to be prepared, listen to your body, and have a backup plan for setbacks, injuries, or unplanned challenges. You never know what could happen.
This is not meant to scare you, but more to prepare you so that you stay safe!
Signs of Dehydration
- Dry mouth & extreme thirst – Your body is already behind on fluids if you feel super thirsty.
- Dark yellow urine – A sign that your body is holding onto water because it’s dehydrated.
- Headache & dizziness – Not enough water in your system affects blood flow and oxygen levels.
- Fatigue & muscle cramps – Your muscles lose electrolytes, making you feel weak or achy.
- Less sweating – A red flag that your body can’t cool itself properly.
Severe Dehydration Symptoms (Get Help Immediately!)
- Rapid heartbeat & breathing – Your heart is working overtime to compensate.
- Confusion or disorientation – A sign of heatstroke risk—this is an emergency.
- No urination for several hours – Your body is shutting down fluid loss, a critical danger sign.
Signs of Heat Exhaustion
- Heavy sweating & clammy skin – Your body is working hard to cool down.
- Dizziness & lightheadedness – A sign of low blood pressure from fluid loss.
- Weakness & extreme fatigue – Your body is struggling to function in the heat.
- Nausea or loss of appetite – Heat messes with your stomach and hydration balance.
- Cramping & muscle spasms – Low sodium and potassium levels cause painful cramps.
Heat Exhaustion Turning into Heatstroke (Life-Threatening!)
- Skin becomes hot, red, and dry – Your body stops sweating, which is a critical emergency.
- Confusion, slurred speech, or irritability – A sign of brain overheating.
- Rapid heartbeat & trouble breathing – The body is shutting down.
- Collapse or loss of consciousness – CALL FOR HELP IMMEDIATELY!
Nutrition: Fueling Your Hike the Right Way
Your body is going to burn thousands of calories on this hike, and if you don’t replenish that energy, you’ll hit a wall hard. Since there’s nowhere to buy food along the way, you need to pack everything you’ll need.
How Many Calories Should You Eat?
Expect to burn anywhere from 3,000 to 5,000+ calories depending on your weight, speed, and pack load.
Aim to consume 200-300 calories per hour to keep your energy levels steady.
Eat before you feel hungry—waiting too long can lead to bonking (hitting an energy crash).
Best Foods for a Rim to Rim Hike
Since you’ll be moving for 10+ hours, you want food that is:
- High in calories but lightweight
- Easy to eat on the go (you won’t want to stop often)
- Not too sugary (to avoid energy crashes)
| Food Type | Best Options |
| Carbs (fast energy) | Tortillas w/ peanut butter, granola bars, dried fruit, pretzels |
| Protein (sustained energy) | Jerky, hard-boiled eggs, protein bars, nuts |
| Fats (long-lasting fuel) | Cheese, nut butter packets, avocado |
| Electrolytes (prevent cramps) | Electrolyte chews, sports drinks, salted nuts |
| Quick Sugar Boosts | Honey packets, gummies, Snickers, trail mix |
Pro Tip: Salty snacks (pretzels, nuts, jerky) are crucial to replace the sodium you lose through sweat and prevent cramping.
I ended up packing lots of meat sticks, beef jerky, protein bars, and yogurt covered raisons.
And, of course, since I was Halloween, I actually ended up getting a lot of candy handed to me by various hikers when I was ascending up the South Rim. Not the safest thing, but I loved the thought!
Training for Rim to Rim in the Grand Canyon
This is definitely not a hike that you can just wake up and be like, “Well, I’ve never hiked before. I’m going to hike Rim to Rim.”
Don’t be the person that takes a helicopter ride without booking a tour (if you know what I mean…)
I do think that your chances of success are higher without training if you do this in a multi-day trip.
However, if you want to do it all in one day, you basically need to be in tip-top physical shape.
How I Trained
Personally, I just did a bunch of brutal long endurance hikes.
I live in Colorado, so I’m used to climbing 14ers (mountains with over 14,000 summits).
This hike might have been a spontaneous adventure, but I still hiked over 70 miles just in the month of October.
However, I still don’t think I trained enough.
I really went through the stages of grief with this hike…I started out angry, thinking, “I hate the Grand Canyon, this is terrible.”
Then I was bargaining, thinking, “Please, God, I will do anything—just get me off this trail.”
Then I reached acceptance: “I’m just going to be hot and miserable for the next six hours. It’s fine. Whatever.”
Since we are learning from my mistakes, here are some training ideas to help you conquer Rim to Rim like an absolute pro!
1. Build Up Your Endurance
This hike can take anywhere from 10 to 15 hours in a single day or multiple long days if you’re doing a multi-day trek.
You need to train your body to move for long periods without breaking down.
How to Train:
- Long-distance hikes: Work up to 15-20 miles in a single session with similar elevation gain.
- Back-to-back training days: The Grand Canyon will test your stamina, so do two long hikes on consecutive days to simulate fatigue.
- Time on your feet: Aim for at least 8+ hours of hiking per week to prepare your legs and feet.
Pro Tip: Hike with the same backpack and weight you plan to carry on your Rim to Rim hike to get used to the load.
2. Train for Elevation Gain & Descent
Most people train for going uphill, but going down is just as brutal—especially on your quads and knees.
The first half of your hike is mostly downhill, meaning if you don’t prepare, your legs will be destroyed before you even start climbing out.
How to Train for Downhill & Uphill:
- Stair climbing – Use a stair machine or do stadium stairs with a weighted pack.
- Hill repeats – Find the steepest hill near you and go up and down multiple times.
- Step-down exercises – Do box step-downs to strengthen knees and quads.
- Weighted squats & lunges – Focus on slow descents to mimic hiking downhill.
Pro Tip: If you have access to a treadmill, set it at -10% decline and walk for 30-60 minutes. Your legs will thank you later!
3. Heat & Altitude Acclimation
The Grand Canyon is notorious for extreme temperature swings. The bottom of the canyon can be over 100°F (38°C), while the rims can be 40°F (4°C) or colder in the morning.
How to Train for Heat & Elevation:
- Hike in the heat – If possible, train in hot conditions to get used to sweating and hydrating properly.
- Sauna sessions – If you don’t live in a hot climate, sit in a sauna after workouts to simulate heat exposure.
- Altitude training – The North Rim sits at 8,200 feet, so if you can, do some training at higher elevations.
Pro Tip: Your body loses salt and electrolytes fast in the heat. Train with electrolyte drinks & salty snacks so you don’t cramp up during your hike.
4. Strength Training for Injury Prevention
A strong body reduces injury risk and keeps you moving efficiently. You don’t need to lift like a bodybuilder, but targeting key muscle groups will make a huge difference.
Best Strength Exercises for Rim to Rim:
- Step-ups & step-downs – Mimic trail conditions and strengthen quads.
- Deadlifts & Romanian deadlifts – Build glute & hamstring power for climbing.
- Core work (planks, Russian twists, hanging leg raises) – A strong core keeps you balanced.
- Calf raises – Strengthen calves for all the uphill work.
- Ankle stability drills – Prevent rolled ankles on rocky trails.
Pro Tip: Do these exercises a few times a week with moderate weight and high reps for endurance.
5. Train With Your Full Gear & Hydration Strategy
Nothing ruins a hike faster than realizing your gear isn’t comfortable or you didn’t bring enough water.
Hydration & Nutrition Training:
- Hike with 3+ liters of water and practice drinking every 15-20 minutes.
- Use electrolyte tabs or powder to replace lost salts.
- Eat real food – Bring trail mix, peanut butter wraps, energy bars, jerky—test what works for you.
Pro Tip: If your stomach feels off when training, adjust your nutrition strategy NOW, not on hike day!
6. Simulate the Full Hike Beforehand
Before heading to the Grand Canyon, try doing a test hike with similar distance and elevation gain to see how your body responds.
Ideal Test Hikes:
- Anywhere with 5,000+ feet of elevation gain
- 14ers or long ridge hikes (if you live in the mountains)
- Back-to-back 15-mile days to mimic fatigue
Pro Tip: If you can’t replicate Grand Canyon conditions, find a long hill and do multiple laps. It’s not fun, but it works.
7. Mental Preparation: Embrace the Suck
Hiking Rim to Rim is as much a mental challenge as a physical one. There will be moments where you feel exhausted, overheated, or overwhelmed.
How to Build Mental Toughness:
- Train in uncomfortable conditions – If it’s raining or hot, go anyway.
- Use mantras – Repeat phrases like “One step at a time” or “I’ve trained for this”.
- Hike with purpose – Know why you’re doing this—whether it’s for personal achievement, adventure, or proving what you’re capable of.
Pro Tip: Visualize yourself finishing the hike. Picture standing at the rim, looking back at the canyon, and feeling that incredible sense of accomplishment.
Recovery After Hiking Rim to Rim
Once you’ve crawled out of the canyon from whence you came, let’s talk a little bit about recovery and reflecting on the entire experience.
You will be sore. I’m sorry, but if you hike that long and have that much elevation gain and are not sore, I’m suspicious of you.
You’re too good to be true. I don’t trust your muscles, and I don’t trust you 🤣
Here are some ideas for recovering from Rim to Rim:
- Replenish fluids ASAP – Even if you drank plenty on the hike, you probably still lost more water than you think. Aim to drink at least 1-2 liters post-hike, ideally with electrolytes to rebalance your system.
- Eat a solid post-hike meal – Your body just burned 3,000-5,000 calories, so fuel up with a mix of protein, carbs, and fats.
- Protein + carbs = faster muscle recovery – A burger, pizza, burrito, or pasta with protein (chicken, steak, tofu) is a great choice.
Take Care of Your Muscles
Expect sore quads, calves, and feet—those steep descents and climbs took their toll! Here’s how to bounce back faster:
- Stretch & foam roll – Loosen tight muscles, especially quads, hamstrings, and calves.
- Take an ice bath or soak your feet – If you have access to cold water, soaking for 10-15 minutes reduces swelling.
- Wear compression socks – These can help reduce leg fatigue and soreness.
- Take it easy the next day – Light walking is great, but avoid intense activity for 1-2 days.
DOMS (Delayed Onset Muscle Soreness) peaks 24-48 hours post-hike—so don’t be surprised if stairs feel impossible the next day!
Adrenaline Rush Post-Hike
As for fatigue, I didn’t really experience any mental fatigue after the hike. It was just a giant adrenaline rush—not because I did it, but because it was finally over.
There was a moment when I thought, “This is never-ending. I’m just going to hike for the rest of my existence up this South Kaibab Trail.”
But guess what? It did end. Eventually.
Life Lessons When Hiking rim to Rim
And, you know, mindfulness is key. Reflect on how the experience impacted you, the sense of accomplishment, and the lessons learned.
I know this sounds cheesy, but there was a point when I was going up the South Kaibab, dying, unable to breathe because of my asthma, hot, sweating, and it smelled like mule poop.
Then I got to Skeleton Point, and there was this part of the trail that was flat—a gentle uphill. I had never felt such peace and relief. I thought to myself, “It’s like life. It might be hard, but just wait for that peace.”
After Skeleton Point, it felt like everything was okay. Sometimes, the hardest parts of life lead to moments of calm.
Ways to Reflect on Your Hike
📝 Journal Your Experience – Write about the highs, the struggles, and the lessons learned. What surprised you? What did you love? What would you do differently?
📸 Look Back at Your Photos – Reliving the scenery and moments can make the experience feel even more surreal.
📍 Mark It Off Your Bucket List – This is a huge achievement! Celebrate it by checking it off! You deserve it!
💬 Share Your Story – Whether it’s with fellow hikers, friends, or on social media, telling your story helps solidify the experience.
My Ideal Rim to Rim Itinerary
So now that it’s all over, let’s talk about what I’d change if I did it again. Here’s what I would do:
I would stay at the South Rim, take a shuttle all the way to the North Rim, and then go down the North Rim to Phantom Ranch.
I would rest there, let my little toes breathe, and then, right before the sun comes up, I’d start ascending up the Bright Angel Trail, hopefully finishing by mid-morning or lunchtime.
I’d do this because starting at the North Rim means getting the descent out of the way and then resting your body.
When you start the ascent early, you’re not stuck in the heat or the switchbacks, and the whole experience would be different.
Can You Do Rim to Rim in a Day?
Now, finally, the question you may be waiting for: Can you do it in a day? Absolutely, if you have the right amount of training and preparation.
If you’re a hiker used to high elevation gains and long distances, you can do it.
Should you? Probably not. They definitely don’t recommend it, and everyone on the internet says, “Don’t do it!”
That wasn’t helpful to me because I didn’t have a permit, and I was going to do it no matter what.
I’m glad I did it, but I’m not going to lie: that ascent was brutal. I was pretty miserable the whole time, and I think if I’d done it over multiple days, the whole thing would have been more enjoyable.
The first three-fourths were fine; it was just the ascent that killed me.
So, if I did it over multiple days, it might’ve been a more positive experience, rather than me cursing the Grand Canyon halfway up at Skeleton Point.
So, is it possible? Yes. Should you do it? Probably not.
Stay safe. There are a lot of things that could go wrong with this hike—water, the elements, and the sheer length of it in a hot desert environment.
If you do attempt it, please be safe, talk to the rangers, do your homework, take your best gear, and be honest with yourself about your physical ability.
But with the right training and preparation, I believe anyone can accomplish this hike if they really want to.

Share Your Rim to Rim Success Story
Hiking Rim to Rim in the Grand Canyon isn’t just a trek—it’s a journey of endurance, grit, and awe-inspiring beauty.
It’s a test of both physical strength and mental resilience, rewarding those who take it on with breathtaking views, deep canyon solitude, and a sense of accomplishment few hikes can match.
Whether you did it in one brutal day or stretched it out over multiple days, you now belong to a small group of hikers who have crossed one of the Seven Natural Wonders of the World on foot.
This hike is not for the faint of heart, but for those who prepare, train, and push through the challenge, the reward is life-changing.
So as you recover and reflect, take pride in what you’ve accomplished.
You’ve walked through millions of years of geological history, battled the canyon’s unforgiving elements, and emerged victorious.
Let this hike be a reminder that you are stronger than you think, braver than you know, and capable of more than you ever imagined.
Final word on Hiking Rim to Rim
If you do conquer this hike, I’d love to see it! I’m on all social media at @TheBucketListMermaid.
I’d love to see you check this off your bucket list, and maybe even do the ascent more gracefully than I did.
So, after listening to this podcast and reading this article, are you may be thinking, “Maybe I’ll just go to Skeleton Point on the South Kaibab”? Or are you saying, “Nah, I can do it better than you!”
Either way, bring on the bucket list challenge—I’m living for it.
Thanks so much for listening and reading! If you enjoyed this episode or found anything helpful in my ramblings about Rim to Rim, please subscribe on your favorite podcast platform, send it to a fellow adventurer!
Thank you, guys! Stay safe out there on the Rim to Rim! Keep adventuring!
More Adventure for Your Bucket List
How to Hike Half Dome…And Live to Tell About It [Podcast + In-Depth Guide]
Worst Mistakes Hikers and Photographers Make In Devils Garden
Hiking Gear Checklist: What to Bring for Comfort, Safety & Great Trail Photos
A Bucket List Guide to Heli-Hiking Fox Glacier
Follow The Tail


More Hiking Resources
Adventure Bucket List Resources
I am here to help your travel adventures go as smoothly as possible! That way you can check off that bucket list with minimal complications and spending!
SHOP – Shop the best adventure gear and essentials on my Amazon Storefront – handpicked by a full-time adventuring mermaid!
AIRFARE – There are a few I use, but Aviasales is normally my go-to for flights without any extra fees or markups.
ACCOMMODATION – My two favorites are Booking.Com for hotels and VRBO for rentals.
GUIDED TOURS – If you are looking for quick and easy tours, check out GetYourGuide and Viator.
MULTI-DAY TOURS – For more in-depth tours that span several days, TourHub has many great options with reputable travel companies. Use my code (ALEXANDRA1GURU) for up to 5% off your next bucket list adventure.
TRANSPORTATION – You can either rent a car yourself with Discover Cars or do a guided bus tours like Big Bus Tours.
SIM CARDS – Avoid expensive roaming charges with an eSim card with Airalo. Personally, I prefer wifi boxes, and recommend WiFi Candy (get 10% of with the code THEBUCKETLISTMERMAID).
TRAVELER’S INSURANCE – Check out VisitorsCoverage for affordable insurance plans. If you are a nomad or remote worker, I would check out SafetyWing.
SEE MORE – Adventure Resources | Photography Resources
See Some PHotos You Like?
Check out my full photography page for a full gallery and prices.